That “MAINT REQD” light on your 4Runner’s dash is a common sight. Before you turn it off, it’s worth knowing what it means. It’s less of a warning and more of a simple, automated reminder for routine service.
Think of it as a helpful nudge from your truck. It’s designed to keep you on top of your service schedule, like oil changes.
Understanding Your 4Runner’s Maintenance Light
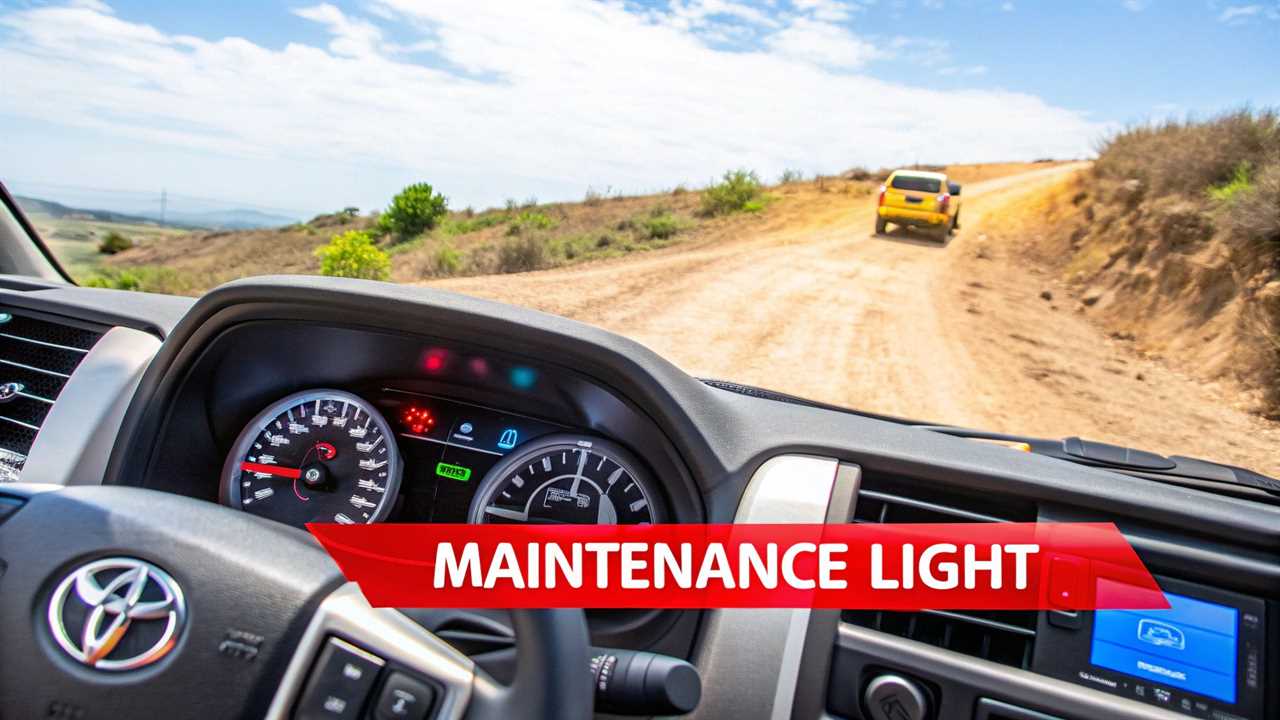
It’s easy to panic when a dash light comes on, but this one is different. This is not the dreaded “Check Engine” light, which can signal a real engine fault.
The maintenance reminder is much simpler. It is based purely on mileage to help you keep service intervals consistent.
This system prompts you for essential upkeep. The light turns on around 7,500 miles after the last reset. You’ll see it blink around 5,000 miles as a heads-up. For more details, see this helpful forum thread on the system.
Key Takeaway: The “MAINT REQD” light is your partner in vehicle care. It’s a simple heads-up, not an emergency alert. This confirms it’s a task you can handle yourself after doing the service.
Knowing this distinction brings peace of mind. You’re not troubleshooting a complex issue. You’re just turning off a reminder after routine maintenance.
How to Reset the Light on 4th Gen 4Runners (2003-2009)
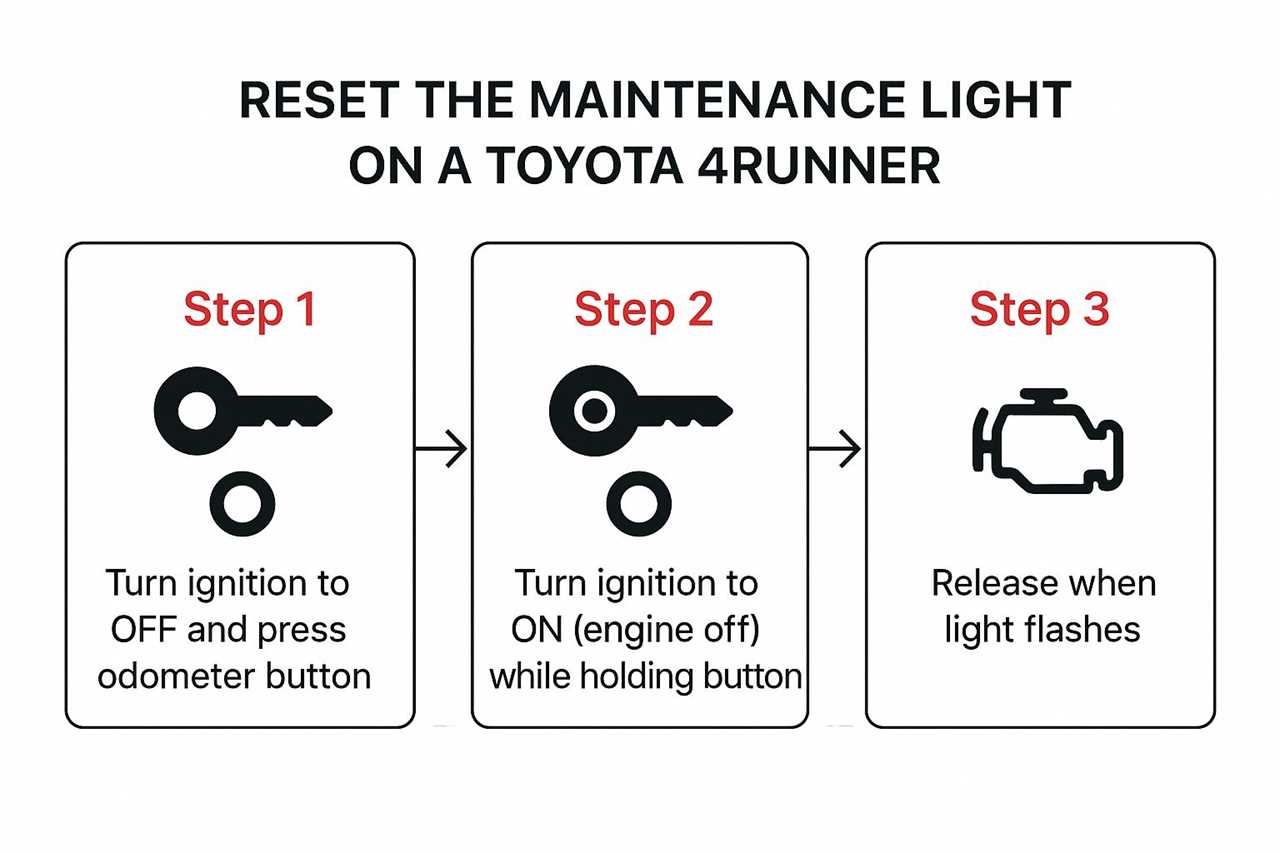
If you drive a 4th Generation 4Runner (2003–2009), the reset is easy. It’s a simple mechanical sequence using your key and trip meter button. No digital menus are involved.
A common mistake is starting with the wrong display active. Make sure your dashboard shows the main odometer reading (ODO), not Trip A or B. Tap the trip button until ODO is displayed.
The Reset Sequence
Once the display is set to ODO, you’re ready to go. The trick is to hold the reset button down through the whole process.
Here’s the step-by-step breakdown:
- Turn the ignition key to the OFF position.
- Press and hold the trip meter reset button.
- While holding the button, turn the ignition key to the ON position (do not start the engine).
- Keep holding the button until the “MAINT REQD” light flashes and then turns off.
That’s it; the system is reset. Don’t worry if it takes a couple of tries to get the timing right.
Keeping these older 4Runners in top shape is key for any adventure. If you’re outfitting your rig, check out our guide on building a Toyota 4Runner for overlanding.
Resetting the Light on 5th Gen 4Runners (2010-Present)
For a modern 5th Generation 4Runner, the reset process is more streamlined. The steps are similar whether you have a key or a push-button start. There’s one critical detail to remember.
The key is setting your display to ‘Trip A’, not the main odometer. Messing this up means the reset won’t work.
First, cycle through the display options until you see ‘Trip A’. Then, turn the truck completely off.
From here, the steps vary slightly by ignition type:
- Key Ignition: Press and hold the odometer reset button. While holding it, turn the key to the ‘ON’ position without starting the engine.
- Push-Button Start: Keep your foot off the brake. Press and hold the odometer reset button, then press the start button twice.
The 5th Gen gives you clear feedback during the reset. The display will show a message like “Resetting Maintenance DATA”. It might even show a progress bar.
This visual confirmation is a huge improvement. It removes the guesswork from the process.
This procedure is much simpler now, especially on models from 2018 and newer. You can watch this straightforward 4Runner reset method to see how it’s done.
4Runner Maintenance Light Reset At a Glance
Feeling lost in the details? This quick table helps keep the steps straight. It all comes down to which trip meter you use.
| Step |
4th Generation (2003-2009) |
5th Generation (2010-Present) |
| 1. Select Display |
Cycle display to the main Odometer reading |
Cycle display to Trip A |
| 2. Turn Off Vehicle |
Turn ignition completely off |
Turn ignition completely off |
| 3. Press & Hold |
Press and hold the odometer reset button |
Press and hold the odometer reset button |
| 4. Turn On Ignition |
Turn the key to the ‘ON’ position (don’t start engine) |
Turn key to ‘ON’ or press Start button twice (foot off brake) |
| 5. Watch Display |
Hold button until the maintenance light turns off |
Hold until “Resetting” message disappears |
| 6. Release & Start |
Release button and start the vehicle to confirm |
Release button and start the vehicle to confirm |
The table shows the one key difference. Use the odometer on older models and ‘Trip A’ on newer ones. Get that right, and you’re set.
Troubleshooting Common Reset Problems

So, you followed the steps, but the “MAINT REQD” light is still on. Don’t worry, it’s usually a simple hiccup in the sequence.
The most common culprit is starting on the wrong display setting. Remember: ‘ODO’ for 4th Gen models and ‘Trip A’ for 5th Gen. This one detail solves most failed resets.
If the light is still on, just run through the process again. The timing can be tricky. Pay close attention to holding the button down correctly.
Alternative Reset Methods
For some newer 4Runners, there’s an easier way. If your rig has an advanced multi-function display, you can skip the button sequence.
Look in your vehicle’s settings menu on the main screen. You’re looking for ‘Scheduled Maintenance’ or ‘Vehicle Settings’. There, you can often find a simple digital reset option.
If you have a 5th Gen with a conventional key, timing is critical. Here is a sequence that usually works:
- Turn the ignition to “ON” (don’t start the engine).
- Make sure the odometer is displaying ‘Trip A’.
- Turn the ignition completely off.
- Press and hold the odometer button while turning the ignition back “ON,” and hold until the light goes out.
A stubborn maintenance light is almost never a big deal. It’s different from a check engine light. If you are in a maintenance mindset, consider other fluids like in our guide on changing the transmission fluid in your Toyota 4Runner.
Maintaining Your 4Runner Beyond the Light
Resetting the light is only half the job. The real goal is completing the actual service. This keeps your 4Runner running well for years.
Good ownership habits create the legendary reliability of these trucks. Think of the light as a helpful nudge. Being proactive is the best way to avoid bigger problems later.
Simple Tracking for Proactive Care
Keeping up with your service history is easy. A couple of simple habits can make a huge difference.
- Keep a Logbook: A small notebook in the glove compartment is a classic for a reason. Jot down the date, mileage, and service performed.
- Use Digital Reminders: After an oil change, set a calendar reminder on your phone for the next one. It’s a simple trick that works.
Expert Insight: Treating routine maintenance as non-negotiable changes your relationship with your vehicle. It shifts your mindset from reacting to problems to actively caring for your truck. This is the secret to getting hundreds of thousands of miles from a 4Runner.
By tracking these tasks, you’ll ensure crucial jobs are never forgotten. This includes a regular 4Runner oil change.
Got Questions? We’ve Got Answers
If you’ve run into an issue, you’re not alone. Let’s clear up a few common questions.
Maintenance Light vs. Check Engine Light
These two lights mean very different things. The “MAINT REQD” light is just a mileage-based reminder. It’s like a pre-set alarm for an oil change.
The Check Engine light is the one to take seriously. It means the computer has flagged a real problem. This could be with the engine, emissions system, or a related sensor.
A maintenance light is a suggestion. A Check Engine light is a command. Never ignore it—get the code scanned right away.
Can I Keep Driving with the Maintenance Light On?
Your 4Runner won’t explode if you drive with the light on. It is safe to drive for a short period. The light itself doesn’t indicate an immediate failure.
That said, it means you’re overdue for critical service. Putting off oil changes causes premature engine wear. It’s best to get the maintenance done soon.
What If the Reset Just Won’t Work?
You’ve tried the steps multiple times, and the light is still on. While uncommon, a reset can sometimes fail.
First, double-check that you’re using the right process for your 4Runner generation. If you’re sure you’re doing it right, you might have a deeper electrical issue.
This could point to a problem in the instrument cluster or a faulty sensor. At this point, let a professional take a look. A mechanic can run diagnostics to find the real issue.
At Offroading.com, our goal is to help you know your rig inside and out. Check out our other guides to keep your 4Runner ready for anything. Find more at https://www.offroading.com.
https://offroading.com/how-to-reset-maintenance-light-on-4-runner/?utm_source=rss&utm_medium=rss&utm_campaign=how-to-reset-maintenance-light-on-4-runner
Did you miss our previous article...
https://manstuffnews.com/4x4-off-road-cars/a-guide-to-truck-tailgate-accessories
