The Ultimate Snack: Easy Homemade Beef Jerky on the Big Green Egg
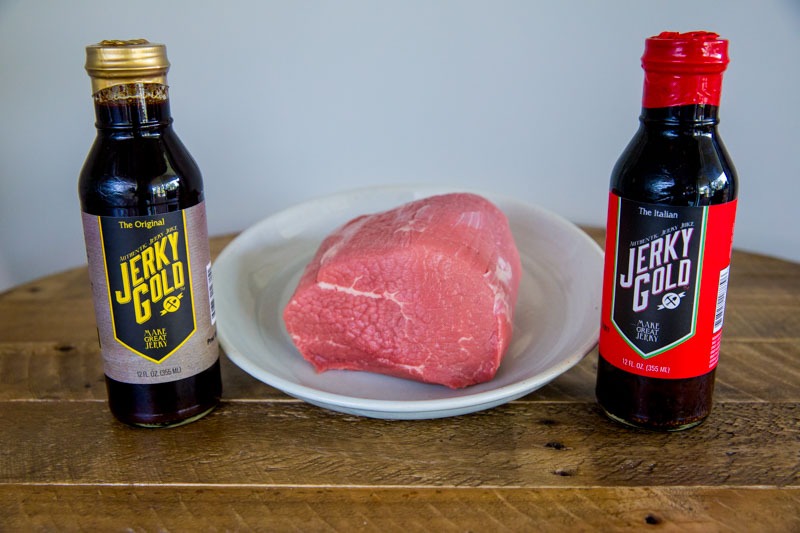
There is something undeniably satisfying about a perfectly cured piece of beef jerky… that ideal balance of salt, smoke, and chew. Many people think great jerky is a dark art reserved for commercial factories, but I’m here to tell you: YES, YOU CAN MAKE THIS AT HOME. In the past, I leaned heavily on a product called Jerky Gold Marinade to get those classic flavors of garlic, hickory, and onion just right. Unfortunately, they are no longer in business. But don’t worry, I haven’t let that stop the smoke! I have spent time perfecting a homemade marinade that captures that same award-winning profile, and I’m going to walk you through the entire recipe and cooking process step-by-step.
Using your Big Green Egg and a few simple ingredients from your pantry, you too will be the envy of your friends and neighbors with this delicious homemade treat. It’s easier than you think, and the results are far superior to anything you’ll find in a gas station bag.
So, let’s get that Egg stabilized. Sit back, grab an ice-cold Stella, and enjoy this guide to Big Green Egg Easy Homemade Beef Jerky.

The Foundation: Choosing the Right Meat
Before we dive into the marinade, we have to start with the right cut of beef. For jerky, lean is king. Fat does not render out during the low-temperature drying process; instead, it can spoil and make your jerky go rancid.
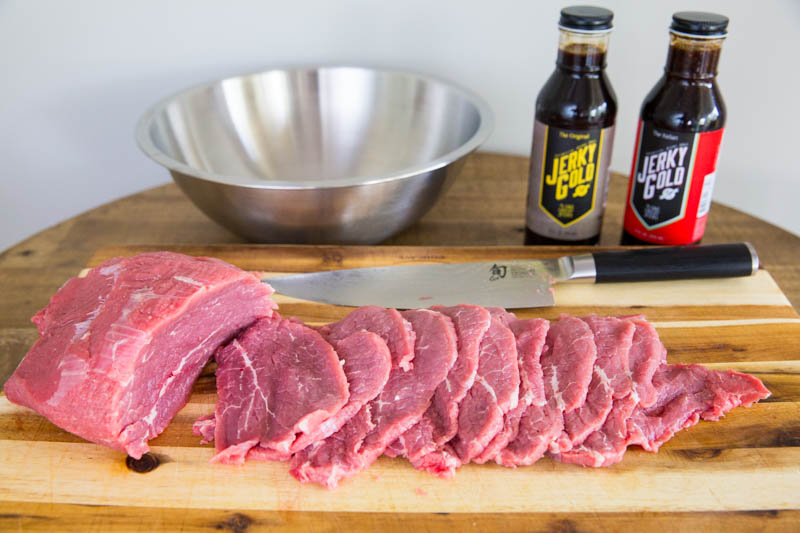
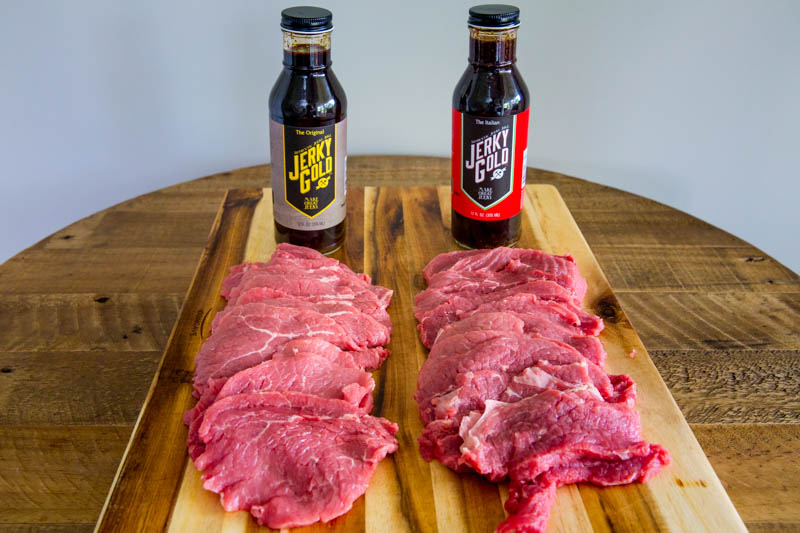
The Prep: Trim away every bit of visible fat you can find. To make slicing easier, put your beef in the freezer for about 1-2 hours before you start. You want it firm, but not frozen solid as this allows you to get those perfect, uniform 1/8 to 1/4 inch strips.
Top Round or Eye of Round: These are the gold standards. They are extremely lean, budget-friendly, and easy to slice.
London Broil: Another fantastic option that provides a great “bite.”
The “Firm-Up” Technique: Slicing for Success
If you’ve ever tried to slice raw beef into thin, uniform strips, you know it can be a slippery, frustrating task. To get that professional “thin-cut” look, I use a simple but essential pitmaster trick: the 30-minute deep chill.
Before taking a knife to that Eye of Round, place the entire roast in the freezer for about 30 to 45 minutes.
Why the Freezer?
- Control: You aren’t trying to freeze the meat solid; you just want to stiffen the exterior and the muscle fibers. This firmness stops the beef from “rolling” or squishing under the pressure of your knife.
- Precision: This allows you to achieve those perfect 1/8 to 1/4 inch strips. Consistency is vital here… if your slices vary in thickness, some pieces will be bone-dry while others are still dangerously underdone.
- Safety: A firm piece of meat is a safer piece of meat. You won’t have to fight the roast, which keeps your fingers out of the path of the blade.
The Direction of the Cut
This is the most important decision you’ll make for the texture of your jerky:
With the Grain: If you slice parallel to those fibers, the jerky will have that classic, tough “chew” that lasts a long time.
Against the Grain: Look for the long lines of muscle fiber. If you slice across those lines, the jerky will be tender and easy to chew (perfect for a “soft-and-tender” style).
Making the Jerky Marinade
The Deep Soak: Mixing the Marinade and the Overnight Marinate
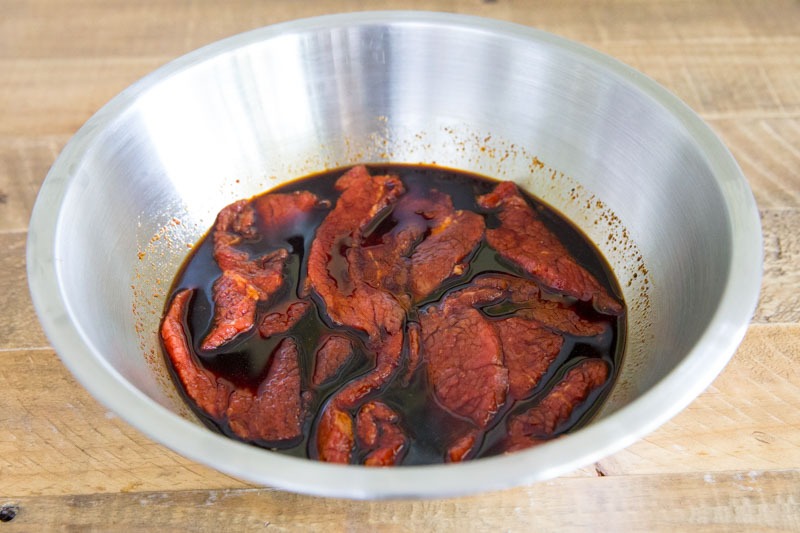
Once your Eye of Round is sliced into those perfect, uniform strips, it’s time to build the flavor profile. Since we can no longer grab a bottle of Jerky Gold, we are going to build that savory, aromatic base from scratch. This step is where the magic happens… the salt cures the meat, while the garlic, onion, and hickory penetrate deep into the fibers.
1. Mixing the “DIY Jerky Gold” Marinade
In a medium mixing bowl, whisk together your ingredients. You want to make sure the sugar and spices are fully dissolved into the liquids so every piece of beef gets equal treatment.
The Recipe (Optimized for 2-3 lbs of beef):
- 1/2 cup Soy Sauce: This provides the essential salt for curing and a deep, rich color.
- Alternative: Use Tamari for a gluten-free option or Liquid Aminos.
- 1/4 cup Worcestershire Sauce: For that “umami” kick and savory depth.
- 2 tbsp Liquid Smoke (Hickory): This is the secret to that “Jerky Gold” flavor. Even though we are smoking on the Egg, this adds an extra layer of concentrated hickory punch.
- 1 tbsp Garlic Powder & 1 tbsp Onion Powder: These provide the aromatic backbone.
- Homemade Tip: If you want a more rustic texture, use granulated garlic and onion.
- 1 tbsp Brown Sugar: Just enough to balance the salt and help the jerky “tack up” later.
- 1 tsp Black Pepper: For a subtle, classic warmth.
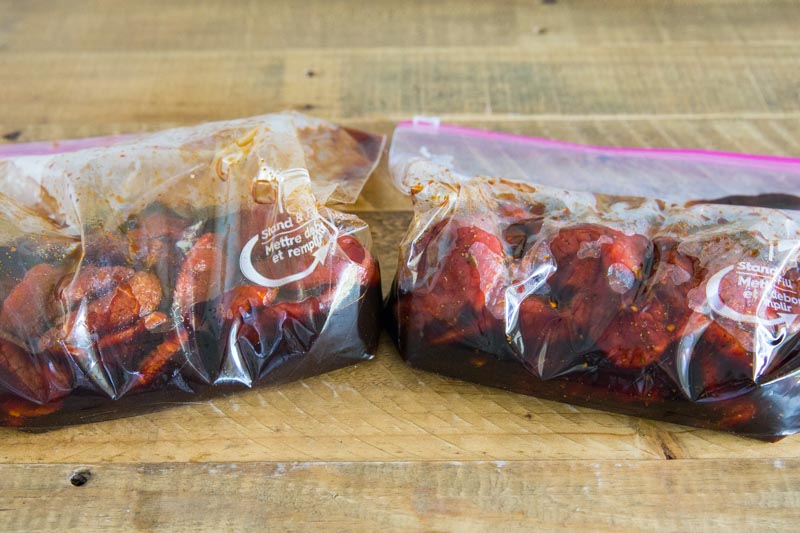
2. The Ziploc Method
The most efficient way to marinate jerky is using a gallon-sized Ziploc bag.
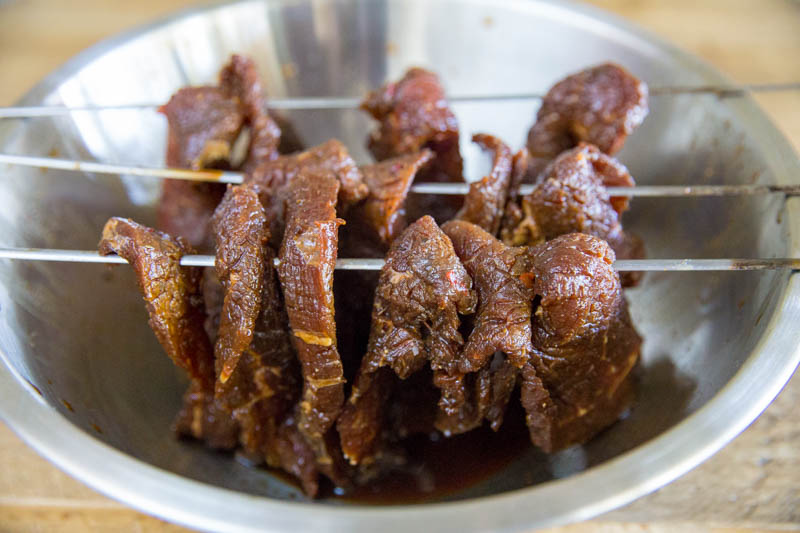
- Load the Meat: Place your sliced beef strips into the bag.
- Add the Liquid: Pour the marinade over the meat.
- The “Massage”: Seal the bag, leaving a little air inside at first. Shake and massage the bag vigorously to ensure every single strip of beef is coated. You don’t want any pieces stuck together, as the “white spots” won’t be flavored or cured.
- Burp the Bag: Once the meat is coated, open a corner of the seal, squeeze out as much air as possible, and re-seal it. This creates a “vacuum” effect that forces the marinade into the meat.
3. The Overnight Wait
Place the bag in the refrigerator and let it sit for at least 12 to 24 hours.
Pitmaster Tip: Every few hours (or whenever you head to the fridge for a Stella), give the bag a quick flip and a massage. This redistributes the liquid and ensures the pieces at the bottom aren’t getting all the salt while the top pieces stay dry.
Setting up the Big Green Egg
The Setup: Creating the “Jerky Chamber”
After the beef has spent 12 hours soaking up that garlic and hickory goodness, it’s time to fire up the Big Green Egg. For jerky, we aren’t “grilling” or even “BBQing” in the traditional sense, we are dehydrating.
The biggest challenge on a ceramic cooker like the Egg is keeping the temperature low enough. We need to stay below 200°F (ideally around 160°F-170°F). If it gets too hot, you’ll end up with tiny, overcooked steaks instead of pliable jerky.
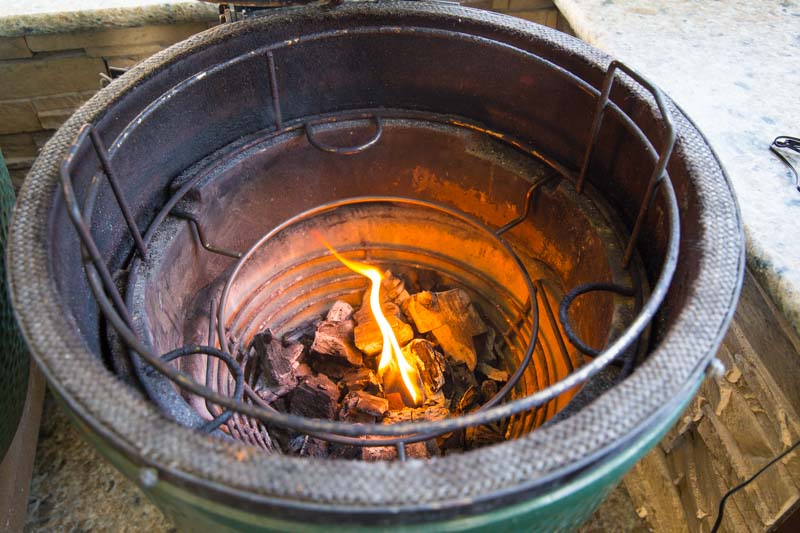
1. The Fire Management
Start with a very small pile of lump charcoal. You don’t need a full firebox for this. Light one single spot with a firestarter and keep the vents barely cracked.
- The Wood: Since we already have hickory in the marinade, you can add one small chunk of Apple or Cherry wood for a subtle, sweet smoke layer.
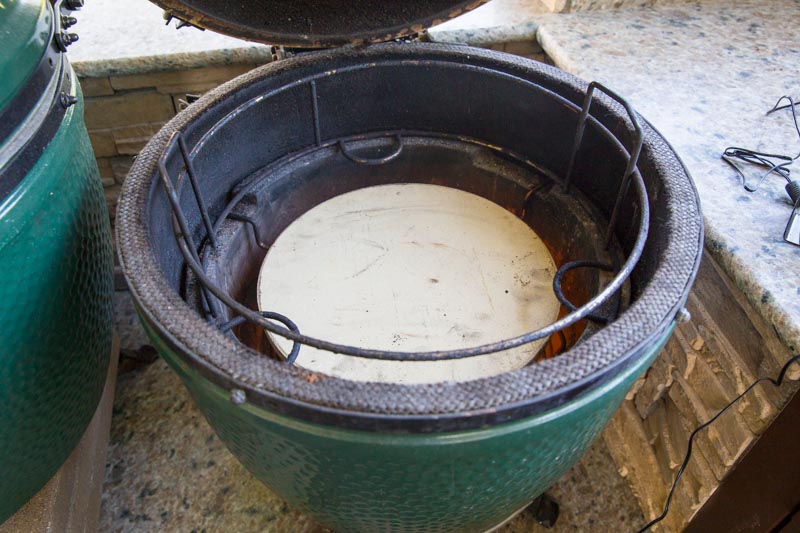
2. Configuring the Indirect Space
To protect the meat from the direct heat of the coals, you need a heat deflector. I use a Large 3-Leg Spider combined with a Raised Grid. This allows me to place a ceramic pizza stone or heat deflector low in the Egg, leaving me plenty of vertical space to hang the beef strips.
3. No Spider? No Problem! (The DIY Options)
If you don’t own a Spider rig or a multi-level rack, you can still create a perfect jerky environment with these DIY setups:
- The “Firebrick” Lift: Place three or four firebricks (available at most hardware stores) on top of your standard plate setter (convEGGerator). Set your grill grate on top of the bricks. This extra 4-5 inches of height keeps the jerky further from the heat source.
- The “Bolt & Nut” Raised Rack: Buy four long 5-inch stainless steel bolts, eight nuts, and eight washers. Attach them to your spare grill grate to create “legs,” then set that rack on top of your main grate. This gives you a second story of cooking space for about $10.
- The “Crumpled Foil” Spacer: In a pinch, you can tightly crumple four large balls of heavy-duty aluminum foil and place them on your convEGGerator, then set your grate on top of the foil balls. It’s not the prettiest, but it gets the job done!
The Hanging Method vs. Laying Flat
By using a raised setup, you have the option to hang the jerky using toothpicks suspended across the grate. This allows for maximum airflow around every inch of the meat. If you prefer to lay them flat, just ensure they aren’t overlapping so the edges can dry properly.
Temperature Control is Key
Precision Temperature Control: Staying in the “Safe Zone”
When it comes to jerky, the temperature window is incredibly narrow. You need enough heat to kill bacteria (160°F), but not so much that you “cook” the meat into a steak (above 200°F). Maintaining a steady 160°F-170°F on a ceramic grill (which is designed to hold heat efficiently) can be a challenge.
This is where technology becomes your best friend.
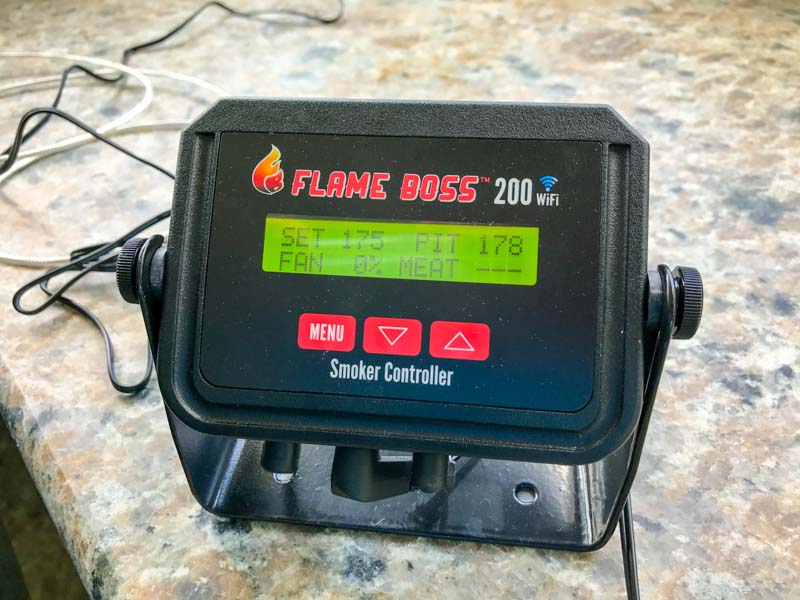
My Choice: The Flame Boss
I use a Flame Boss to manage this cook. It’s a “set it and forget it” system that uses a variable-speed fan to blow the exact amount of oxygen needed into the bottom vent to maintain your target temp.
- The Benefit: It monitors the pit temperature and adjusts the air in real-time. If the temp starts to creep toward 180°F, the fan shuts off completely, starving the fire of oxygen and bringing it back down.
Other Great Tech Options
If you aren’t using a Flame Boss, there are several other fantastic controllers that work perfectly with the Big Green Egg:
- The EGG Genius: This is the official Big Green Egg temperature controller. It’s powered by Flame Boss technology and integrates seamlessly with the BGE app. It’s incredibly user-friendly and great for monitoring your jerky from your phone while you’re inside watching the game.
- The Thermoworks Billows: If you already own a Signals or Node thermometer, the Billows fan is a powerful add-on. It’s known for having a very strong fan that can recover temperatures quickly if you have to open the dome.
The DIY / Analog Method (No Controller)
Don’t have a digital controller? You can still make great jerky by “feathering” your vents manually:
- The Bottom Vent: Keep the screen closed and the solid door open only about 1/8th of an inch (roughly the width of a pencil lead).
- The Top Vent: Keep the Daisy Wheel or rEGGulator almost entirely closed, leaving only a tiny sliver of a crescent moon open.
- The “Cold Plate” Trick: If the Egg is still running too hot, place a drip pan filled with cold water on top of your ceramic stone. The water will act as a heat sink, absorbing excess energy and keeping the air temperature down.
The Target: 160°F to 170°F
Regardless of the tool you use, your goal is a steady, low heat. Once your controller (or your manual vent setting) has held that 165°F mark for 20 minutes, it’s time to get the meat on the grate.
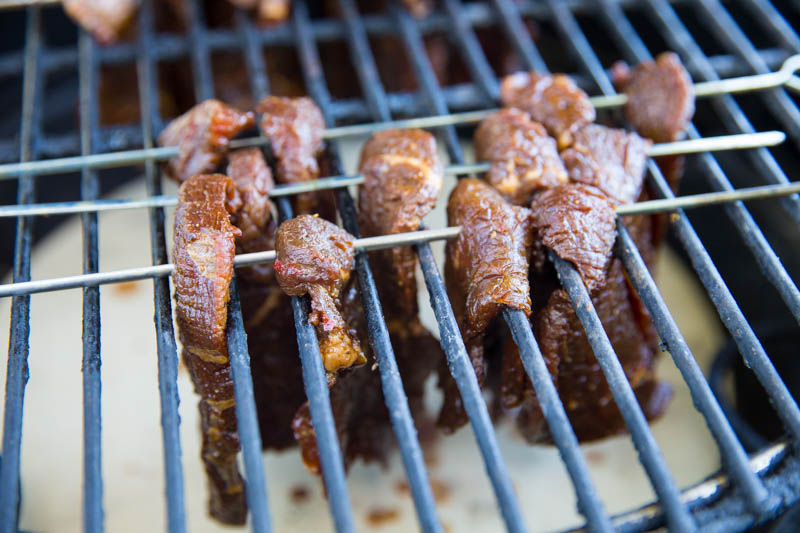
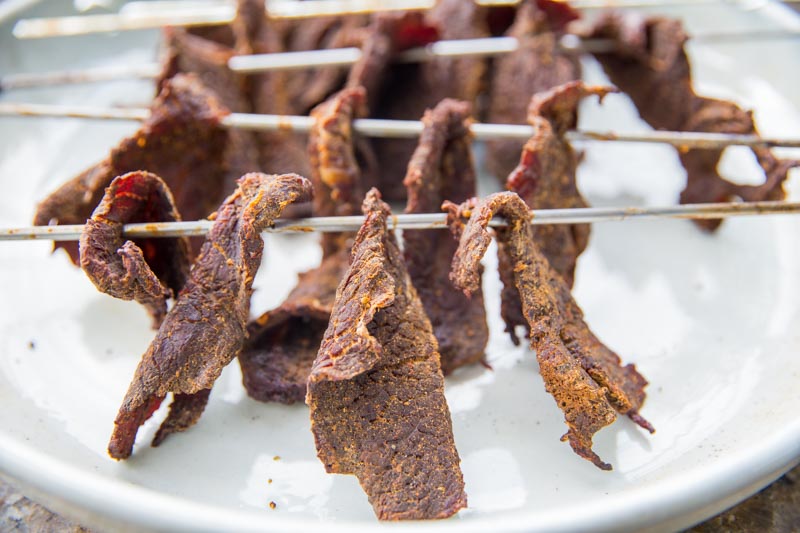
The Skewering Technique: Vertical Dehydration
Once the Big Green Egg has stabilized at 175°F, it’s time to move the beef from the marinade to the grill. While many people choose to lay their jerky flat on the grate, I prefer the vertical hanging method using metal skewers.
Why Skewer and Hang?
When you lay meat flat on a grate, the area touching the metal doesn’t get the same airflow as the top. By skewering the strips and hanging them between the bars of your raised grid, you achieve three things:
- 360° Airflow: Every millimeter of the beef surface is exposed to the gentle heat and hickory smoke. This results in a more even “snap” and prevents any soggy spots.
- Increased Capacity: You can fit significantly more meat on a single grate. By hanging them vertically, you aren’t limited by the square inches of the grid; you’re only limited by the depth of your setup.
- Gravity-Assisted Drip: Any excess marinade drips off the meat immediately, allowing the “tack up” process to start sooner.
The Process: Skewering Like a Pro
Take your metal skewers and pierce each strip of beef about half an inch from the top.
- Spacing: Slide the strips along the skewer, leaving about half an inch of space between each piece. If the strips touch, they will stick together and won’t dry properly in those spots.
- The “Bridge”: Rest the ends of the skewers across the bars of your raised grid. The beef should hang down freely into the “safe zone” created by your ceramic stone.
A Quick Note on Metal vs. Wood
I use metal skewers because they are reusable, easy to clean, and slide through the chilled meat effortlessly. However, if you only have wooden bamboo skewers on hand, just make sure to soak them in water for 30 minutes prior to skewering. Even at 175°F, a dry wooden skewer can become brittle in the convection environment of the Egg.
The Waiting Game
With the beef hanging and the hickory smoke swirling around the strips, the dehydration process officially begins.
The Art of the Hang: Precision and Patience
This is the part of the process where your “Pitmaster Zen” really comes into play. Sliding each individual slice of beef between the rungs of the cooking grid requires a steady hand and a bit of patience, but the payoff is worth every second.
The Precision Fit
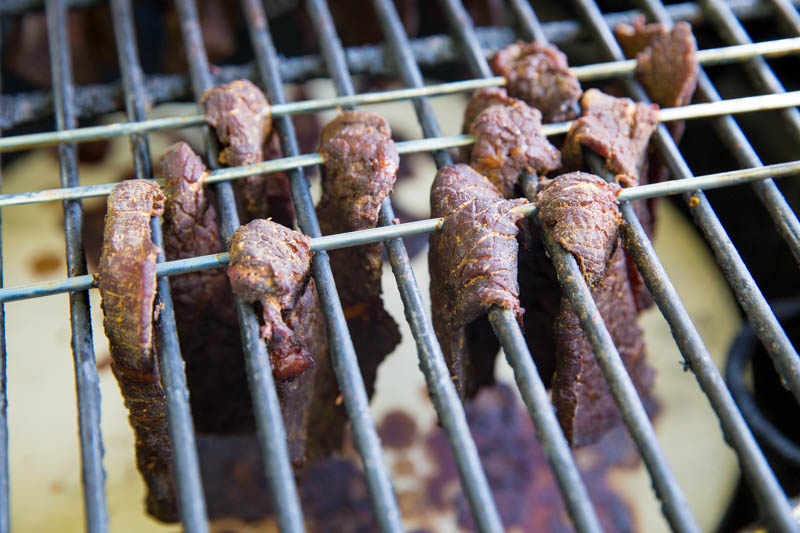
Because you are working with a Raised Grid, you have that crucial vertical clearance above your ceramic stone. As you lower each skewer:
- Threading the Needle: You want to carefully guide each strip so it hangs freely between the stainless steel bars.
- No Touching: Ensure that the strips aren’t leaning against each other like dominoes. If they overlap, moisture gets trapped, creating “soft spots” that won’t cure properly.
- The Clearance Check: Make sure the bottom of your longest strips aren’t touching the ceramic stone or the drip pan below. You want them suspended in mid-air, surrounded by that consistent 175°F convection.
Why the Effort is Worth It
It might feel tedious to thread 3 pounds of beef slice-by-slice, but once you step back and look at the setup, you’ll see why it’s the superior method. Your Big Green Egg has been transformed into a professional-grade dehydrator. Instead of a crowded mess on a flat grate, you have a perfectly organized “curtain” of beef.
Closing the Dome
Once the last skewer is in place and your spacing is perfect, it’s time to close the dome. Now, the airflow takes over. The heat rises from the charcoal, hits the ceramic stone, and is forced around the edges, creating a gentle vortex of heat and smoke that passes over every single piece of beef.
The Transformation Begins
Now that your marinated slices are hanging and ready to go, the clock starts. Over the next few hours, the soy sauce will darken, the sugars will become tacky, and the hickory-infused steam will fill the air.
The Sensory Check: Knowing When It’s Done
Making beef jerky is as much an art as it is a science. While your temperature controller handles the heat, you have to use your senses to determine the exact moment of perfection. Unlike a brisket or a rack of ribs, you can’t just rely on an internal temperature probe… you have to rely on taste, sight, and touch.
1. The Three Senses of Jerky
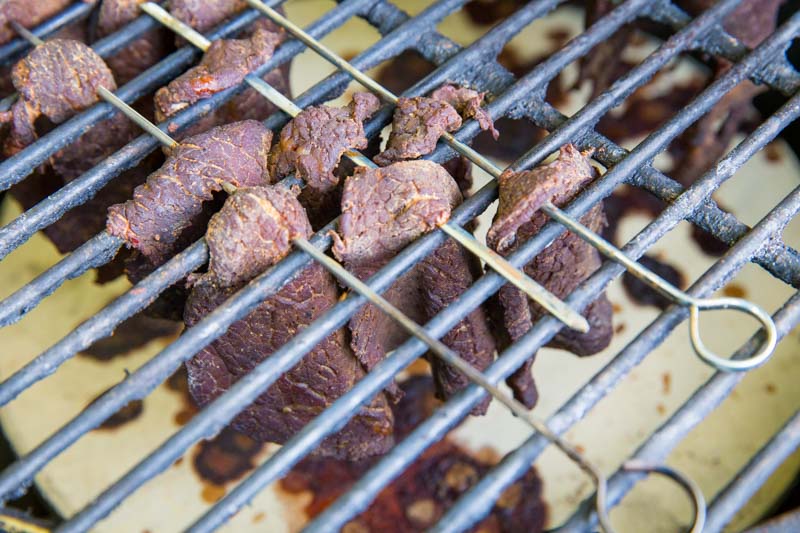
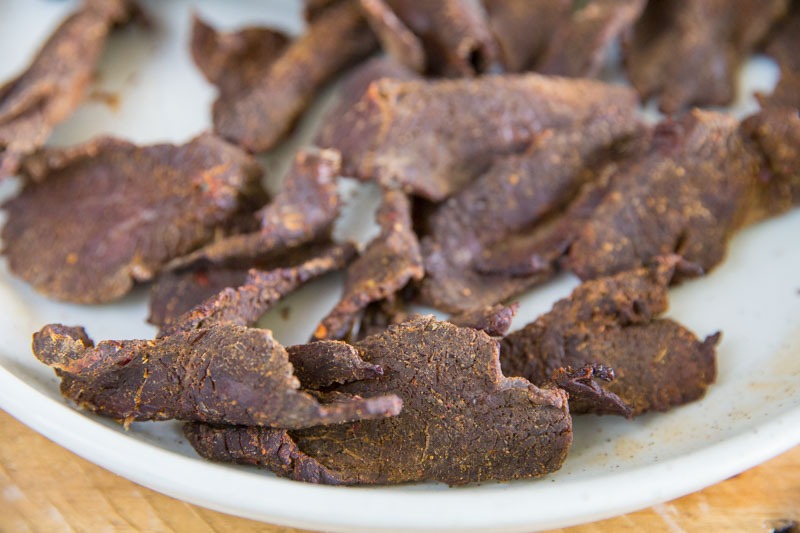
- Sight: At the 3-hour mark, open the dome and look for a dramatic color change. The meat should have transformed from a raw, translucent purple-red to a deep, opaque mahogany or dark chocolate brown. The surface should look “matte” rather than “wet.”
- Touch: This is the most critical test. Pick up a piece and give it a squeeze. It should feel firm and leathery, not soft or spongy. If it still feels “squishy” like raw steak, it needs more time.
- Taste: The best part of being the pitmaster! Around hour 4 or 5, pull a small piece off and let it cool for a minute (jerky firms up as it cools). If it has that satisfying chew and the flavors of garlic and hickory have concentrated, you are closing in on the finish line.
2. The “White Fiber” Bend Test
To know for sure if your jerky is done, take a piece and bend it slowly in half.
- Underdone: It bends easily without any resistance and feels like a piece of deli meat.
- Perfect: The meat should bend and the surface fibers should begin to crack and turn white, but the piece should not snap in half. This “white fiber” look is the sign that the moisture has been successfully removed, leaving only the cured protein.
- Overdone: The piece snaps or breaks cleanly like a dry twig. (If this happens, don’t worry, it’s still edible, just very crunchy!)
3. The 6-Hour Transformation
Patience is your greatest ingredient. On this specific cook, it took 6 hours at 175°F to reach the finish line. Every environment is different i.e., humidity, the thickness of your slices, and how tightly you packed the Egg will all affect the timing. By checking at the 3-hour mark and then every hour after, you ensure you catch that perfect window between “dehydrated” and “burnt.”
The Final Result
When that 6-hour mark hits and your bend test shows those beautiful white fibers, you’ve done it. You’ve successfully turned a raw Eye of Round into a shelf-stable, smoky, garlic-heavy snack that rivals any professional brand.
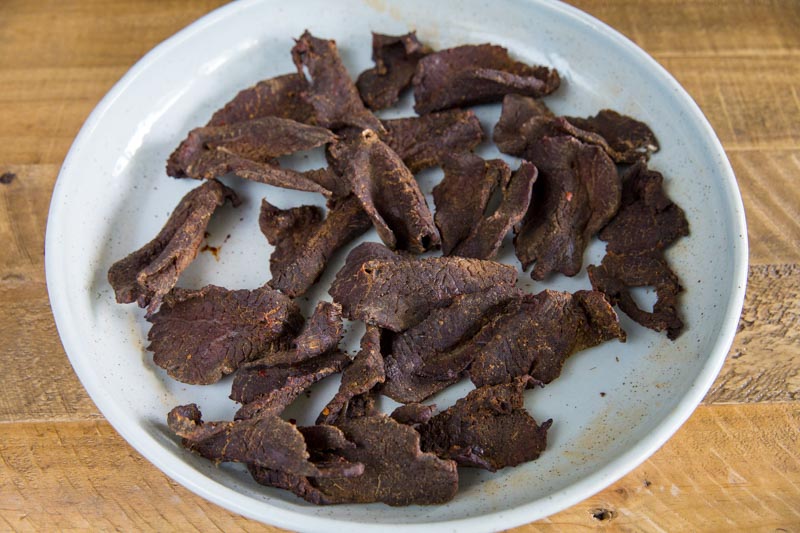
The Harvest: Cooling and Finishing
For me, the homemade beef jerky reached that sweet spot, the perfect balance of pliable and dry, right at the 6-hour mark. The aroma of garlic and hickory was concentrated, and the bend test showed those beautiful white fibers I was looking for.
1. Pulling the Skewers
Carefully lift the skewers off the grid. Be mindful that while the air temp was only 175°F, the metal skewers and the ceramic interior of the Big Green Egg will still be hot. Using heat-resistant gloves or a pair of tongs, transfer the skewers over to a large bowl or a clean baking sheet.
2. The Cooling Phase (Crucial Step!)
It is incredibly important to let the jerky cool completely in an open bowl before you even think about putting it into a container or a Ziploc bag.
- Why wait? If you bag the jerky while it’s even slightly warm, it will create condensation inside the bag. That moisture is the enemy of jerky… it will ruin your bark and, more importantly, it can lead to mold growth.
- The “Firm Up”: Jerky actually finishes its texture change during the cooling process. As the remaining fats and sugars stabilize at room temperature, the beef will firm up and achieve that classic “snap” you’re looking for.
3. Sliding the Pieces Off
Once the meat has cooled for about 15-20 minutes, slide the strips off the metal skewers. Because we used a lean cut like Eye of Round and a touch of oil from the soy sauce in the marinade, they should slide right off without sticking.
Storage and Enjoyment
Now that you have a bowl full of “BBQ Buddha” gold, you have a decision to make: eat it all now or save some for later?
Long Term: For maximum freshness, store it in the refrigerator. The cold temperature keeps the flavors sharp and ensures the jerky stays safe for weeks.
Short Term: Keep it in a Ziploc bag in the pantry for about a week (if it lasts that long!).
Print
Big Green Egg Easy Homemade Beef Jerky
Making delicious beef jerky at home is easy to do and tastes better than any store-bought jerky will ever have.
Course Appetizer
Cuisine American
Prep Time 10 minutes minutes
Cook Time 6 hours hours
Total Time 6 hours hours 10 minutes minutes
Servings 6
Author The BBQ Buddha
Marinade Ingredients:
- 1/2 cup Soy sauce
- 1/4 cup Worcestershire Sauce
- 2 tbsp Liquid Smoke
- 1 tbsp Garlic powder
- 1 tbsp Onion powder
- 1 tbsp Brown sugar
- 1 tsp Coarse black pepper
Remove all fat from meat.
Place meat in the freezer for 30 minutes.
Slice strips no thicker than ¼ inch for best results.
Mix marinade ingredients together.
Marinate meat refrigerated in a large bowl or gallon Ziploc bag for 12-24 hours (12 is plenty), stirring occasionally. (DO NOT REUSE MARINADE).
Set up your Big Green Egg for indirect cooking using a raised cooking surface.
Preheat the grill to 175° (using a device like the Flame Boss).
Hang meat vertically between rungs of the cooking surface draping the meat down below.
Slowly roast the marinated beef strips on the grill at 175 degrees until dry (6-12 hours depending on thickness).
NOTE: To maintain the temperature of 175 use a device like the Flame Boss.
You will know when the jerky is done by touching it to see if it is “squishy” and thus holding onto moisture, or ripping a piece in half to see if it is still pink inside.
Once done remove from the grill, allow to cool, and store in a dry space.
The post Big Green Egg Easy Homemade Beef Jerky appeared first on The BBQ Buddha.
Did you miss our previous article...
https://manstuffnews.com/backyard-grilling/bacon-wrapped-chicken-drumsticks
