If you’ve ever heard the term “Meat Candy,” you know exactly what we’re talking about today. Pork Belly Burnt Ends are perhaps the most elusive, sought-after bite in the world of BBQ… and for good reason. They are the perfect trifecta of flavors: the richness of the pork belly, the savory crust of your favorite rub, and a sticky, sweet caramelized glaze that ties it all together.
While they look like something that requires a professional pitmaster’s touch, achieving that melt-in-your-mouth “squish” is actually easier than you think. It’s all about the process of layering flavor and having the patience to let the smoke do the heavy lifting.
I’ve perfected this recipe using the Big Green Egg, utilizing its legendary temperature control to render that fat into pure gold, but the principles here will work on any smoker you call home.
So, let’s get the charcoal lit, grab a bold glass of Shiraz to balance out the sweetness, and enjoy this recipe for Big Green Egg Pork Belly Burnt Ends.
Why Pork Belly Burnt Ends?
Customizable: Whether you like them spicy, honey-sweet, or heavy on the vinegar, this method serves as the perfect canvas for your favorite BBQ sauce.
The Texture: Unlike traditional brisket burnt ends, which can occasionally be “chewy,” pork belly is naturally marbled with fat, ensuring every single cube is succulent and tender.
The Party Favorite: If you bring a tray of these to a tailgate or a backyard bash, they will be the first thing to disappear. Guaranteed.
Where to Find Pork Belly
Finding the raw material for this cook can sometimes feel like a scavenger hunt, but the payoff is worth the search. For a long time, pork belly was a “butcher’s secret,” but as the popularity of burnt ends has exploded, it’s becoming much easier to find.
Where to Source Your Belly
I have found that locating a pork belly is often half the battle. For this cook, I found a beautiful, high-quality piece of pork belly at my local Costco.
If you don’t have a Costco nearby, here are your best bets:
- Local Butcher Shops: Most can order a whole belly for you if they don’t have one in the case.
- Asian Markets: These are fantastic sources for pork belly, as it’s a staple in many traditional dishes.
- Specialty Grocers: Places like Whole Foods or The Fresh Market usually keep a few slabs on hand.
What to Look For: The Selection Process
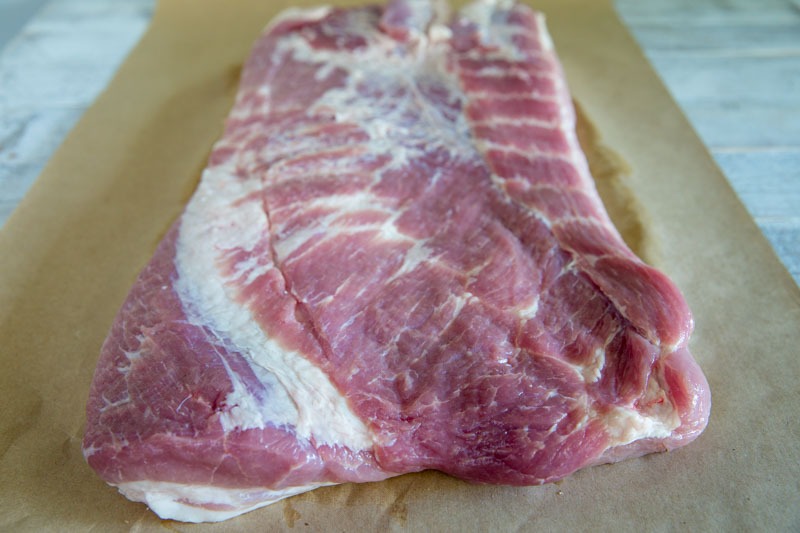
When you’re standing at the meat counter, don’t just grab the first package you see. You are looking for a slab that will hold up to a long smoke and a heavy glaze.
The “Flop” Test: If the pork belly is vacuum-sealed, give it a little bend. It should feel firm but have some give. This indicates good quality and freshness.
The Fat-to-Meat Ratio: You want a “zebra-stripe” appearance. Look for even, distinct layers of fat and lean meat. If the slab is 90% fat, the cubes will disappear into nothing during the cook; if it’s too lean, they won’t have that “meat candy” texture.
Uniform Thickness: Try to find a piece that is consistent in height (usually about 1.5 to 2 inches thick). This ensures that when you cube the belly, every piece is the same size and cooks at the same rate.
Skinless is Best: For burnt ends, you definitely want skinless pork belly. If the only slab available has the skin on, you’ll need to carefully slice it off with a sharp knife before you begin cubing, otherwise, it will become tough and leathery in the smoker.
Prep the Pork Belly
Once you’ve brought your pork belly home, it’s time for the most important part of the process: the prep. Because we are aiming for those perfect, individual bites of “meat candy,” how you trim and cut the belly determines the quality of the final product.
The Cleanup: Trimming for Maximum Flavor
Start by laying the pork belly on your cutting board meat-side up. You’ll want to take a sharp boning or paring knife and trim away any excess loose fat or silver skin from the surface of the meat.
While pork belly is naturally high in fat, we want that fat inside the layers, not a thick, leathery membrane on the outside. Removing that silver skin is crucial because it acts as a barrier; by clearing it away, you allow your rub to make direct contact with the meat. This ensures the seasoning penetrates deep and helps develop that beautiful, savory “bark” on all six sides of every cube.
The Geometry of a Perfect Bite
Next, it’s time to slice. I recommend cutting the pork belly into 1″ cubes. At first glance, an inch might seem small, but this is the “Goldilocks” size for burnt ends:
- The Shrinkage Factor: Remember that these cubes are going to render down as the fat melts. A 1″ raw cube will shrink slightly during the cook, resulting in a perfect, bite-sized morsel.
- Surface Area: By cubing the meat before smoking (rather than after), you increase the surface area exponentially. This means more room for rub, more exposure to smoke, and more area for that sticky glaze to cling to.
- Even Cooking: Use a ruler if you have to! Keeping the cubes uniform in size ensures that every piece reaches that “melt-in-your-mouth” tenderness at exactly the same time.
Pro Tip: The “Cold Cut”
Pork belly is much easier to slice when it is very cold. If the fat starts to feel soft or “squishy” while you are cubing it, pop the slab back into the freezer for about 15 minutes. This firms up the fat, allowing you to make clean, square cuts without the meat sliding around under your knife.

Seasoning the Pork Belly
The Slather and Seasoning: Building the Foundation
Once your pork belly is cubed and ready, it’s time to build the flavor profile. Because pork belly is so rich, it can handle (and actually needs) a generous amount of seasoning to balance out the fat.
The Binder: Why Mustard?
To get the rub to stick to every nook and cranny of those cubes, I start with a yellow mustard base. Don’t worry your burnt ends won’t taste like a hot dog! The vinegar in the mustard evaporates during the cook, leaving behind a perfectly tacky surface that locks the dry rub in place and helps build a superior bark.
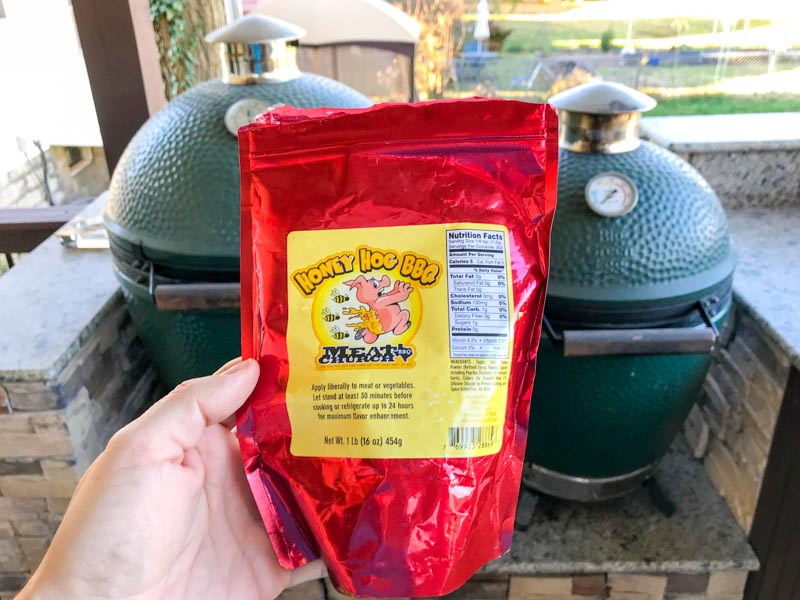
The Rub: Meat Church Honey Hog
For this cook, I went with Meat Church Honey Hog. It’s a “heavy hitter” in the BBQ world for a reason. The honey-powder base provides a beautiful reddish hue and a sweetness that complements the pork perfectly, while the back-end spices provide just enough savory balance.
Other Great Options
If you don’t have Honey Hog on hand, you have plenty of ways to pivot:
- Store-Bought Alternatives: Look for any “Sweet Heat” or “Honey” style rubs. Lane’s BBQ “Apple Pie” or Dizzy Pig “Raging River” are fantastic on pork.
- The Homemade Path: You can easily whip up a killer pork rub in your kitchen. Mix together:
- 1/2 cup Brown Sugar (for caramelization)
- 1/4 cup Paprika (for color)
- 2 tbsp Coarse Salt
- 1 tbsp Black Pepper
- 1 tsp Garlic Powder
- 1 tsp Onion Powder
- A pinch of Cayenne (if you want a little kick)
The “Rub Bath” and the Wire Rack
Don’t just sprinkle the rub over the top; give these cubes a “bath.” Place your mustard-coated cubes into a large bowl, dump in a healthy amount of rub, and toss them by hand until every single side of every cube is fully encapsulated in seasoning.
The Pro Setup: Once seasoned, arrange the cubes on a wire cooling rack (placed inside a baking sheet to catch the mess).
- Airflow is King: Using a wire rack allows the smoke to circulate around all six sides of the cube simultaneously.
- Easy Transport: Instead of moving 50 individual cubes to the grill, you can just pick up the rack and slide it onto the Big Green Egg in one motion.
Let the cubes sit on the rack at room temperature for about 20 minutes. You’ll notice the rub will start to look “wet”, this means the salt is drawing out a bit of moisture and the seasoning is “tacking up,” which is exactly what you want before they hit the smoke.
Set Up the Big Green Egg
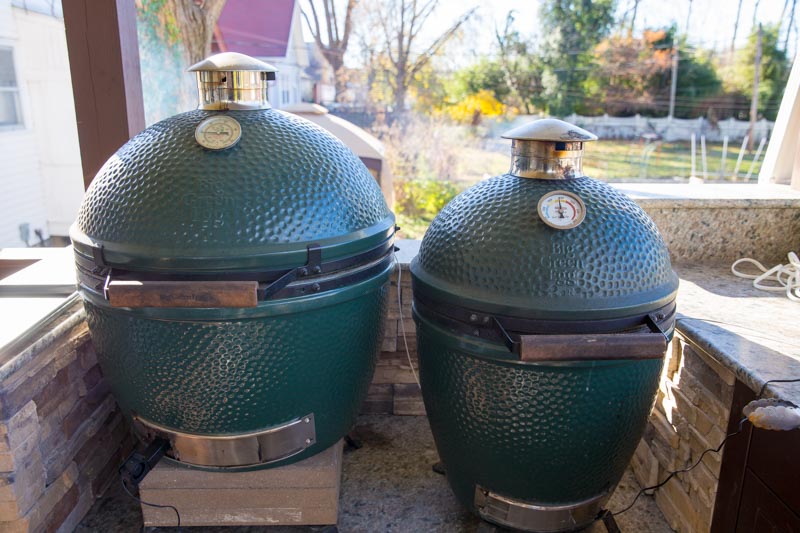
Setting the Stage: The Big Green Egg Setup
While your pork belly cubes are “sweating” in their rub, it’s time to get the Big Green Egg dialed in. For pork belly burnt ends, we want a moderate temperature, hot enough to start rendering that thick fat, but low enough to let the smoke penetrate deeply without burning the sugars in the rub.
The Indirect Foundation
Configure your Egg for indirect cooking by installing the ConvEGGtor (Plate Setter) in the “legs up” position. This is non-negotiable for this cook. Because pork belly has such a high fat content, cooking it over direct fire would result in massive flare-ups and charred, bitter meat. The ConvEGGtor turns your Egg into a ceramic smoker, providing the gentle, circulating heat needed to transform these cubes into “meat candy.”
Targeting 275°F
I find that 275°F is the “sweet spot” for pork belly. It’s slightly higher than the traditional 225°F used for brisket, which helps the fat render more efficiently and speeds up the process so you aren’t waiting all night for a snack.
The Smoke Profile: Hickory
Once your temp is stable, it’s time to add the flavor. For this cook, I used Hickory wood chunks.
- Why Hickory? Pork belly is incredibly rich and fatty, so it can stand up to a bold, pungent smoke. Hickory provides that classic, “old-school” BBQ aroma that cuts through the sweetness of the rub perfectly.
- The Chunk Advantage: Always use chunks over chips in the BGE. Chunks smolder slowly, providing a consistent “thin blue smoke” throughout the first half of the cook.
The “Set and Forget” Placement
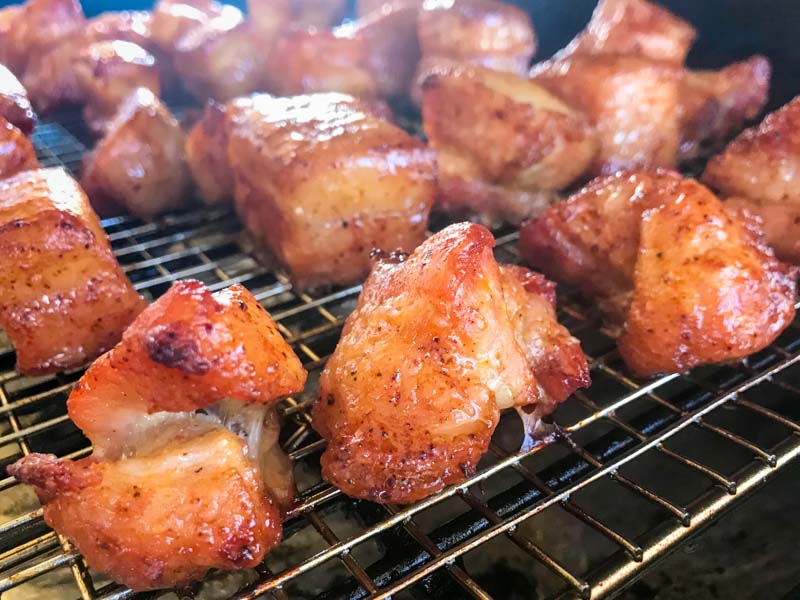
Once you see that clean, translucent smoke coming out of the daisy wheel, place the entire wire rack of pork belly cubes onto the cooking grate.
Pro Tip: Position the rack so the cubes aren’t touching each other. You want at least a half-inch of space between each piece to ensure the smoke and heat can hit every side. This is how you get that uniform, mahogany-colored bark on all sides of the “candy.”
Close the dome and let the Egg work its magic. We are looking for these to smoke undisturbed for about 2 to 2.5 hours, or until the bark is well-set and the cubes have taken on a deep, dark red color.
Spritzing the Pork Belly
The Spritz: Hydration and Flavor Development
After the pork belly has been bathing in that hickory smoke for the first hour, it’s time to start the spritzing phase. As we’ve discussed in my previous “heavy hitter” recipes, a consistent spritz is the difference between a dry, leathery exterior and a perfect, supple bark.
For this cook, we’re going with my go-to “Liquid Gold” formula: 100% pure Apple Juice.
Why We Spritz
- Humidity is Your Friend: Smoke clings better to a moist surface. By keeping the exterior of the pork belly cubes slightly damp, you’re encouraging more smoke to adhere to the meat, deepening that mahogany color.
- The Sugar Boost: The natural sugars in the apple juice work in tandem with the Honey Hog rub. Every time you spritz, you’re adding a micro-layer of sugar that caramelizes under the heat, building a complex, sticky crust.
- Temperature Control: Spritzing slightly cools the surface of the meat, which slows down the “bark” formation just enough to ensure the internal fat has plenty of time to render out without the edges burning.
The Process: Every 60 Minutes
Let the pork belly smoke undisturbed for the first hour to let the rub set. After that, open the dome and give the cubes a heavy misting of apple juice every hour for a total of 3 hours.
Pro Tip: Use a high-quality spray bottle with a fine mist setting. You want to coat the cubes, not wash the rub off. A quick “cloud” of apple juice over the wire rack is all it takes.
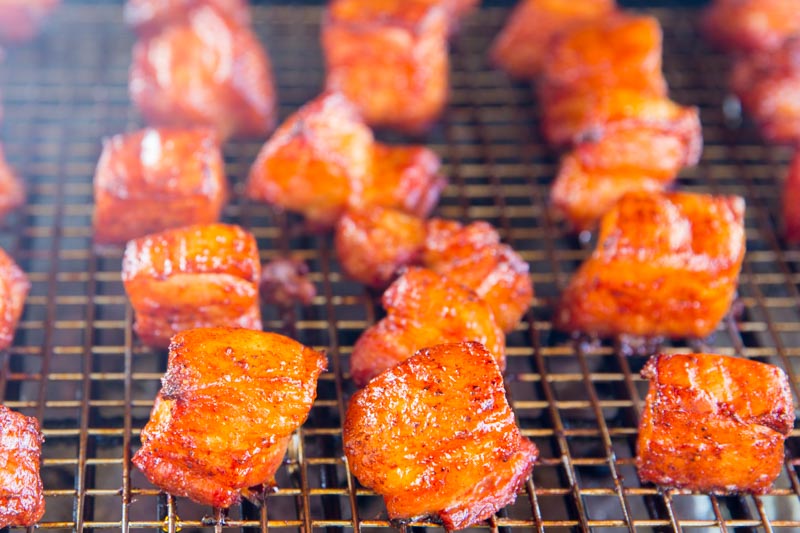
Monitoring the Progress
By the end of the 3-hour mark, you aren’t just looking at meat anymore, you’re looking at dark, jewel-toned cubes of art. The apple juice will have reacted with the hickory smoke to create a deep, reddish-black hue.
At this stage, the cubes should be firm enough to pick up with tongs but have a noticeable “jiggle” when you shake the rack. This tells you the internal collagen is starting to break down, and we are ready for the final, most important step: The Braise.
Braise the Pork Belly
The Braise: The “Meat Candy” Transformation
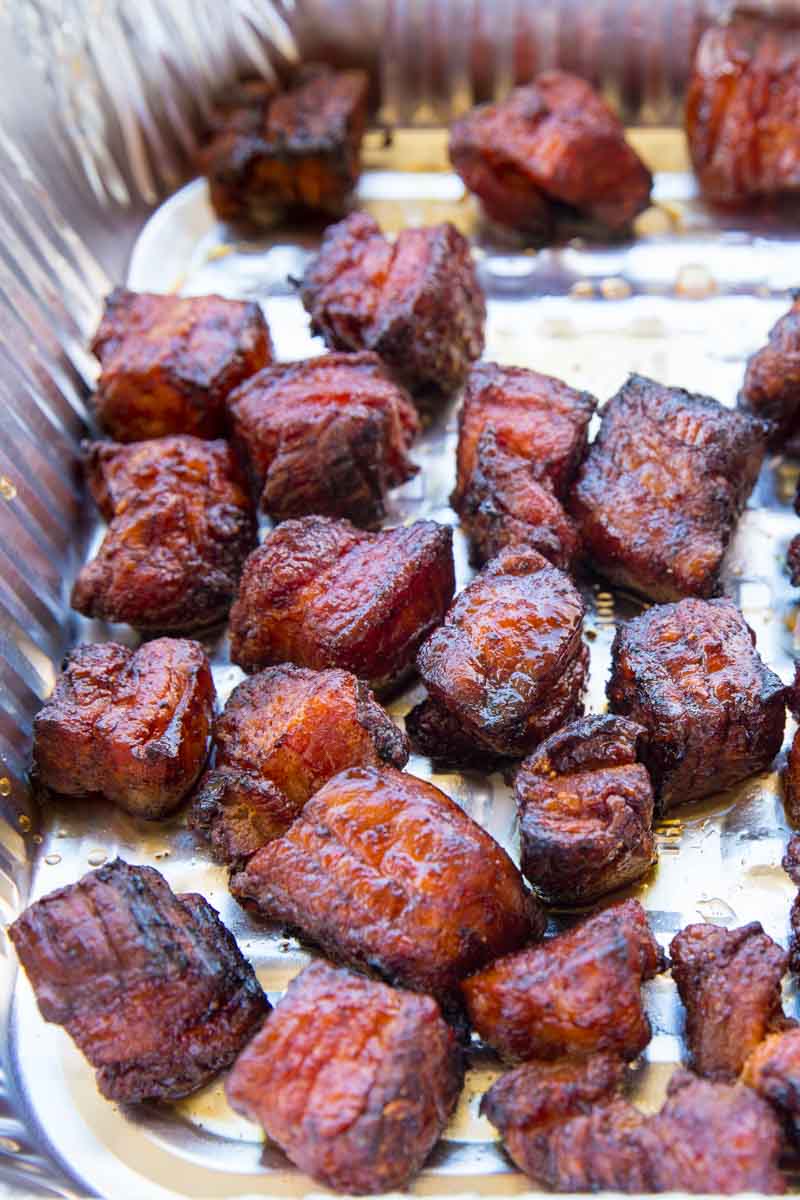
At the 3-hour mark, we move from the “smoking” phase to the “tenderizing” phase. Use an instant-read thermometer to check your progress; once the pork belly hits an internal temperature of 190°F, the fat has rendered significantly, but the meat still needs that final push to become buttery-soft.
This is where we pull the wire rack from the Big Green Egg and transition the cubes into a disposable aluminum pan. This step (the braise) is where the magic happens.
The Flavor Bath
Now, we layer on the richness. With the cubes safely in the pan, it’s time to build the “glaze” that will eventually coat every single piece:
- The BBQ Sauce: Pour your favorite BBQ sauce over the cubes. I recommend a tomato-based sauce with a bit of a kick to balance the fat. Toss the cubes thoroughly until every side is dripping in sauce.
- The Honey Drizzle: Follow the sauce with a generous drizzle of honey. This provides that high-gloss, “jewel-toned” finish and a sticky sweetness that is characteristic of a true burnt end.
- The Butter Hunks: Top the mixture with a few “hunks” of unsalted butter. As the butter melts, it emulsifies with the honey and sauce, creating a rich, velvety lacquer that won’t break or become grainy.
The Final Stretch
Cover the pan tightly with aluminum foil. This creates a pressurized steam environment inside the pan. Place it back onto the Big Green Egg (still at 275°F) for another 1 to 1.5 hours.
During this time, the pork belly is essentially “confit-ing” in its own fat, the butter, and the sauce. We are looking for an internal temperature of around 205°F to 208°F. At this point, the connective tissue has completely dissolved, and the cubes will be so tender they can be smashed with a light press of a finger.
Pro Tip: The “Sticky” Finish
If you prefer a tackier, more set glaze, remove the foil for the last 15 minutes of the cook. This allows the sauce to reduce and tighten up, clinging to the meat like a second skin rather than sitting in the pan as a liquid.
Finish the Pork Belly and Serve
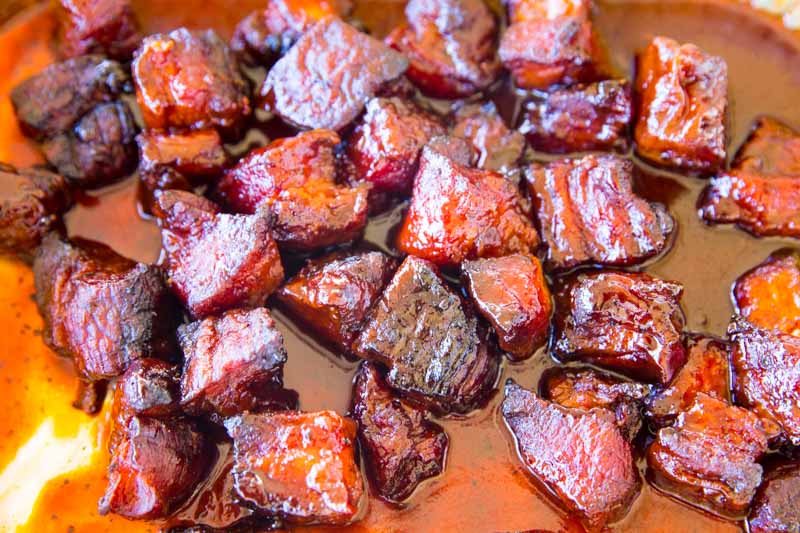
The Finish: Glistening Meat Candy
After an hour or so in the foil, your backyard will be filled with the intoxicating scent of caramelized sugar and hickory. But before you dive in, there is one final visual check to perform.
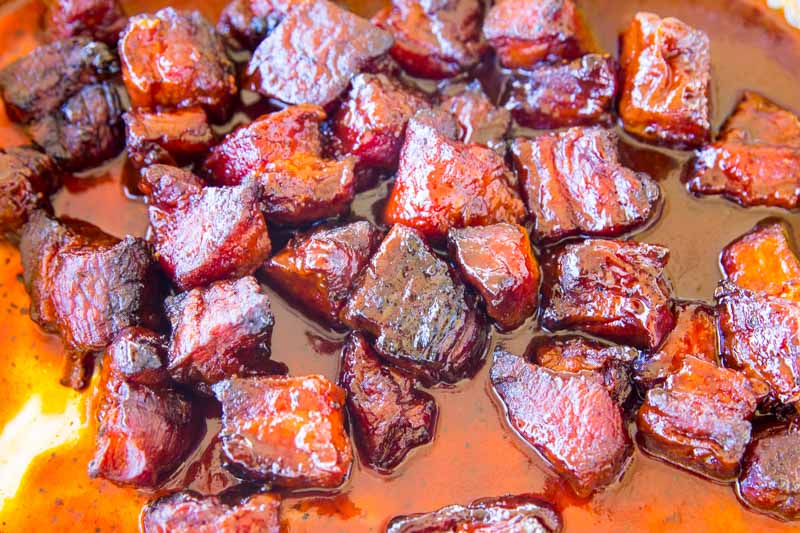
The “Sticky” Indicator
Open the foil and take a look. You are looking for the sauce to have reduced into a thick, mahogany glaze that clings to the pork belly like a second skin. If the sauce still looks a bit thin or watery, leave the pan uncovered on the Egg for another 10-15 minutes. This “sets” the glaze, giving the burnt ends that signature tacky, finger-licking texture.
The cubes are done when they are “probe tender” meaning a toothpick or thermometer slides into the meat with absolutely zero resistance, like poking a stick of softened butter.
How to Serve
Once the sauce has caramelized nicely, pull the pan from the Big Green Egg. While it’s tempting to eat them right then and there, give them about 5 to 10 minutes to cool slightly. This allows the glaze to thicken even further and ensures you don’t burn your mouth on the molten honey!
- As an Appetizer: Place a bowl of toothpicks next to the pan and watch them disappear. These are the ultimate “social” food.
- The “Burnt End” Bowl: Serve them over a bed of white rice or creamy slaw. The acidity of the slaw cuts through the richness of the pork perfectly.
- The Pairing: Pour that nice glass of Shiraz we talked about at the beginning. The dark fruit notes and slight spice of the wine are the perfect dance partner for the smoky, sweet, and fatty profile of the pork.
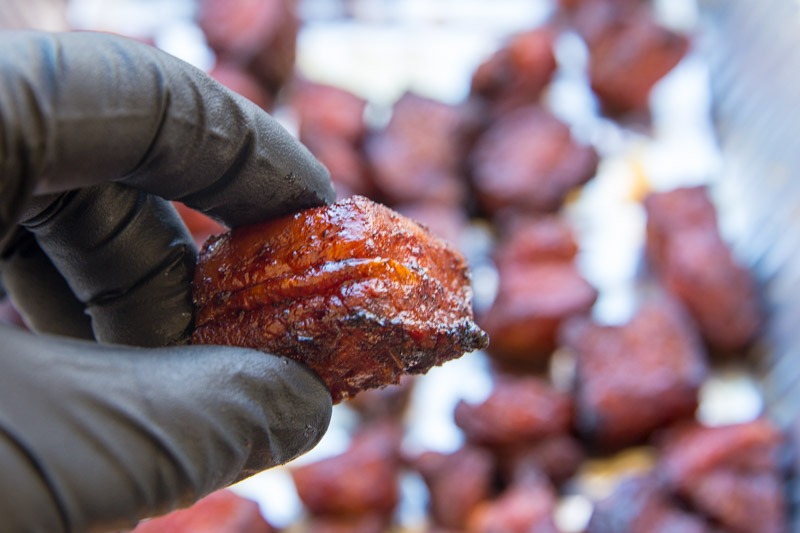
The Result
What started as a humble slab of pork belly from Costco has been transformed into a delicacy. Each bite is a masterclass in BBQ: a crispy, smoky exterior, a sweet and sticky glaze, and an interior that quite literally melts on your tongue.
Whether you’re serving these for a game-day crowd or as a special treat for the family, one thing is certain there won’t be any leftovers.
This recipe takes some time but is easy to do. Have patience as this dish is well worth the time it takes!
Print
Big Green Egg Pork Belly Burnt Ends
Big Green Egg Pork Belly Burnt ends are the most delicious piece of BBQ you will ever put in your mouth. Getting this elusive bite of deliciousness is doable if you have patience.
Course Main
Cuisine American
Prep Time 10 minutes minutes
Cook Time 4 hours hours
Total Time 4 hours hours 10 minutes minutes
Servings 4
Author The BBQ Buddha
- 8-10 pounds Pork Belly cleaned and cubed
- 1/2 cup Yellow mustard
- 1 cup BBQ Rub
- 2 cups BBQ Sauce
- 1/2 cup Honey
- 1 stick butter
- 2 cups apple juice for spritz
Trim the pork belly
Cut the pork belly into 1″ cubes
Cover the pork belly pieces in yellow mustard and then your favorite rub
Place pork belly pieces on wire rack
Preheat the smoker to 275° using Hickory Wood for the smoke
Place the pork belly pieces in the smoker sitting on the wire rack
Smoke for 3 hours spraying with apple juice every hour until the pork measures 190° internally
Pull the pork pieces and place in aluminum pan
Cover the pork belly pieces with BBQ sauce and toss evenly
Drizzle honey and pats of butter all over the pan of BBQ sauce covered pork belly and place back into the smoker
Let cook another hour until the sauce has reduced and caramelized on the pork belly pieces
Pull and serve
The post Big Green Egg Pork Belly Burnt Ends appeared first on The BBQ Buddha.
