The holiday season is all about creating memories around the table, and there is no centerpiece more iconic than a standing rib roast. When this cut is prepared the right way, the aroma and the presentation will leave your guests speechless. If you have never tried the reverse sear method, it is a total game changer for large cuts of beef.
Most traditional recipes tell you to sear the meat at a high temperature first and then finish roasting it. The reverse sear flips that logic. By roasting at a low temperature first and finishing with a high heat sear at the very end, you gain complete control over the cooking process. This technique is the secret to achieving “coast to coast” pink meat in the center with a perfectly charred, salty crust on the outside.
I have kept this recipe as simple as possible. My goal is for you to focus on the celebration and the end result without stressing over the steps. If you follow this guide, it will be the best rib roast you have ever served. Now sit back, grab a glass of your favorite Cabernet Sauvignon, and enjoy this guide to making the ultimate Prime Rib Roast on the Big Green Egg.
Step 1: Finding the Prime Rib Roast
To make the meat selection process easier to navigate, I have broken down your options by grade and source. This helps the reader quickly identify what fits their budget and availability.
Choosing Your Grade
The grade of the beef is determined by the amount of marbling (intramuscular fat) within the meat. For the best holiday experience, here is how they stack up:
- Select: This is the leanest grade. While it is the most affordable, it lacks the fat needed for a truly decadent rib roast. I generally recommend skipping this for the holidays.
- Choice: This is the “sweet spot” for most home cooks. It offers a great balance of flavor and tenderness at a reasonable price point. You can find high-quality Choice roasts at almost any grocery store.
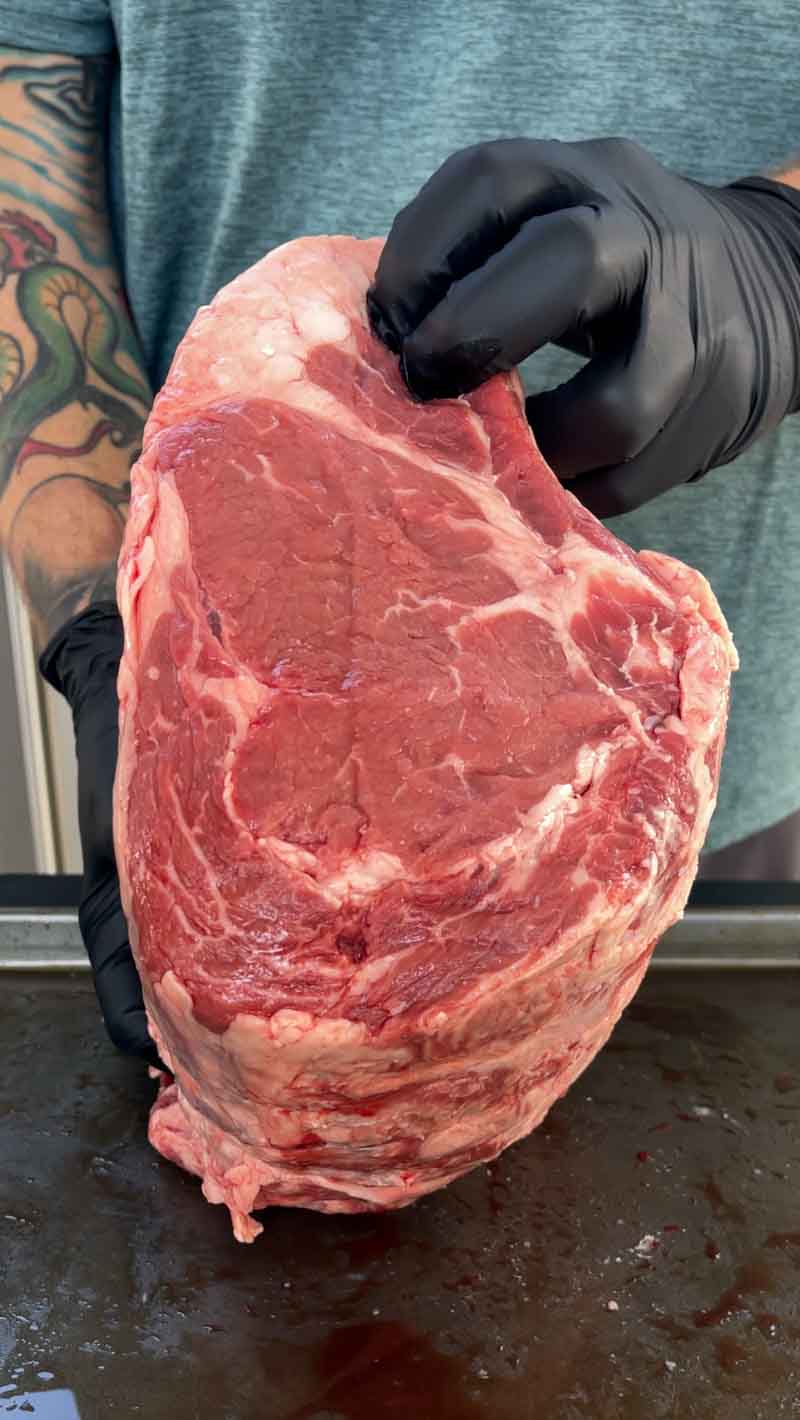
- Prime: This represents the top 2% of all beef. It is heavily marbled and is what you will find at five-star steakhouses. If you want the most luxurious texture possible, this is the one to pick.
- Wagyu: As seen in this post with the Snake River Farms roast, Wagyu features extreme marbling. It is a premium “luxury” option that delivers a buttery, melt-in-your-mouth richness.
Where to Shop
You don’t have to rely on mail-order services to find a great roast. Here are the best local alternatives:
- Local Butcher Shops: This is your best resource for custom cuts. A butcher can trim the fat cap and tie the roast for you, ensuring it is ready for the Egg the moment you get home.
- Warehouse Clubs (Costco/Sam’s Club): These are surprisingly excellent sources for USDA Prime roasts during the holiday season. They often have the best prices for high-end cuts.
- High-End Grocers: Stores like Whole Foods or local gourmet markets typically stock “Dry-Aged” options. Dry-aging concentrates the beef flavor and adds a unique, nutty profile to the meat.
The “Pro” Checklist
Regardless of where you buy or what you spend, keep these three things in mind:
- Bone-In is Best: Always ask for a “Standing Rib Roast.” The bones protect the meat from overcooking and provide better flavor.
- The Fat Cap: Ensure the roast has at least a quarter-inch of white fat on the top. This is your “flavor insurance” during the reverse sear.
- Size Matters: Plan for about one rib for every two people, or roughly one pound of bone-in meat per person.
Step 2: Temper the Prime Rib Roast
The Importance of Tempering
Before the prime rib roast even touches the grill, you need to give it some time on the kitchen counter. Take the roast out of the refrigerator at least one hour before you plan to start cooking. This process is known as tempering.
By allowing the meat to sit at room temperature, you take the “chill” off the center of the roast. This ensures that when the beef hits the Big Green Egg, the heat can penetrate the meat more evenly. If you put a stone-cold roast onto the grill, the outside often overcooks before the center reaches the target temperature, leaving you with a thick grey band of overdone meat. Tempering is the first step toward achieving that perfect edge-to-edge pink center.
Step 3: Setting Up the Big Green Egg
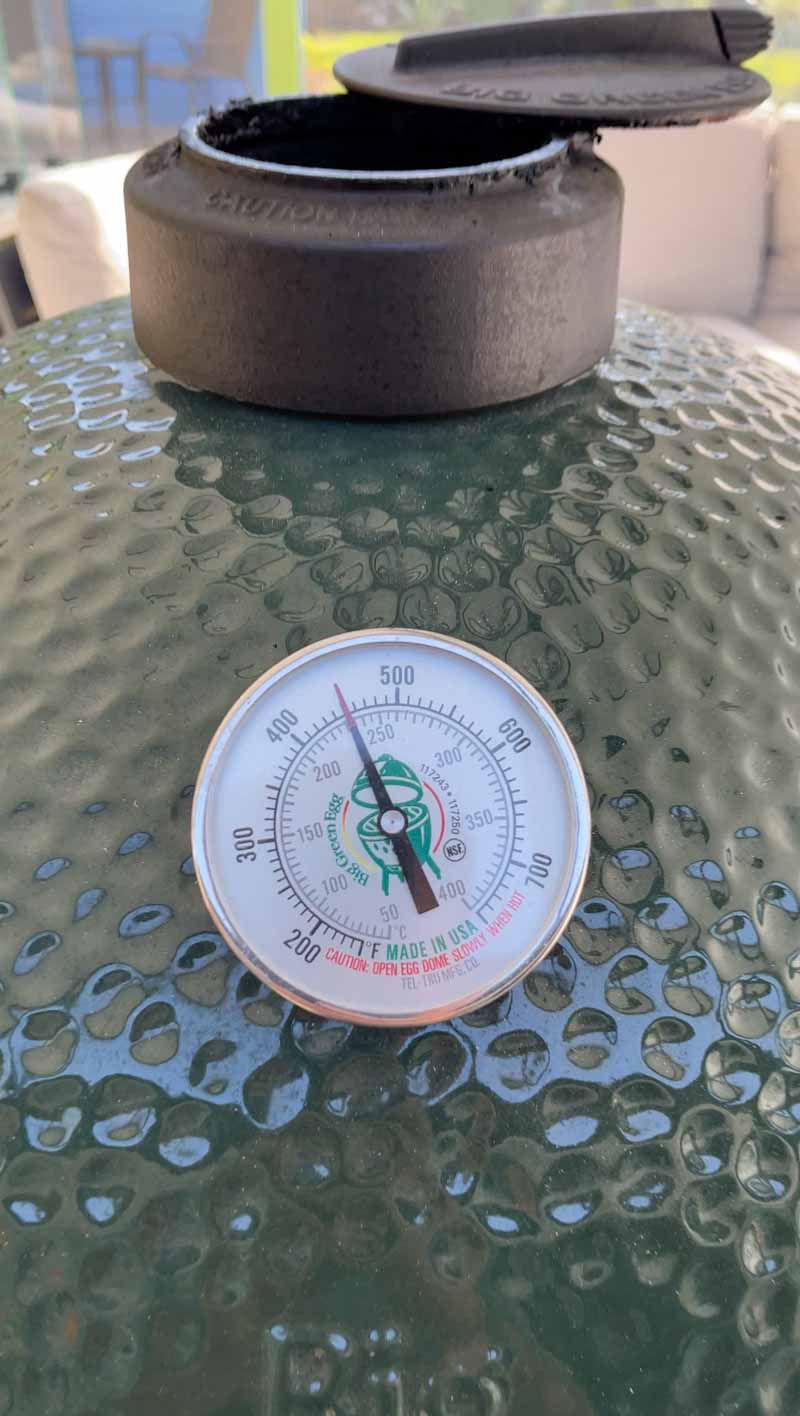
While your roast is tempering, it is time to get the grill ready. Preheat your Big Green Egg to 250°F.
For this recipe, consistency is more important than speed. A low and steady temperature of 250°F allows the fat to render slowly and the connective tissue to break down without toughening the muscle fibers. This gentle heat is the “low” part of the low-and-slow method that makes a reverse sear so successful.
Quick Prep Checklist
- Check the Temp: Use a handheld thermometer to ensure your Egg has stabilized at 250°F before you think about adding the meat.
- The ConvEGGtor: Ensure your heat deflector is in place for indirect cooking. You want the air to circulate around the roast like a convection oven, rather than having the bottom of the meat sit directly over the coals.
- Clean the Grates: A clean cooking surface ensures no off-flavors interfere with the natural taste of the beef.
Step 4: Prep the Prime Rib Roast
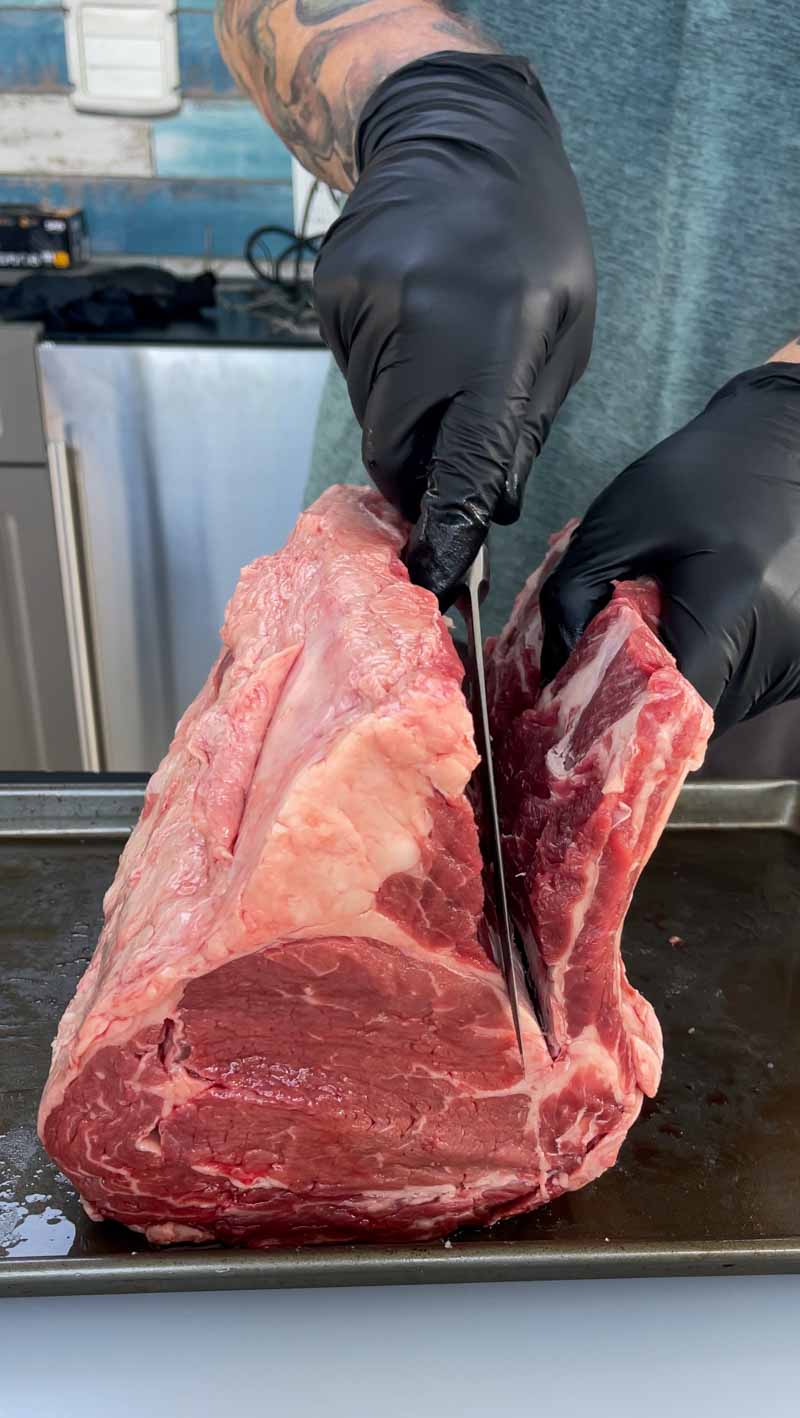
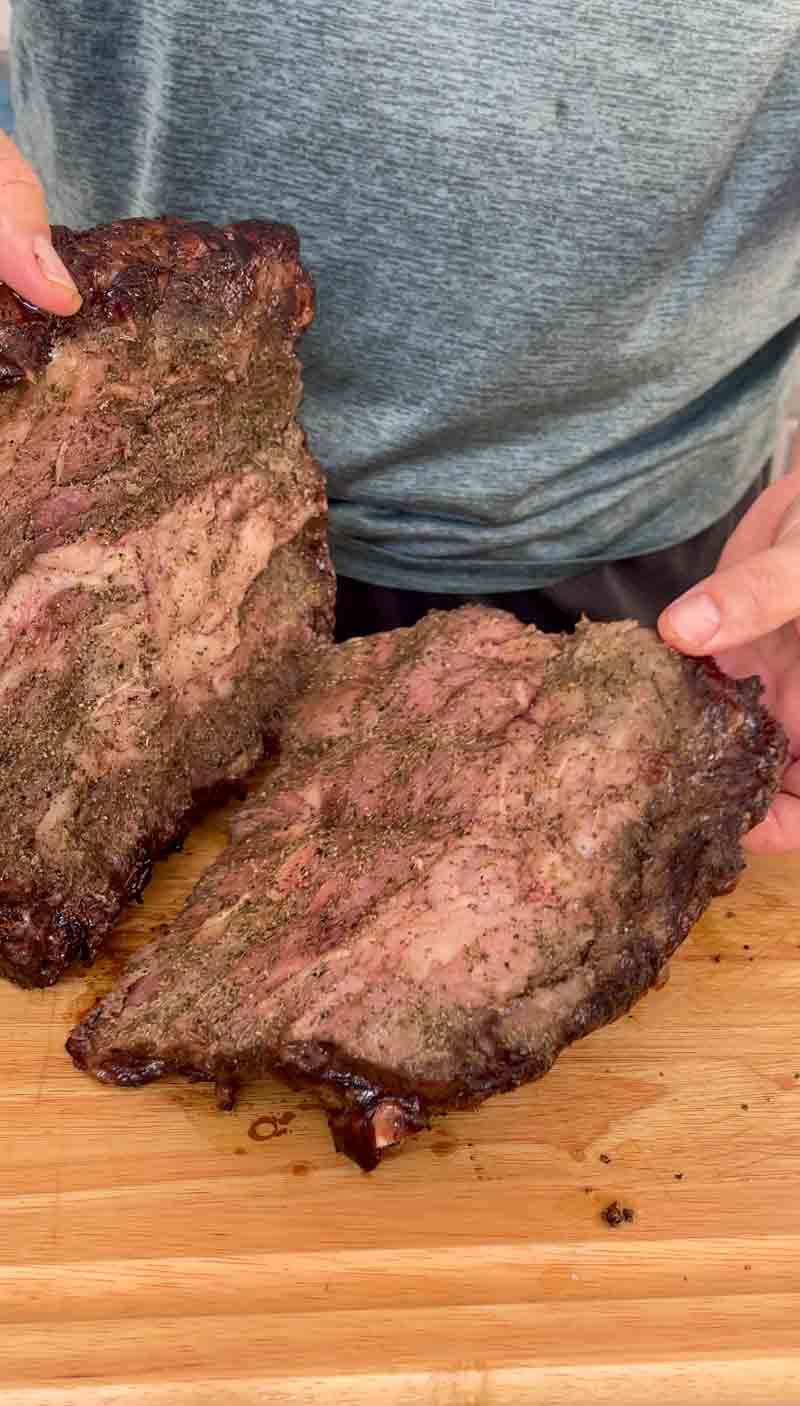
To prepare the prime rib roast for the best possible eating experience, we are going to use a technique often called “cut and tie.” This involves removing the bone section by slicing along the bone line, being careful not to cut into the spinalis dorsi, which is that highly prized, ultra-marbled “rib eye cap” that sits on the outer edge of the roast.
The “Cut and Tie” Method
While it might seem counterintuitive to remove the bones before you cook, there are two major benefits to doing this:
- Seasoning Access: Once the bones are detached, you can season the “bottom” of the meat and the “inside” of the bones. This creates a flavor bridge that you simply cannot get if the bones remain attached during the entire process.
- Easy Carving: By separating the bones now and tying them back on, you enjoy all the flavor benefits of a bone-in roast without the struggle of carving around hot bones at the dinner table. When the meat is done, you simply snip the twine and you have a perfectly shaped, boneless cylinder ready to slice.
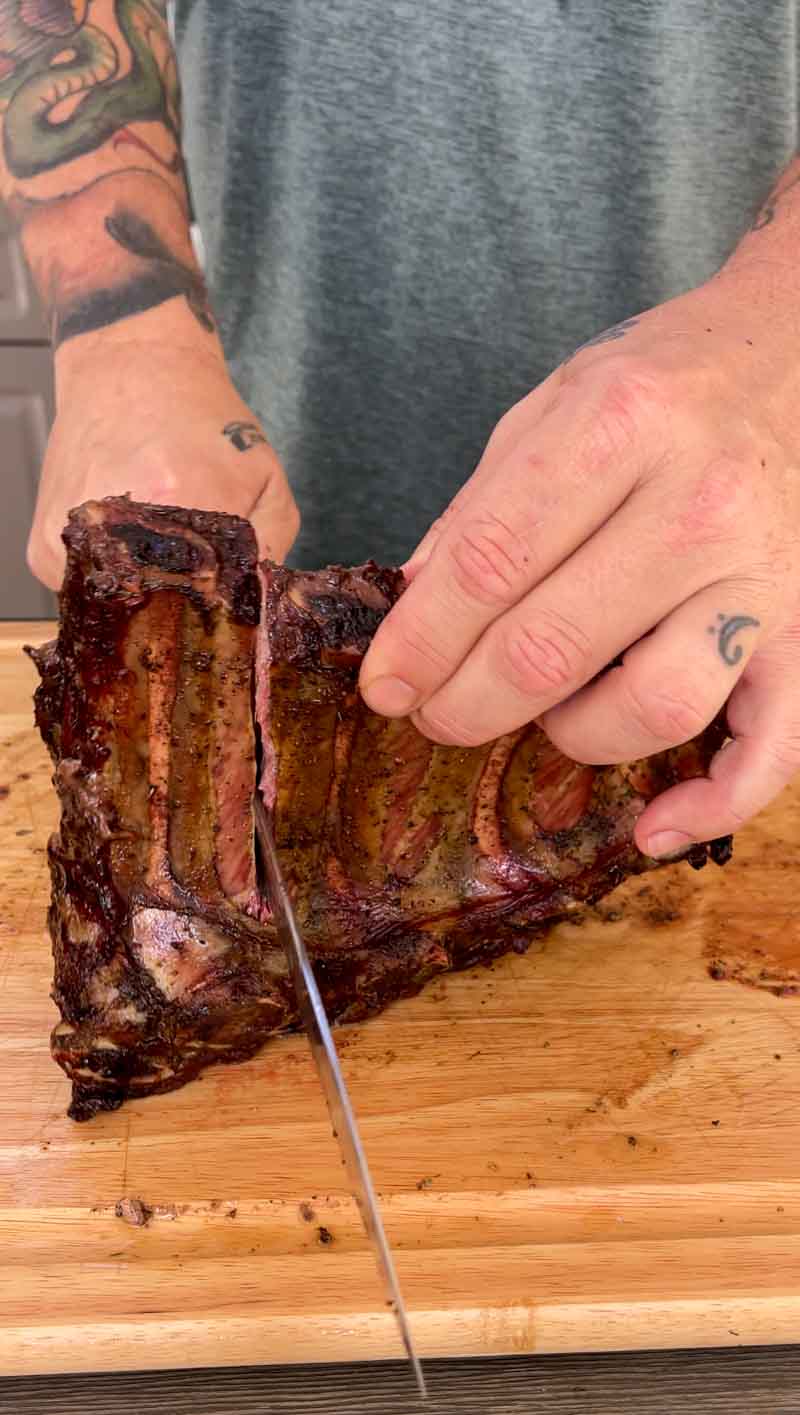
Protecting the Spinalis
As you run your knife along the curvature of the ribs, keep your blade angled toward the bone rather than the meat. The spinalis dorsi is the most tender and flavorful part of the roast. You want to preserve every bit of that fat and muscle. Think of your knife as a guide to gently “unzip” the meat from the ribs.

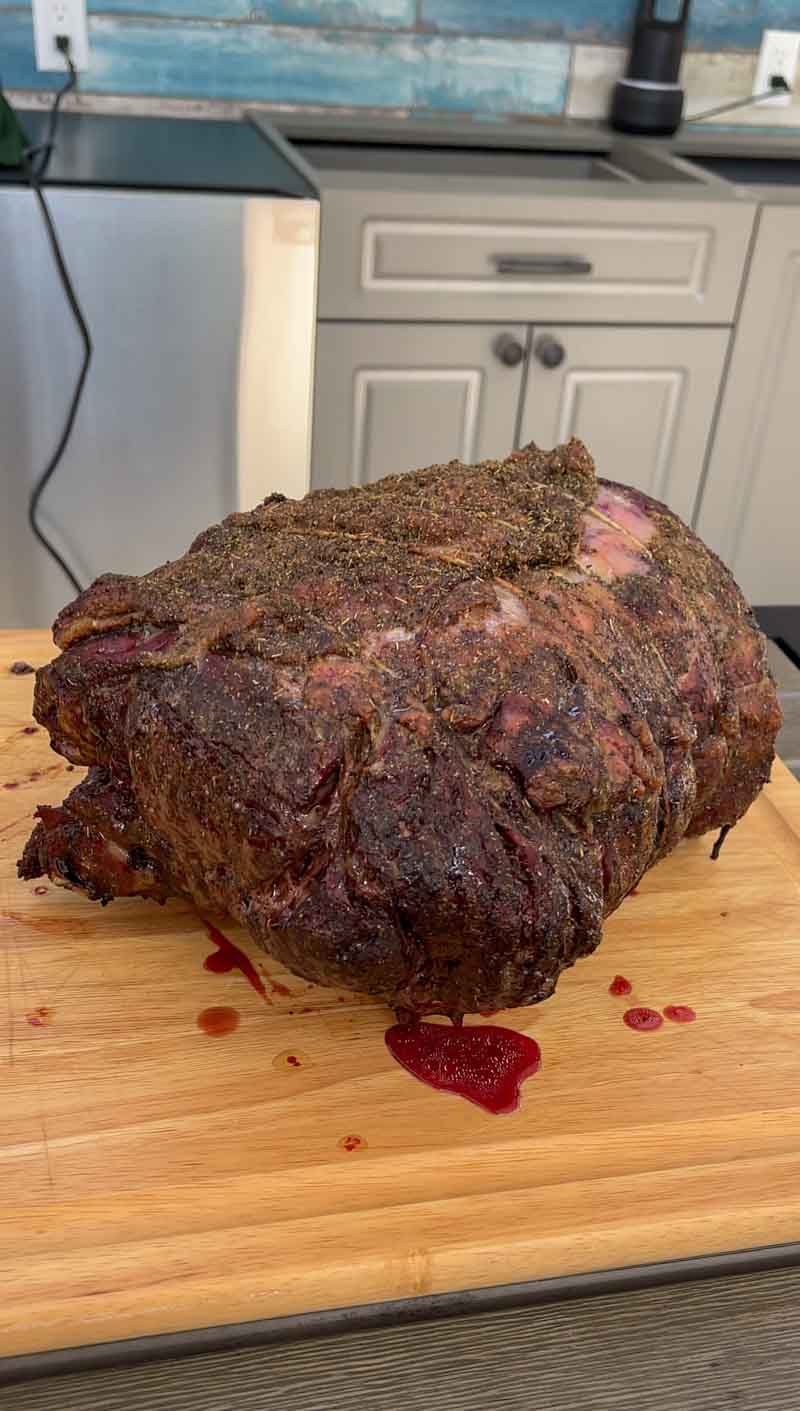
Step 5: Season the Prime Rib Roast
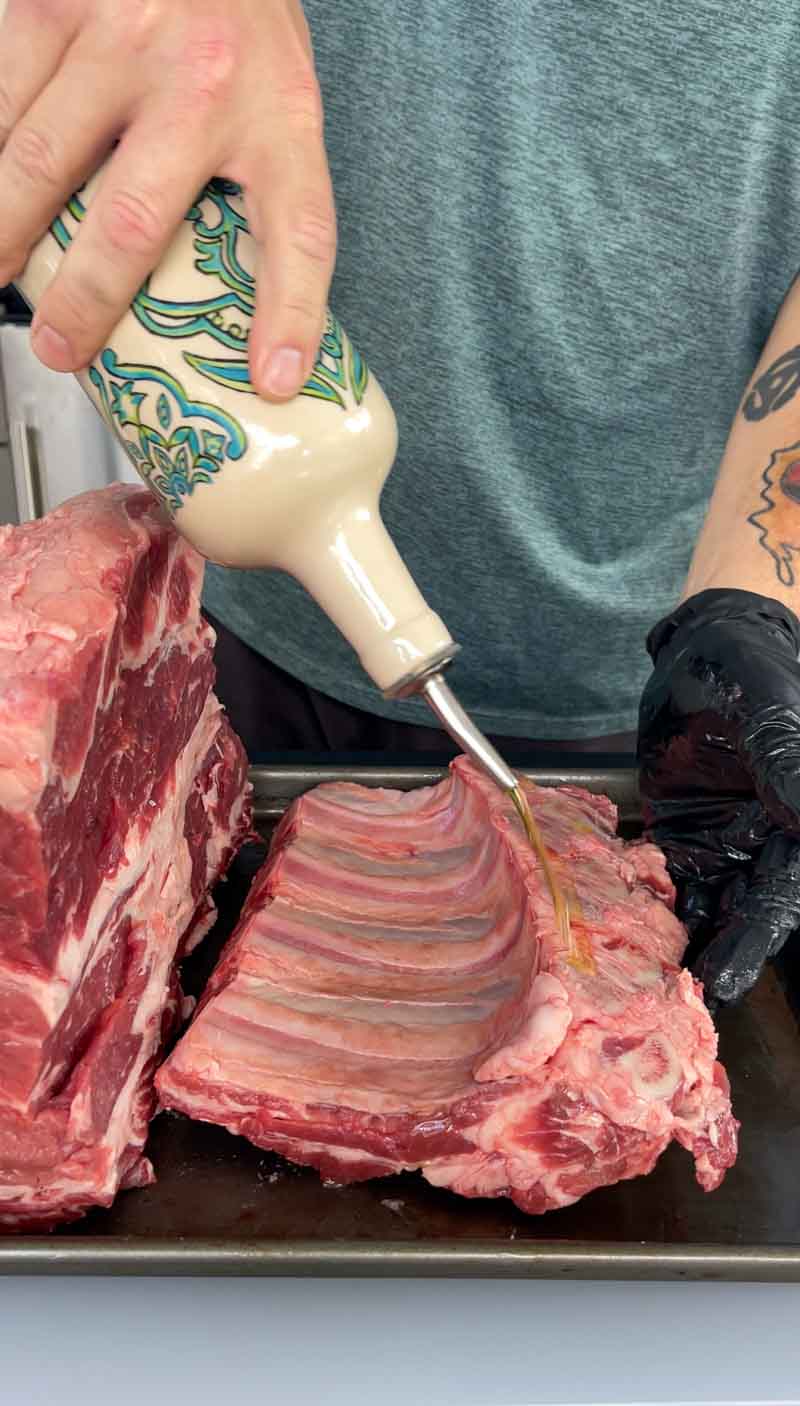
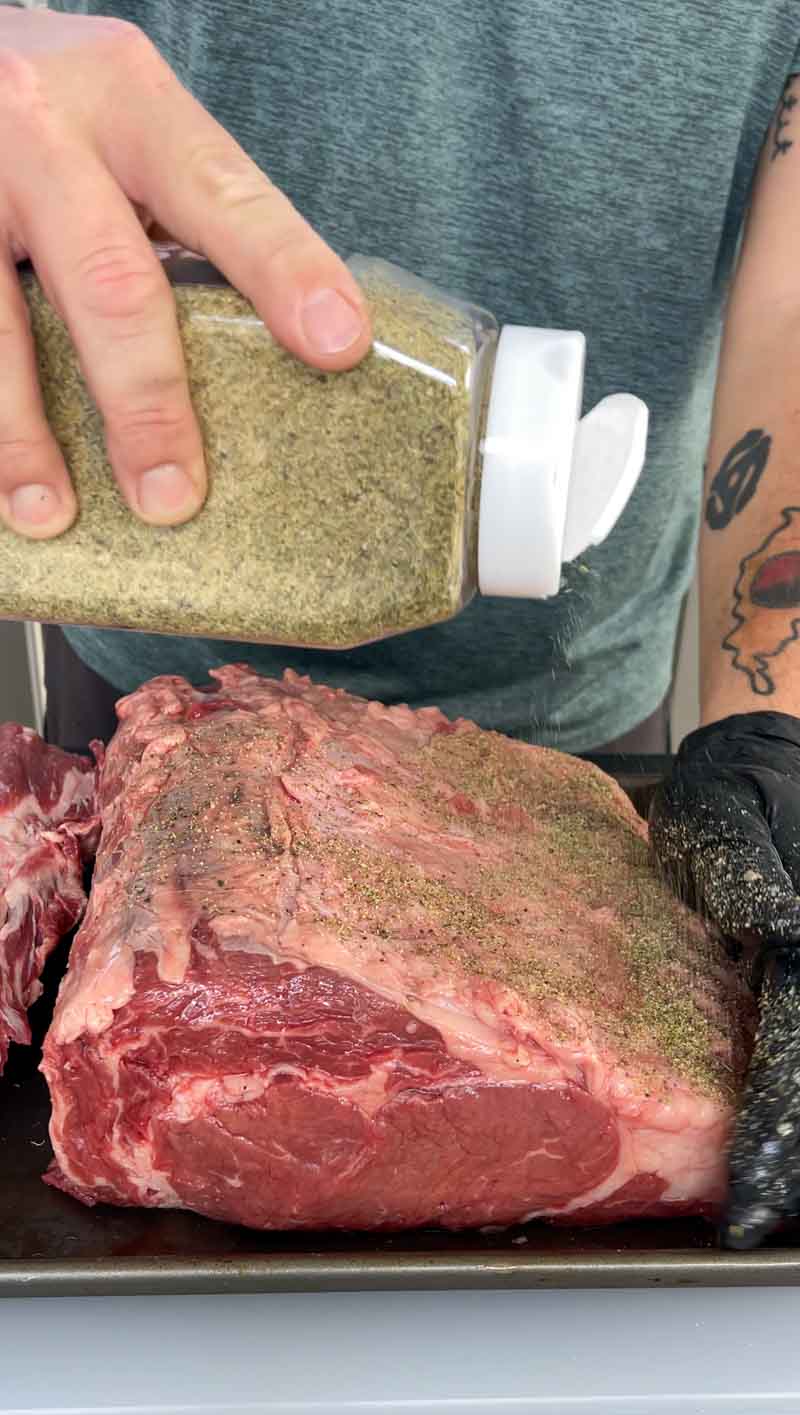
With the bones separated, it is time to build the flavor profile. Start by adding a light coating of olive oil to both the meat and the rib sections. This acts as a binder, ensuring your seasoning sticks to the beef rather than falling off onto the charcoal.
Next, season the roast generously. For this cook, I am using Dizzy Pig SPG Herb Seasoning. This is my personal favorite steak rub because it combines the foundational elements of Salt, Pepper, and Garlic with a sophisticated herbal finish. It consistently delivers a perfect crust and a classic steakhouse taste that highlights the beef without overpowering it.
Seasoning Alternatives
While Dizzy Pig is my go-to, you have several excellent options depending on your flavor preference:
- Hardcore Carnivore Black: If you want a striking, jet-black crust, this rub uses food-grade activated charcoal to create an incredible visual contrast against the pink center.
- Meat Church Holy Cow: This is a Texas-style rub that is heavy on the pepper and salt, perfect if you want a bold, savory bark.
The “Buddha Blend” (DIY Option)
If you prefer to make your own rub from scratch, you can’t go wrong with a classic Buddha Blend. This simple ratio works perfectly for long cooks on the Big Green Egg:
- 2 parts Kosher Salt: Essential for drawing out moisture and creating the crust.
- 2 parts Coarse Black Pepper: Provides that signature bite.
- 1 part Granulated Garlic: Adds a savory, aromatic baseline.
- 1/2 part Dried Thyme or Rosemary: Adds that traditional holiday “roast” aroma.
Regardless of which seasoning you choose, the key is to be generous. A prime rib roast is a massive, dense piece of protein. You need a significant amount of seasoning on the exterior to ensure that every slice has enough salt and spice to balance the rich, unseasoned meat in the center.
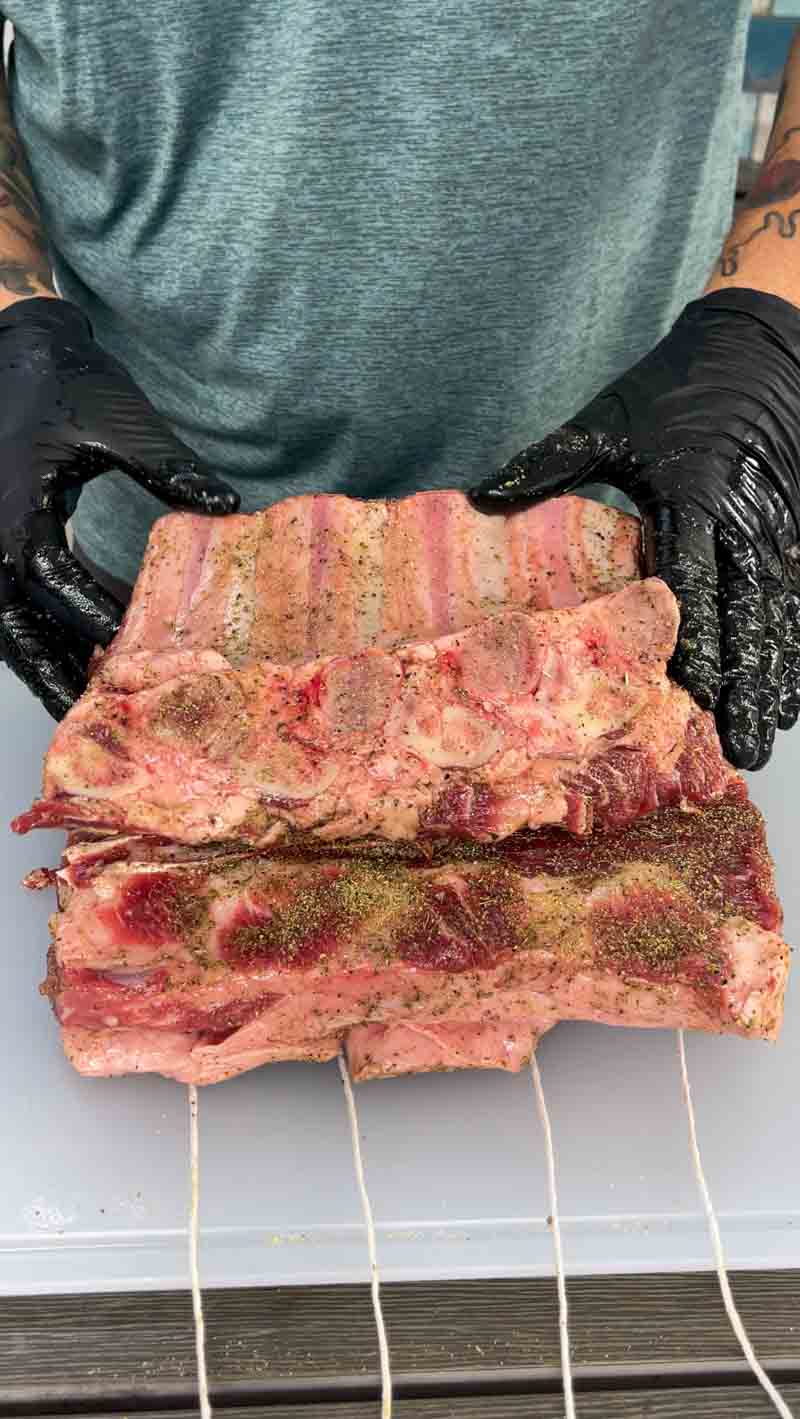
Step 6: Tying the Prime Rib Roast
Once you have seasoned every inch of the roast, it is time to reconstruct the bird… or in this case, the beef. Place the rib section back onto the meat exactly where it was before the trim. Now, use butcher’s twine to secure the bones tightly to the roast.
Why Tying Matters
Tying the roast isn’t just about making it look professional. It serves two very specific functional purposes during the cook:
- Heat Protection: The rib bones act as a natural heat shield. By securing them back in place, you are protecting the bottom of the meat from the rising heat of the Egg. This ensures the bottom doesn’t get tough or overcooked while the top and center reach perfection.
- Structural Integrity: Meat tends to “relax” and expand as it heats up. Tying the roast into a uniform, tight cylinder ensures it cooks at an even rate. Without the twine, the roast might flatten out, leading to unevenly cooked slices.
The Flavor Infusion
As the Big Green Egg works its magic, the “magic” inside the roast begins to happen as well. Between the meat and the bones lies a wealth of fat and connective tissue. As these elements reach their melting point, they begin to render and liquefy.
Because you seasoned the interior of that “bone flap,” this rendering fat picks up the salt, garlic, and herbs, naturally basting the meat from the inside out. This process adds a layer of rich, beefy depth that you simply cannot achieve with a boneless roast. Essentially, the bones act as a flavor reservoir that keeps the roast moist and savory throughout the entire low-and-slow phase.

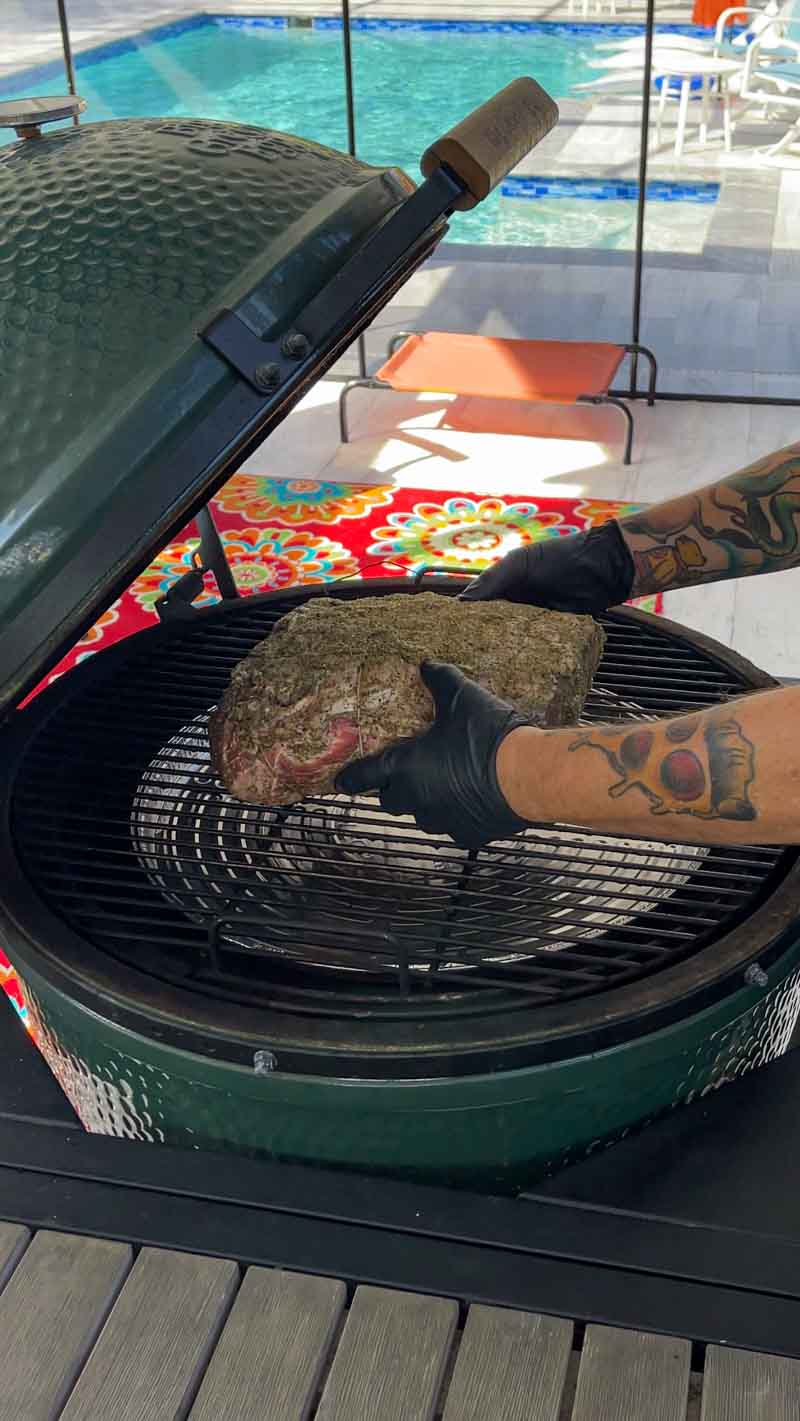
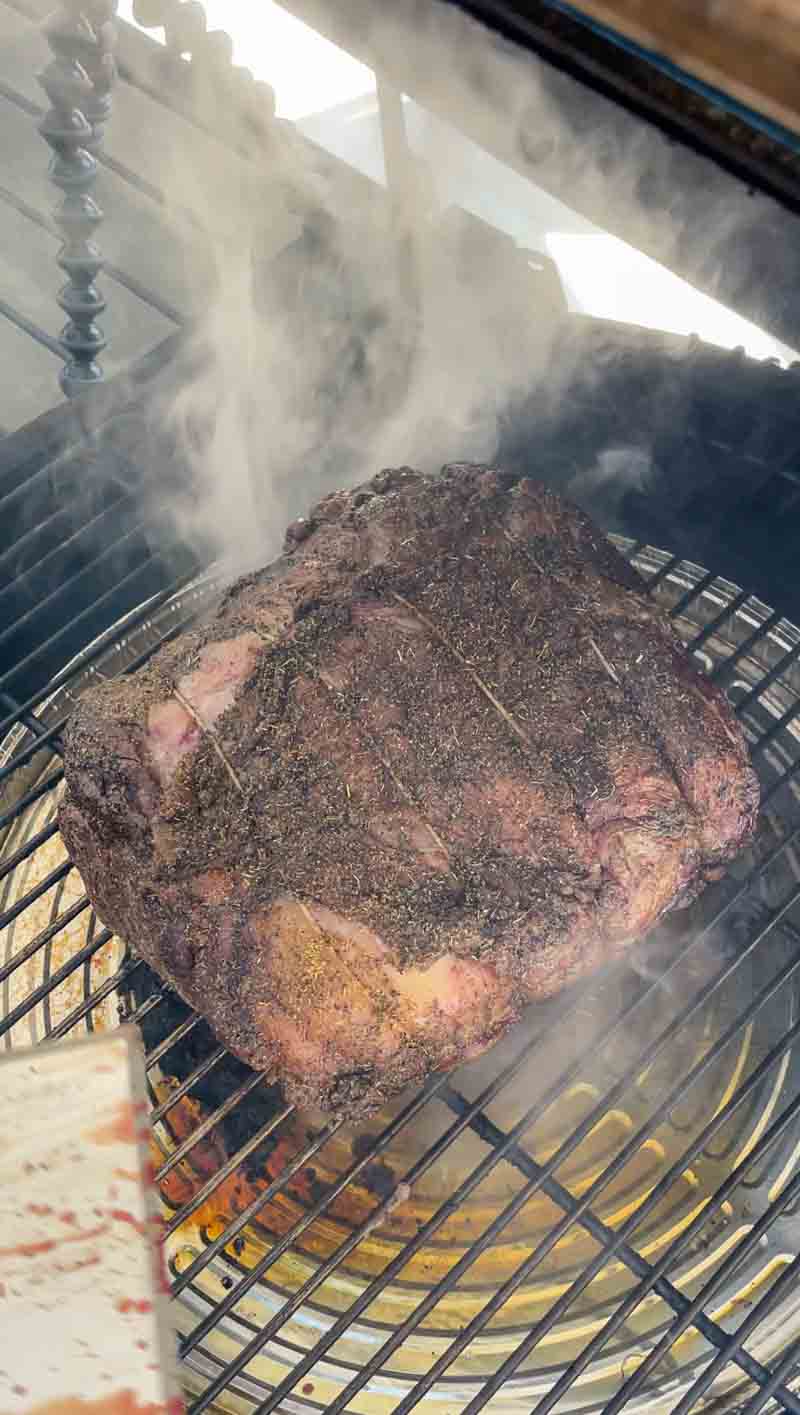
Step 7: Cooking the Prime Rib Roast
With your Big Green Egg stabilized at 250°F and your roast perfectly seasoned and tied, it is time to start the cook. Place the prime rib onto the center of the grate, directly over the ConvEGGtor. Close the dome and settle in; this low-and-slow phase will typically take 3 to 4 hours, depending on the size and thickness of your roast.
The Path to 120°F
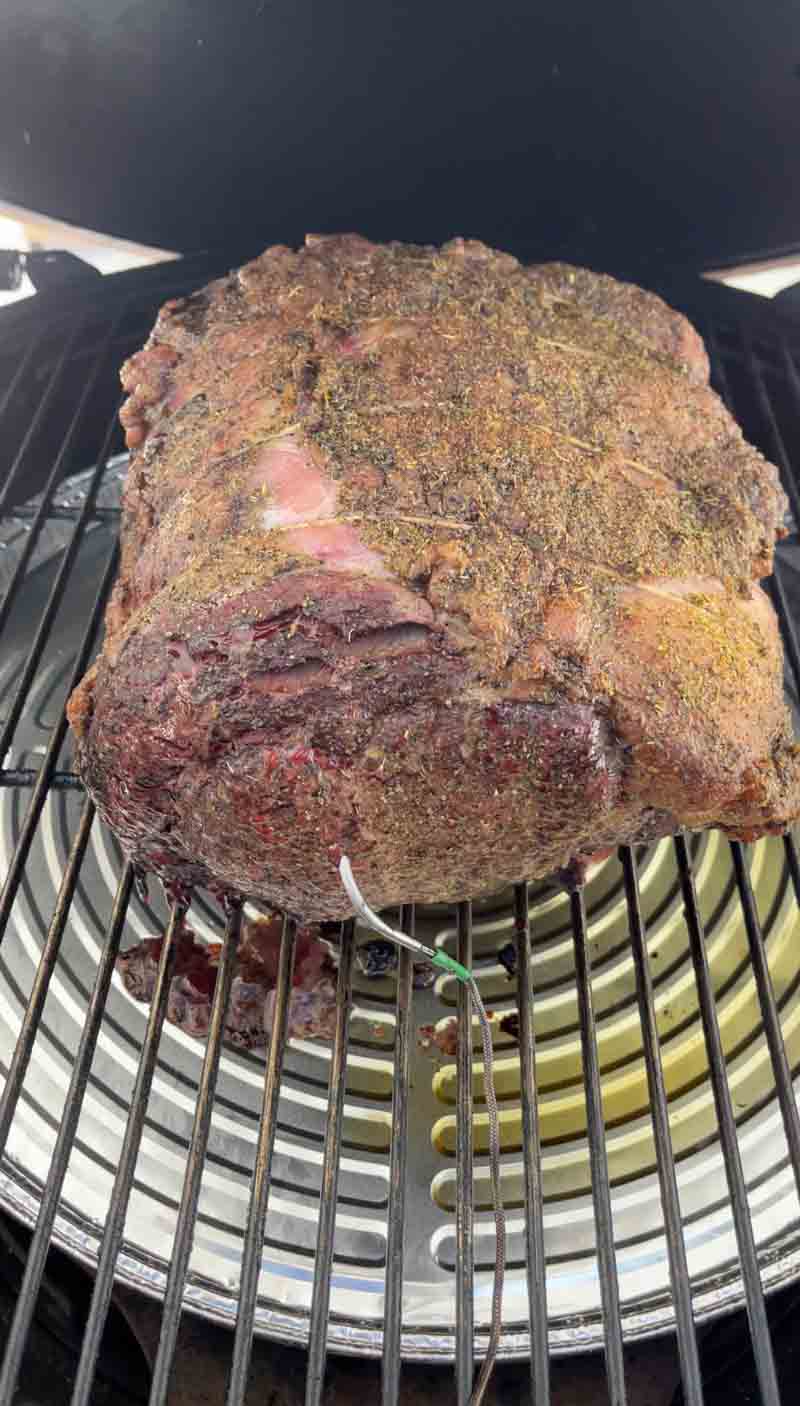
In a reverse sear, the first stage is all about gentle, indirect heat. We are not looking for a crust yet; we are looking for a perfectly even rise in temperature. You want to cook the roast until the internal temperature reaches 120°F as measured by a reliable leave-in probe or a handheld thermometer like a Thermapen.
- Why 120°F? This is the “pull temperature” for the first phase. It leaves us just enough room to perform the high-heat sear later without overshooting our final goal of medium-rare.
- The Color Transition: During these few hours, you will notice the meat transition from a raw red to a beautiful, mahogany brown. This is the smoke and the dry heat of the Egg working together to set the foundation for the final crust.
- The Fat Render: At this temperature, the fat cap will begin to soften and glisten. This slow render is what makes the final product so tender and “melt-in-your-mouth” delicious.
Monitoring the Cook
The Big Green Egg is famous for its temperature stability, but holiday cooks can be busy. Using a dual-probe remote thermometer is a great way to monitor both the internal temperature of the beef and the ambient temperature of the grill from the comfort of your kitchen.
Remember, we are playing the long game here. Every time you open the dome, you let out the heat and moisture that the ceramic walls have worked so hard to build up. Keep the dome closed and trust the process. When that alarm hits 120°F, you are exactly where you need to be.
Size and Cook Times
While every piece of meat is different, having a general timeline is essential for holiday planning. These estimates are based on maintaining a steady 250°F on your Big Green Egg for the initial low-and-slow phase.
Keep in mind that thickness often impacts the cook time more than the total weight. A long, thin 3-bone roast will cook faster than a short, thick 3-bone roast.
Prime Rib Cook Time Estimates
| Number of Ribs | Approximate Weight | Estimated Cook Time (to 120°F) | Serves (Approx.) |
| 2 Ribs | 4 - 5 lbs | 2.0 - 2.5 hours | 4 People |
| 3 Ribs | 6 - 8 lbs | 3.0 - 3.5 hours | 6 People |
| 4 Ribs | 9 - 11 lbs | 3.5 - 4.5 hours | 8 People |
| 5 Ribs | 12 - 14 lbs | 4.5 - 5.5 hours | 10 People |
| Full Rack (7) | 15 - 18 lbs | 6.0 - 7.0 hours | 14+ People |
Variables to Watch
- The “Carry-Over”: Larger roasts have more thermal mass. A 5-rib roast will continue to rise in temperature more than a 2-rib roast once removed from the heat.
- The Starting Temp: If you skipped the tempering step and the meat went in cold, add at least 30-45 minutes to the estimates above.
- The Big Green Egg Load: If you are cooking multiple roasts at once, the airflow might be slightly restricted, which can extend the cook time.
The Golden Rule: Use these times for planning your afternoon, but always cook to internal temperature, not the clock. A digital meat probe is your best friend for a stress-free holiday.
Step 8: Sear the Prime Rib Roast
When the internal temperature hits 120°F, it is time to transition from roasting to searing. Carefully pull the prime rib from the Big Green Egg and set it on a tray. While the meat rests, you need to prepare the grill for the grand finale.
Depending on your comfort level and how much “fire” you want to play with, there are two ways to achieve that perfect holiday crust.
Option 1: The Indirect High-Heat Finish (My Preferred Method)
For this recipe, I am keeping the ConvEGGtor in place. I prefer this method because it offers more control and reduces the risk of flare-ups from the rendering fat.
- The Setup: Simply open your top and bottom vents wide and let the Big Green Egg climb to 450°F.
- The Benefit: Because the heat deflector is still there, you are essentially turning your Egg into a high-powered convection oven. You will get a gorgeous, uniform “mahogany” crust across the entire surface of the roast without any charred or scorched spots. It is a cleaner, more consistent way to finish a premium cut of beef.
Option 2: The Direct Sear Finish
If you are looking for a more aggressive, flame-kissed char, you can opt for a direct sear.
- The Setup: Using heat-resistant gloves, carefully remove the ConvEGGtor and set it aside on a non-flammable surface. Open the vents and let the temperature reach 450°F.
- The Benefit: This method puts the meat directly over the glowing coals. You will place the roast back on the grate and rotate it every minute or two. This creates a traditional “grilled” crust with a bit more smoke and sizzle.
- The Warning: Be vigilant. Prime rib is a fatty cut, and once that fat hits the open coals, you will get flare-ups. Stay by the grill and keep the roast moving to avoid burning the exterior.
The Final Goal
Regardless of which path you choose, the mission is the same: sear the roast until the exterior is dark, crispy, and aromatic, and the internal temperature reaches 130°F to 135°F. At this point, you have achieved the perfect medium-rare.
Step 9: The Homestretch
Once your Big Green Egg has reached that 450°F mark, it is time for the grand finale. Place the prime rib roast back onto the center of the grate for the final 6 to 10 minutes. This is the most exciting part of the cook, where the kitchen starts to smell like a high-end steakhouse.
The Transformation
During these final minutes, the high heat works rapidly on the exterior of the roast. Because the meat has already been “dried out” by the low-and-slow phase and the short rest, the Maillard reaction happens almost instantly.
- The Crust: The fat cap will begin to sizzle, bubble, and turn a deep, golden brown. Those herbs and spices from the rub will bake into a savory, crunchy bark.
- The Render: Any remaining exterior fat will finish liquefying, draping over the sides of the meat and adding one last layer of rich flavor.
Monitoring for Perfection
While the clock says 6 to 10 minutes, your Thermapen is the real boss here. You are looking for a final internal temperature of 130°F to 135°F for a perfect medium-rare.
- Check Frequently: At 450°F, the temperature of the meat will rise much faster than it did earlier. Start checking the center of the roast at the 6-minute mark.
- The Carry-Over: Remember that a roast this size will continue to rise about 5°F after you pull it from the heat. If you want a true $135^\circ\text{F}$ finish, pull the roast when the thermometer reads $130^\circ\text{F}$.
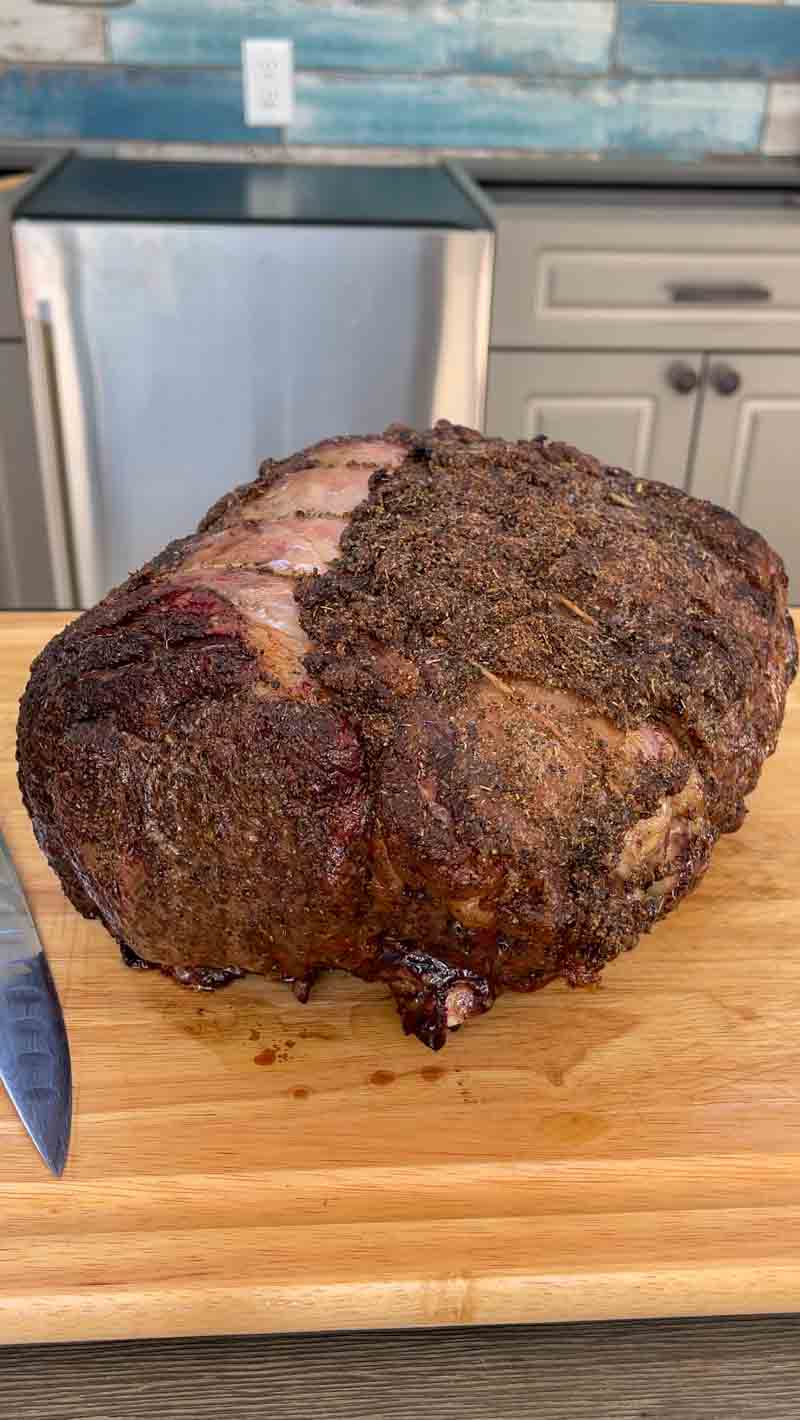
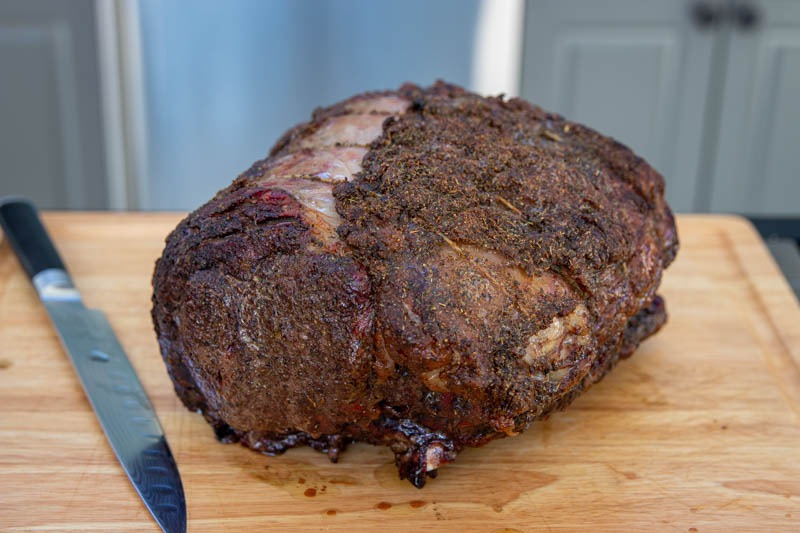
The Visual Cue
You are looking for a roast that looks “lacquered.” The outside should be dark, firm to the touch, and incredibly aromatic. Once you hit that target temperature and the crust looks exactly how you want it, remove the roast from the Egg immediately. You are now just one short rest away from the best meal of the year.
Step 10: Rest, Slice and Serve the Prime Rib Roast
When you see that deep mahogany crust and hit your target temperature, it is time to pull the prime rib from the Big Green Egg. This is the hardest part of the entire process because the roast looks and smells incredible, but you must let it rest for 20 to 30 minutes.
The Science of the Rest
Resting is not just a suggestion; it is a critical step for a holiday roast. During the high-heat sear, the muscle fibers tighten up and push the juices toward the center of the meat. If you slice into the roast immediately, those juices will end up on your cutting board rather than in the meat.
By waiting 20 to 30 minutes, the fibers relax and reabsorb that moisture. This ensures every slice is succulent and tender. Do not worry about the meat getting cold; a roast of this size has a lot of “thermal mass” and will stay perfectly hot for quite a long time.
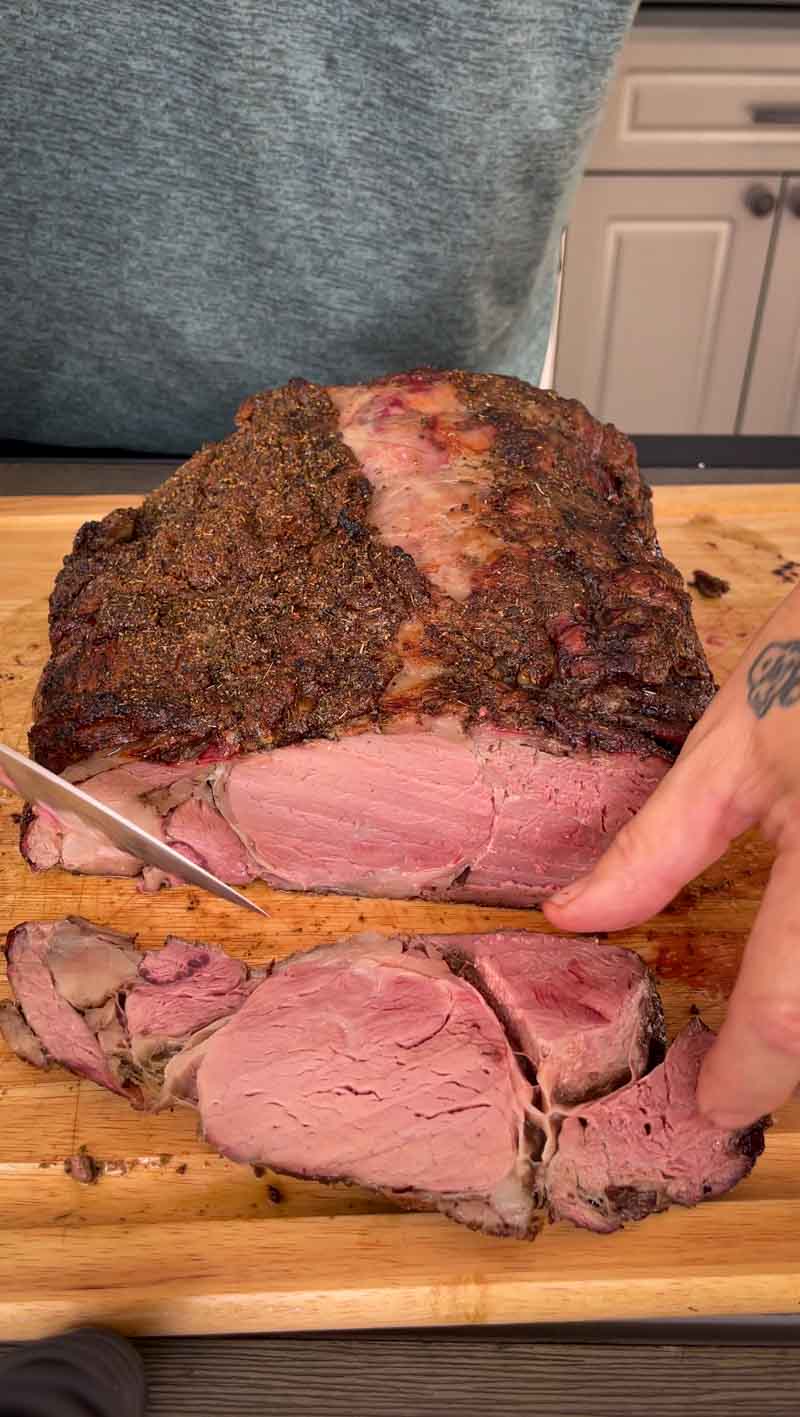
The Carving Reveal
Once the rest is complete, it is time for the “Million Dollar” moment. Since you used the “cut and tie” method earlier, carving is a breeze:
- Snip the Twine: Use kitchen shears to cut the butcher’s twine. The rib rack should pull away cleanly from the meat.
- The Bone Bonus: You can slice between the ribs and serve them as “Texas Lollipops” on the side. They are often the cook’s favorite part.
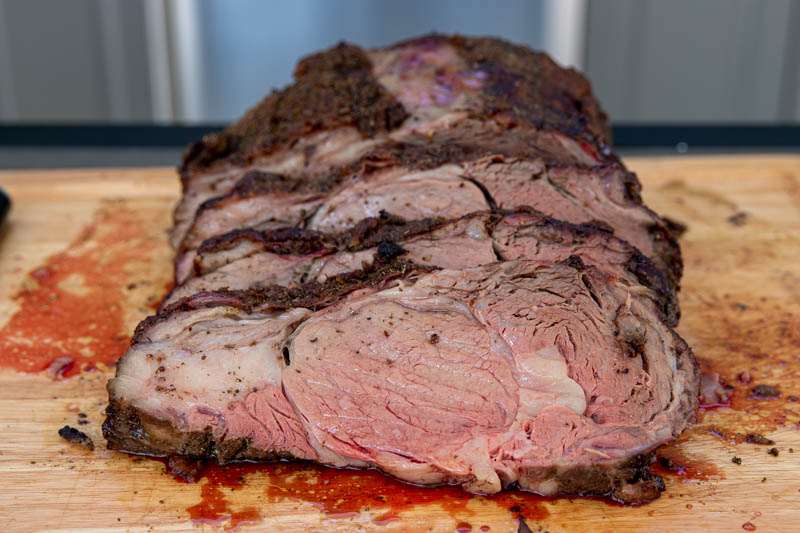
- The Perfect Slice: Now that you have a boneless cylinder of beef, you can slice it to your preferred thickness. Whether you like thin, delicate ribbons or a thick, king-cut slab, you will see the true power of the reverse sear.
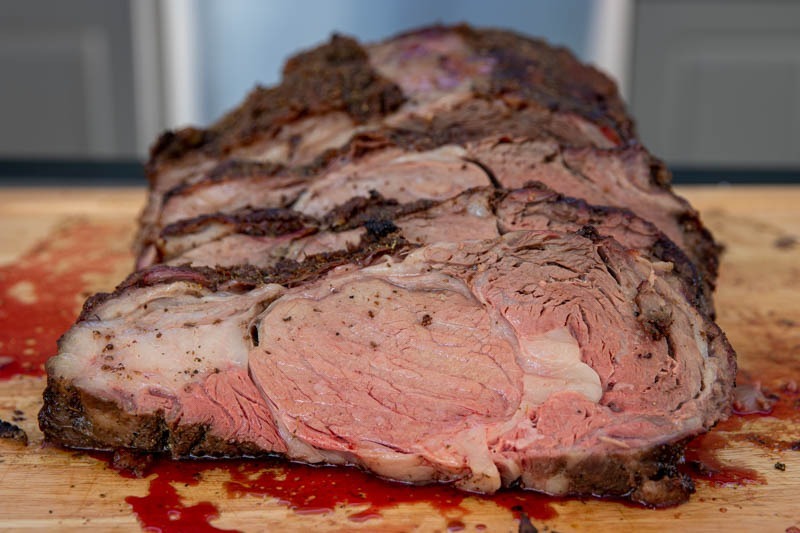
The Result
Because you took the time to roast low and slow before the final sear, you will see “coast to coast” pink meat. There should be no thick grey ring around the edges. Instead, you have a thin, crispy, salty crust that immediately gives way to a perfectly uniform medium-rare center.
This dish is more than just a meal; it is a statement piece. Serve it with a fresh horseradish cream or a simple red wine reduction, and enjoy the praise from your guests. You have officially mastered the Prime Rib Roast on the Big Green Egg.
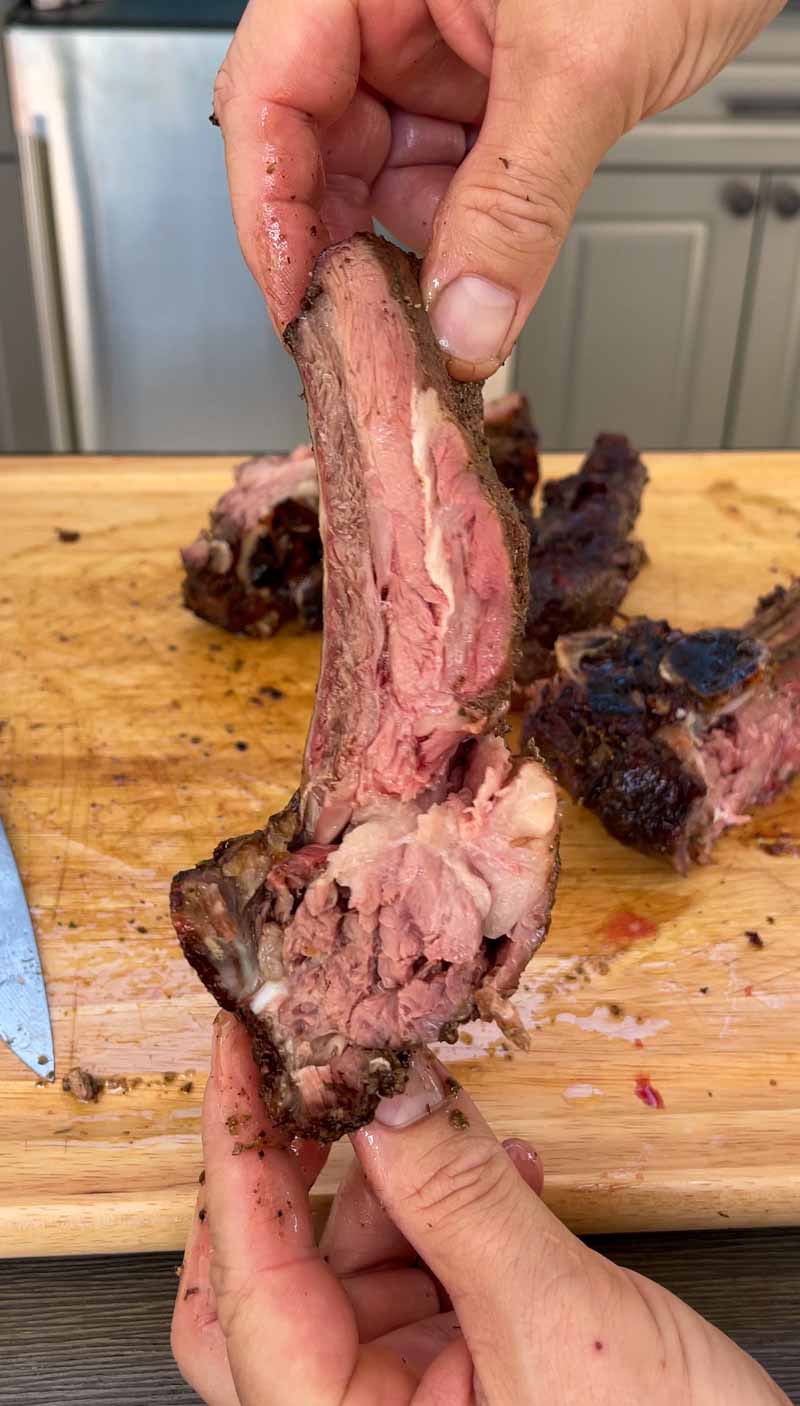
The Pitmaster’s Perk
While your guests are waiting patiently for the main event, you have a secret advantage. As the prime rib rests, the chef gets the “Pitmaster’s Privilege.” Since the bones were already separated and tied back on, you can easily snip the twine and pull that rib rack away before the roast even hits the carving board.
The “Nosh” Factor
Slice between those bones and grab one for yourself. These aren’t just any ribs; they have been seasoned on both sides, bathed in rendering prime rib fat, and kissed by the smoke of the Big Green Egg for hours.
- The Best Bite: The meat tucked between the bones is arguably the most flavorful part of the entire animal. It is rich, heavily seasoned, and has a texture that the center slices just can’t match.
- A Well-Deserved Reward: You have spent the afternoon managing the fire and monitoring temperatures. Consider this your “chef’s tax” for a job well done.
Nosh on a bone while you prep your serving platter. It is the perfect way to quality-control the cook and hold you over until the formal sit-down meal begins.
Print
Big Green Egg Reverse Seared Prime Rib
This recipe for Big Green Egg Reverse Seared Prime Rib is the ultimate guide for the perfect centerpiece for your table.
Course Main
Cuisine American
Prep Time 15 minutes minutes
Cook Time 4 hours hours 30 minutes minutes
Total Time 4 hours hours 45 minutes minutes
Servings 10
Author The BBQ Buddha
Preheat your Big Green Egg to 250°F setup for indirect grilling
Remove the bone section from the rib roast by following the bone line against the meat
Once separated use some olive oil as a binder and season liberally all over the meat section and rib section
Lay the ribs back on the meat and using butcher twine secure the bones to the rib roast
Place inside the Big Green Egg and let cook for 3-4 hours or until the internal temperature measures 120°F
Pull the meat and let rest while you get the Big Green Egg up to 450°F
Place the rib roast back inside and cook 6-10 minutes until the outside is nice and browned
Pull the roast and let rest 20-30 minutes, slice, serve, and enjoy!
The post Prime Rib Roast on the Big Green Egg appeared first on The BBQ Buddha.
