The Weeknight Game Changer: Big Green Egg Hot and Fast Baby Back Ribs
We’ve all been there: it’s 4:00 PM on a Tuesday, you’re craving that deep, smoky flavor of real BBQ, but you realize a traditional “low and slow” cook would have dinner hitting the table at midnight. Do you love baby back ribs but simply don’t have 5 or 6 hours to hover over the smoker? Do you want to know how to achieve that competition-level pull, a perfect mahogany bark, and incredible smoky depth in literally half the time?
Well, you’ve come to the right place.
Forget the “3-2-1 method” and the all-day commitment. This recipe is designed for the modern pitmaster who wants the results without the wait. By cranking up the heat on the Big Green Egg, we can render the fat and tenderize the meat in a fraction of the time, delivering perfect, juicy baby back ribs every single time.
So, let’s stop watching the clock and start the fire. Sit back, grab an ice-cold PBR, and enjoy this guide to Big Green Egg Hot and Fast Baby Back Ribs.
Setting up the Big Green Egg
The Setup: Dialing in the Heat
To pull off “Hot and Fast” ribs, your fire management needs to be spot on. We aren’t just looking for heat; we’re looking for a clean, sustainable burn that stays rock-solid at higher temperatures.
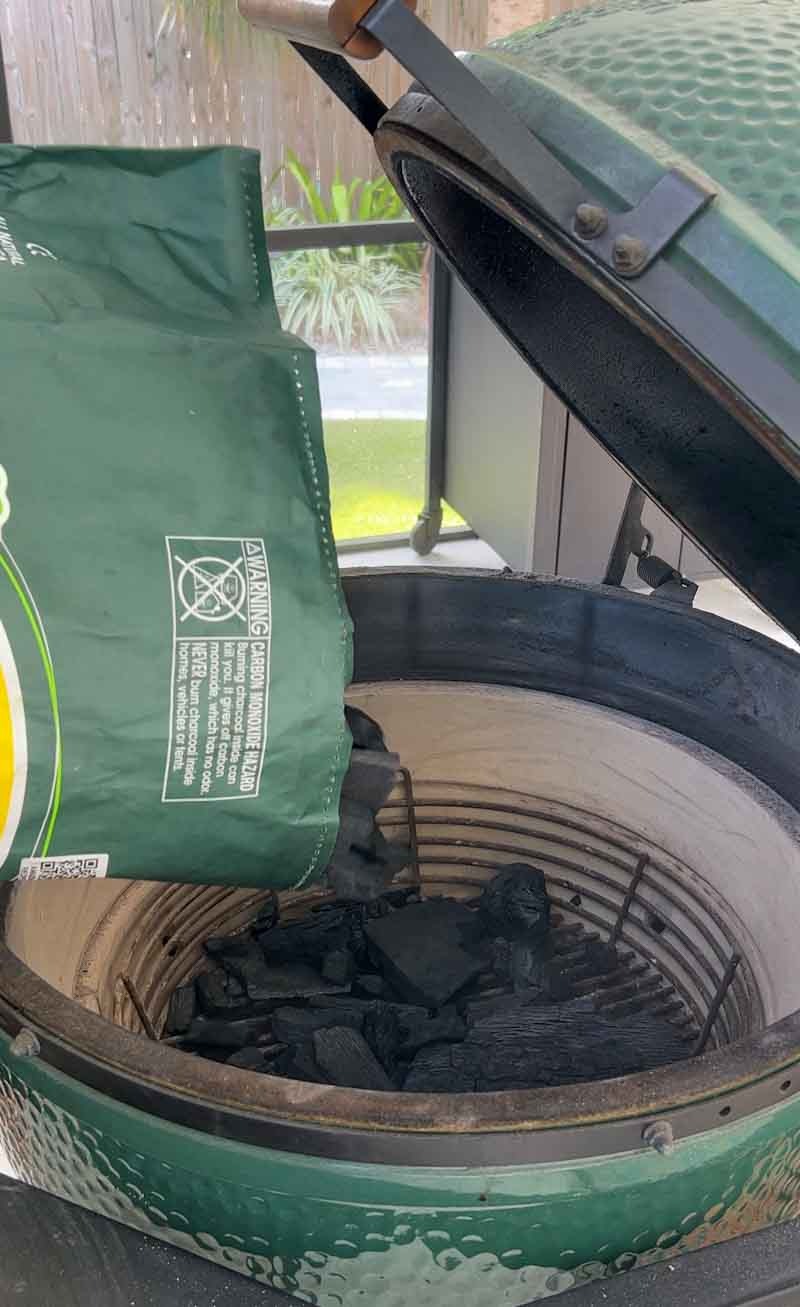
1. Building the Fire
Start by loading your Big Green Egg with high-quality lump charcoal. You only need to fill the firebox about 1/3 of the way since this is a shorter cook, you don’t need a full mountain of fuel.
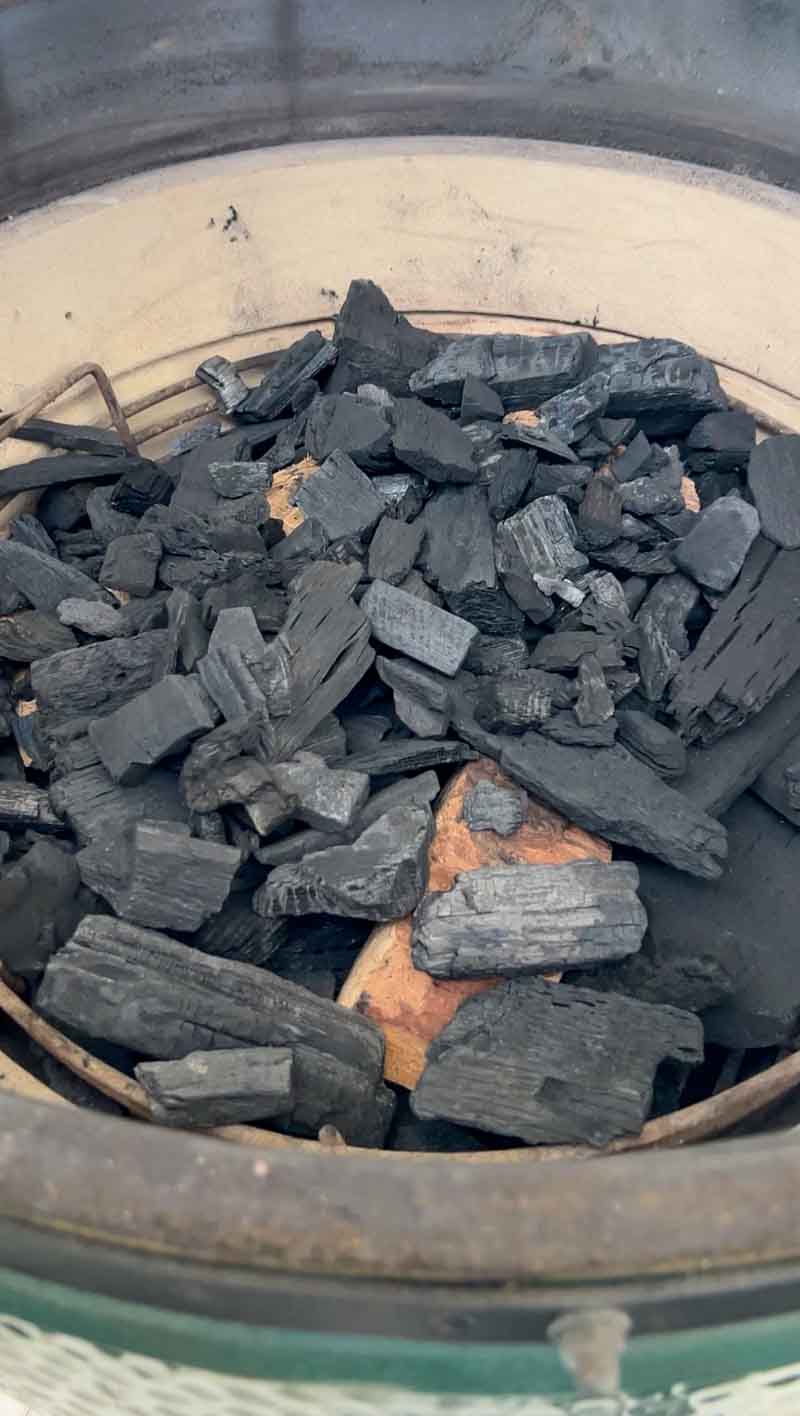
2. Choosing Your Smoke Profile
Before lighting, nestle 3-4 chunks of smoking wood into the charcoal. For ribs, the flavor of the smoke is just as important as the rub.
- My Go-To: I love Hickory for that classic, “bacon-like” BBQ punch, or Apple Wood for a milder, sweeter finish that complements pork perfectly.
- The Alternatives: Pecan is a great “middle-ground” wood.
3. Configuring for Indirect Heat
Light the charcoal in the center. Once the fire is established, it’s time to set up the indirect cooking environment. This is crucial; if you cook ribs directly over the coals at 300°F, you’ll end up with charred “rib-jerky” instead of tender BBQ.
- The Gear: Drop in your convEGGerator (legs up) or your half-moon ceramic inserts.
- The Target: Adjust your vents and let the temperature stabilize at 300°F.
Pro Tip: Don’t rush the “blue smoke.” Wait until the thick, white clouds disappear and you see that faint, ghost-like blue wisp. At 300°F, the Egg will reach this stage faster than it does at 225°F, but patience is still the key to a clean flavor.
The Strategy: Why 300°F?
At this temperature, the fat in the baby back ribs begins to render almost immediately, and the meat reaches the “tender zone” much faster. The goal is to get that beautiful mahogany color and a slight “pull-back” on the bones within the first 90 minutes.
Prep your Baby Back Ribs
The Prep: Trimming and Building the Flavor Foundation
Before those ribs hit the smoke, we need to make sure they are primed to absorb every bit of flavor. Baby back ribs are naturally leaner and more tender than spare ribs, but they still require a little “surgery” to ensure they don’t turn out chewy.
1. The Essential Trim
Lay your rack of ribs on a clean cutting board and look for any loose “shag” or hanging bits of meat and fat. Trim those off so the rack is aerodynamic and uniform.
- The Silver Skin & Membrane: Flip the ribs bone-side up. There is a tough, papery membrane (the silver skin) covering the bones. If you leave this on, it acts as a shield, preventing your rub and smoke from actually reaching the meat.
- Pro Tip: Slide a dull butter knife under the membrane over a middle bone to loosen it. Grab the edge with a paper towel for a firm grip and pull it off in one clean motion.
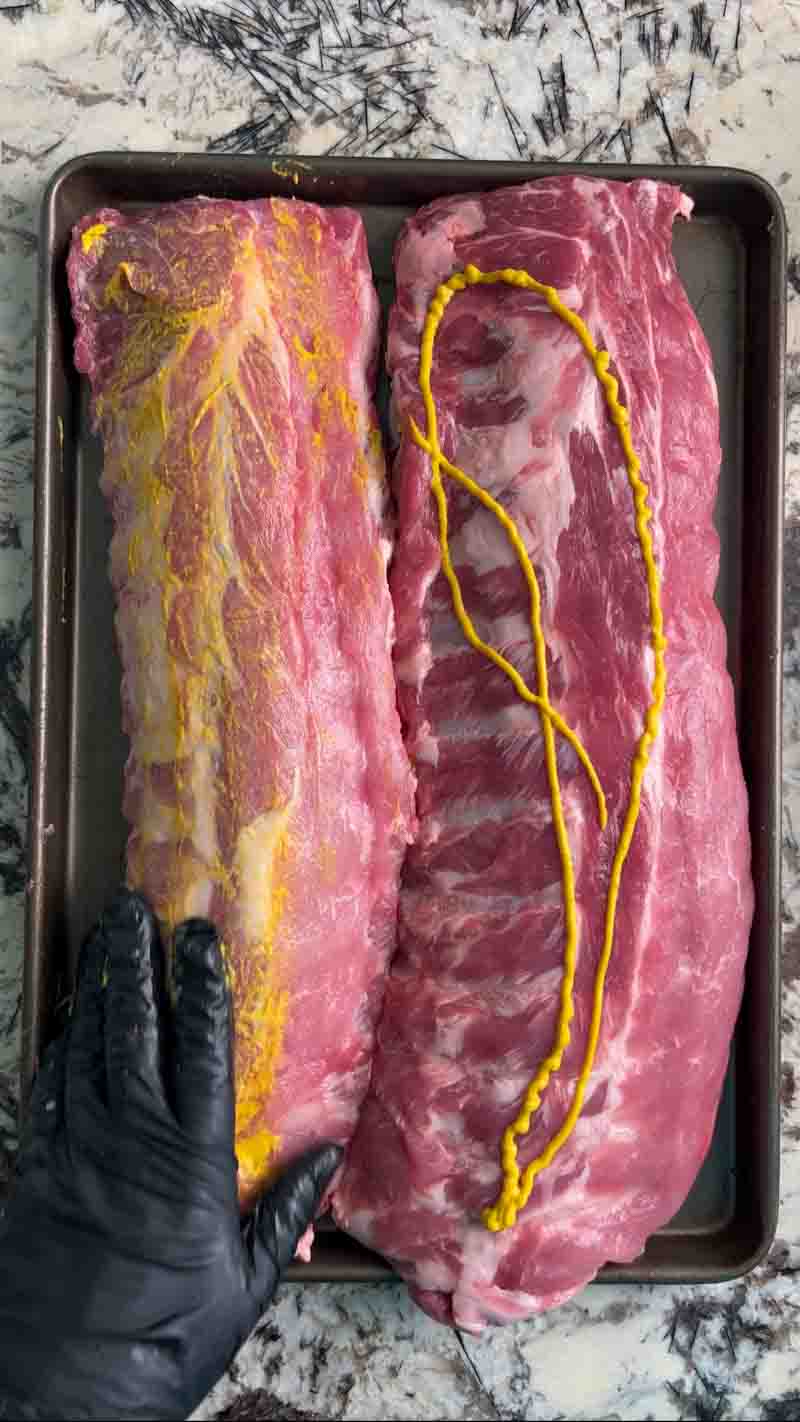
2. The Slather (The “Glue”)
To get our seasoning to stay put during a hot and fast 300°F cook, we need a binder. Slather the front and back of the ribs with yellow mustard.
- The Goal: You aren’t looking for a thick coat; you want a thin, translucent layer.
- The Myth: Don’t worry, your ribs won’t taste like mustard! The vinegar in the mustard helps tenderize the surface, while the mustard itself evaporates, leaving behind a tacky surface that locks the dry rub onto the meat.
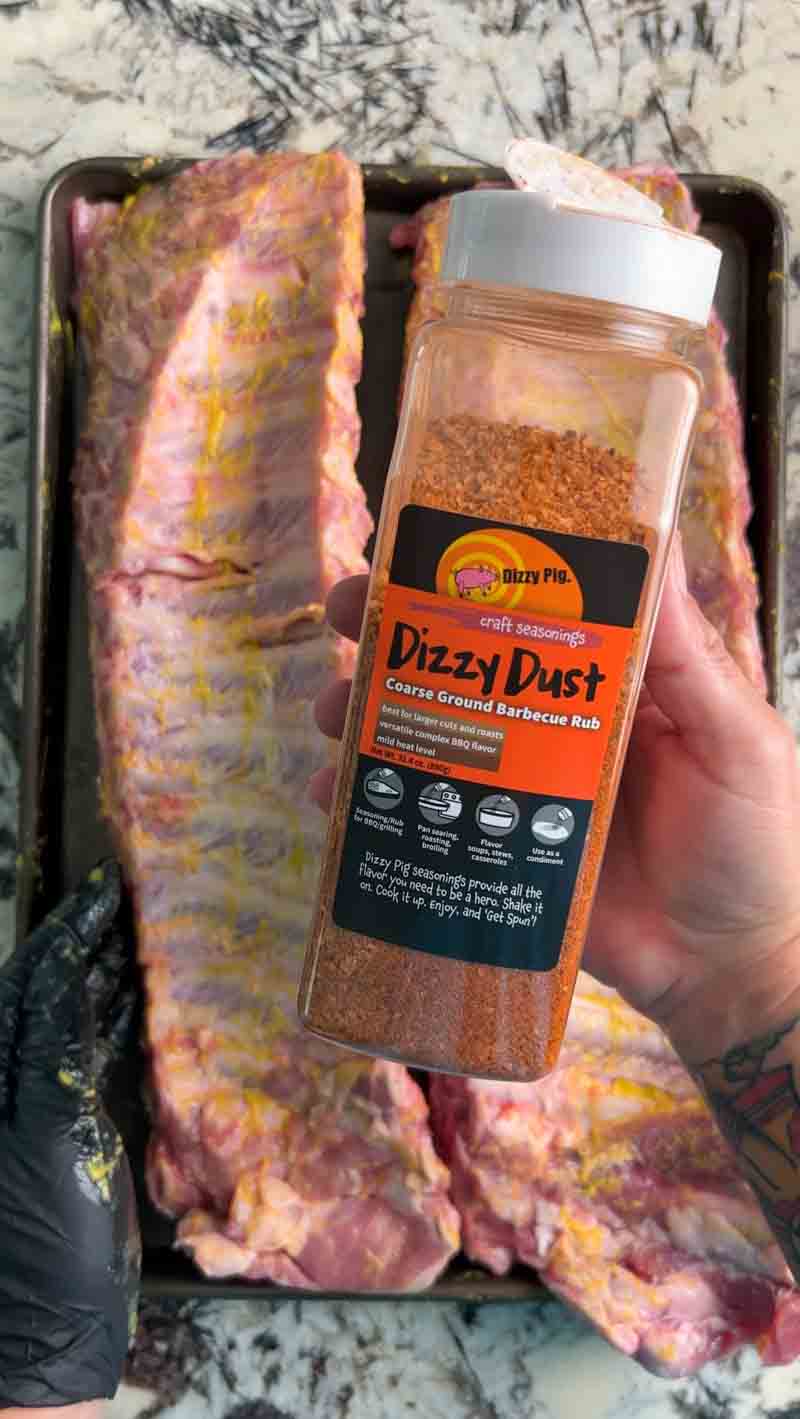
The “Set”
Once you’ve applied your slather and followed up with your favorite BBQ rub (like Dizzy Pig’s Dizzy Dust or your own homemade blend), let the ribs sit for 10-15 minutes. You’ll see the rub start to look “wet” as it draws moisture from the meat. This means it’s “set” and ready for the Big Green Egg.
Smoke & Spritz the Baby Back Ribs
The Cook: Searing in the Smoke
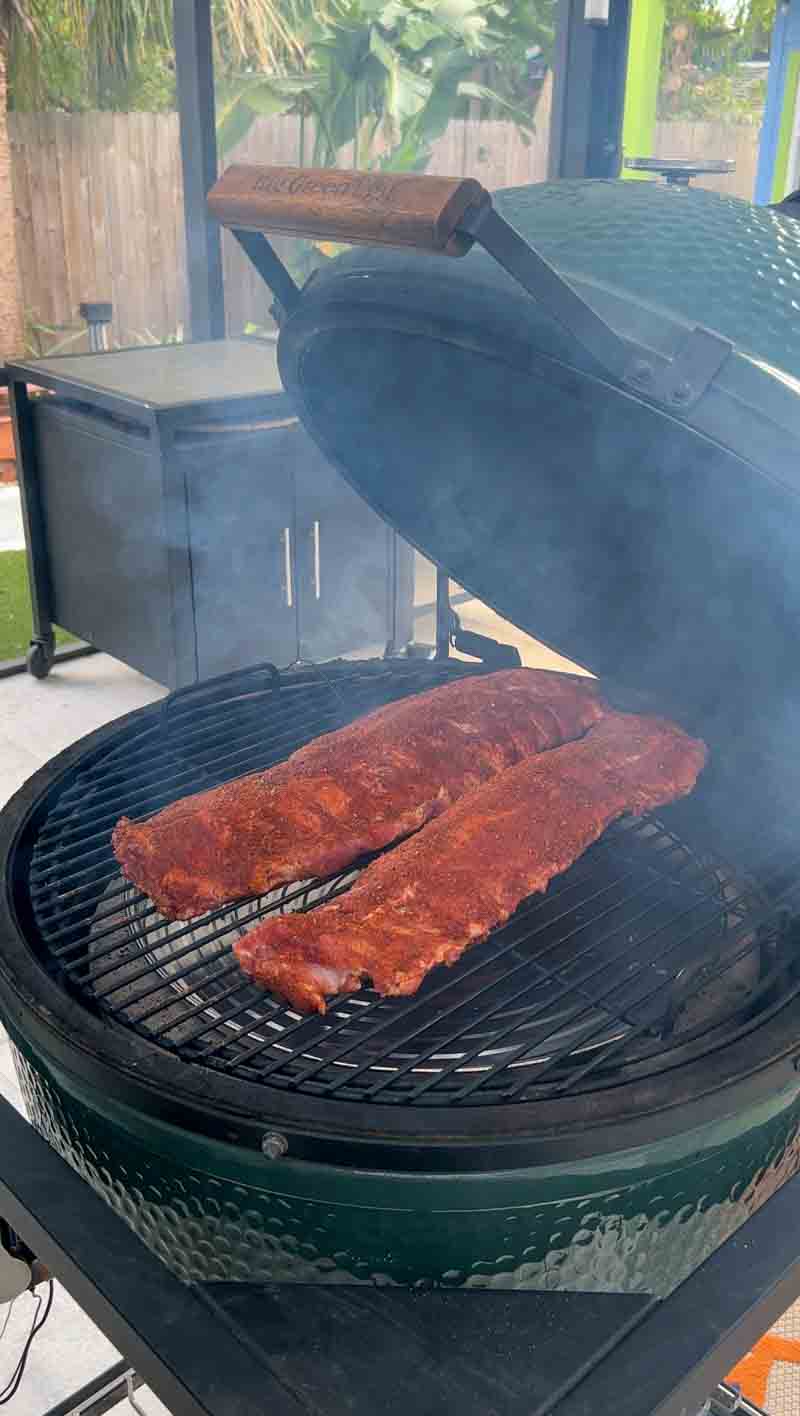
When the Big Green Egg is locked in at 300°F and the smoke has transitioned from thick white clouds to a clean, light gray or faint blue, you’re ready to go. Place the ribs on the grate bone-side down. This position allows the bones to act as a heat shield, protecting the meat from the rising heat while the fat begins to render and baste the muscle from the inside out.
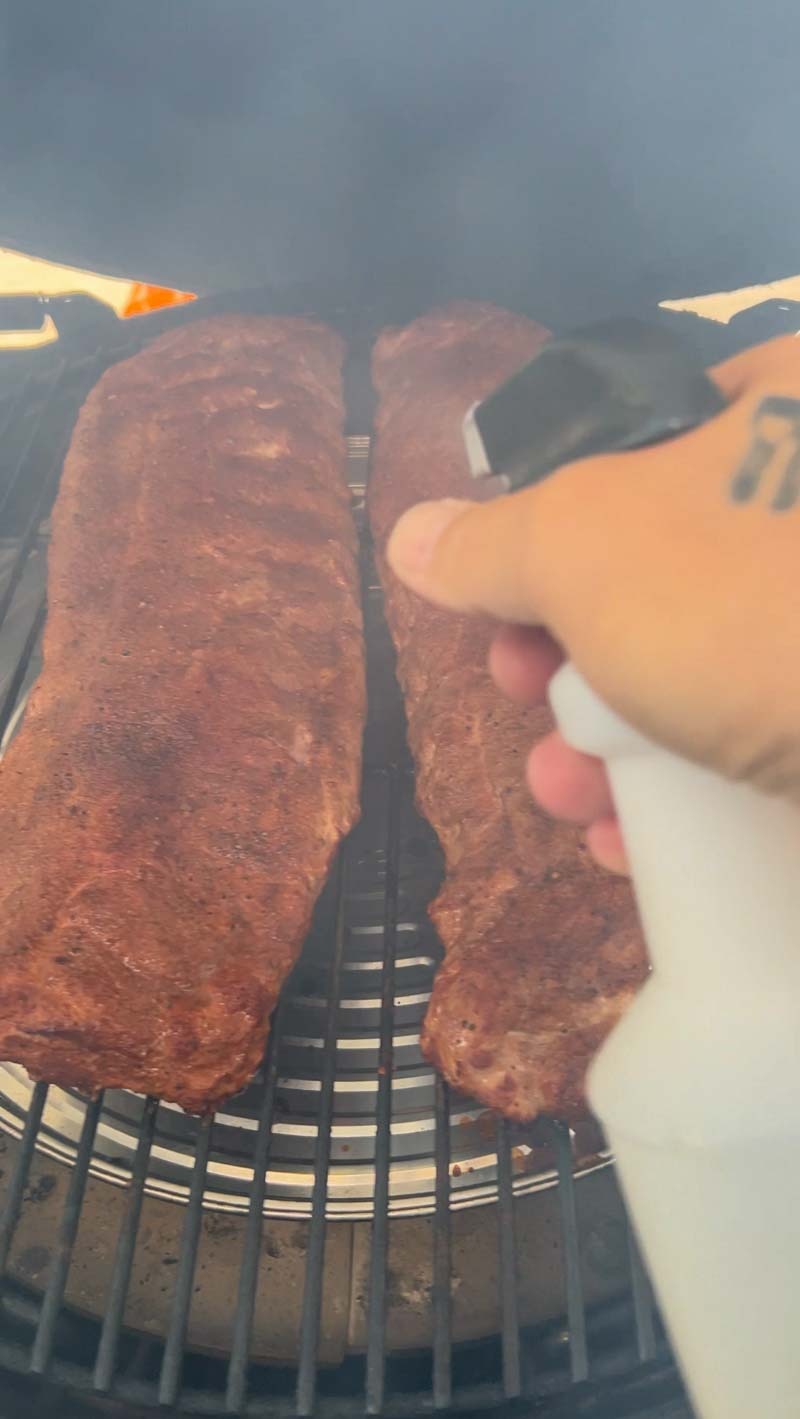
The Secret to Hot & Fast: The 20-Minute Spritz
Since we are cooking at a higher temperature than the traditional 225°F, moisture management is the name of the game. You don’t want the edges of the ribs to crisp up into “bark-jerky” before the inside is tender.
After the ribs have been in for about 30 minutes, start your spritzing routine. I use a 50/50 mix of apple juice and apple cider vinegar.
- The Apple Juice: Provides natural sugars that caramelize quickly at 300°F, helping you achieve that deep mahogany color in record time.
- The Apple Cider Vinegar: The acidity cuts through the pork fat and helps tenderize the surface of the meat.
Why the 20-Minute Frequency? In a “Hot and Fast” environment, the surface of the meat dries out much faster. By spritzing every 20 minutes or so, you are:
- Lowering the Surface Temp: This prevents the sugar in your rub from burning (turning bitter/black).
- Attracting Smoke: Smoke particles “stick” better to wet surfaces, ensuring you still get a deep smoke ring despite the shorter cook time.
- Building Layers: Each spritz adds a microscopic layer of flavor that builds into a complex, tacky bark.
Homemade & Alternative Spritz Ideas
If you don’t have apple juice on hand, you can still keep those ribs hydrated with these easy swaps:
- The “Pure Pork” Spritz: Use plain water. It provides the moisture and cooling effect without altering the flavor of your rub.
- The “Pitmaster’s Punch”: Use Dr. Pepper or Root Beer. The high sugar content creates an incredible dark glaze, though you should watch it closely to ensure it doesn’t over-caramelize at 300°F.
- The “Sharp” Spritz: Use straight Apple Cider Vinegar. This is great if you prefer a tangy, Carolina-style rib that isn’t too sweet.
The 90-Minute Check-In
By the time you hit the 1.5-hour mark, your ribs should have a beautiful, uniform color and the meat should just be starting to “pull back” from the ends of the bones. This is the signal that we are ready for the final stage.
Wrap the Baby Back Ribs
The Wrap: The “Sweet & Savory” Braise
At the 1.5-hour mark, it’s time for the visual inspection. Open the dome of your Big Green Egg and look for a beautiful, set bark. The ribs should be a deep mahogany brown, and the seasoning should stay in place when you lighty touch it. If it looks like a masterpiece, it’s time to transition from smoking to tenderizing.
Building the “Flavor Bed”
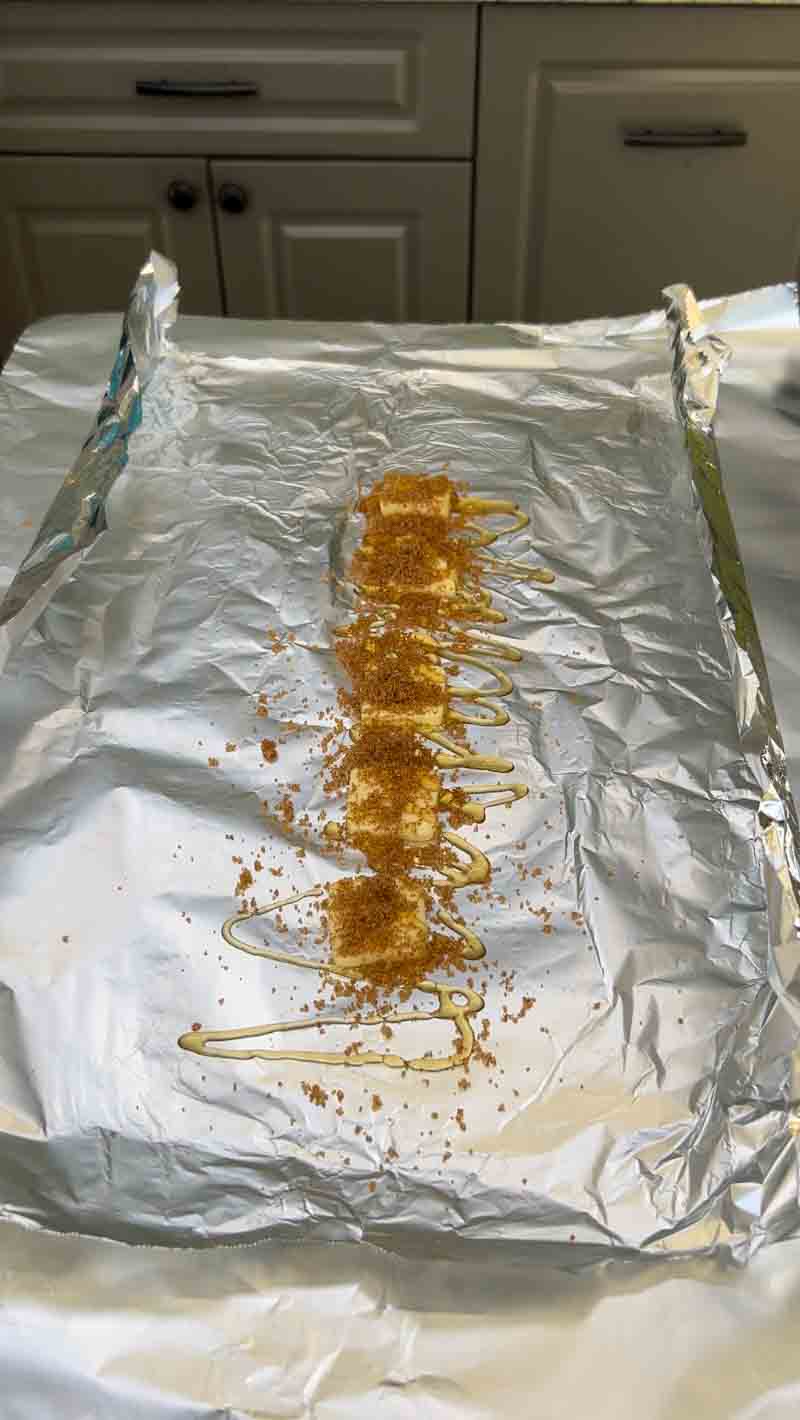
Prepare your workstation by laying out two long sheets of heavy-duty aluminum foil. You want the foil to be wide enough to completely seal the rack. On the center of the foil, create a “bed” for your ribs:
- Pats of Butter: Lay down 3-4 thin slices. This adds a velvety richness to the pan sauce.
- Brown Sugar: Sprinkle a handful over the butter for that classic BBQ sweetness.
- Honey: Drizzle a generous amount in a zigzag pattern.
The “Face-Down” Technique
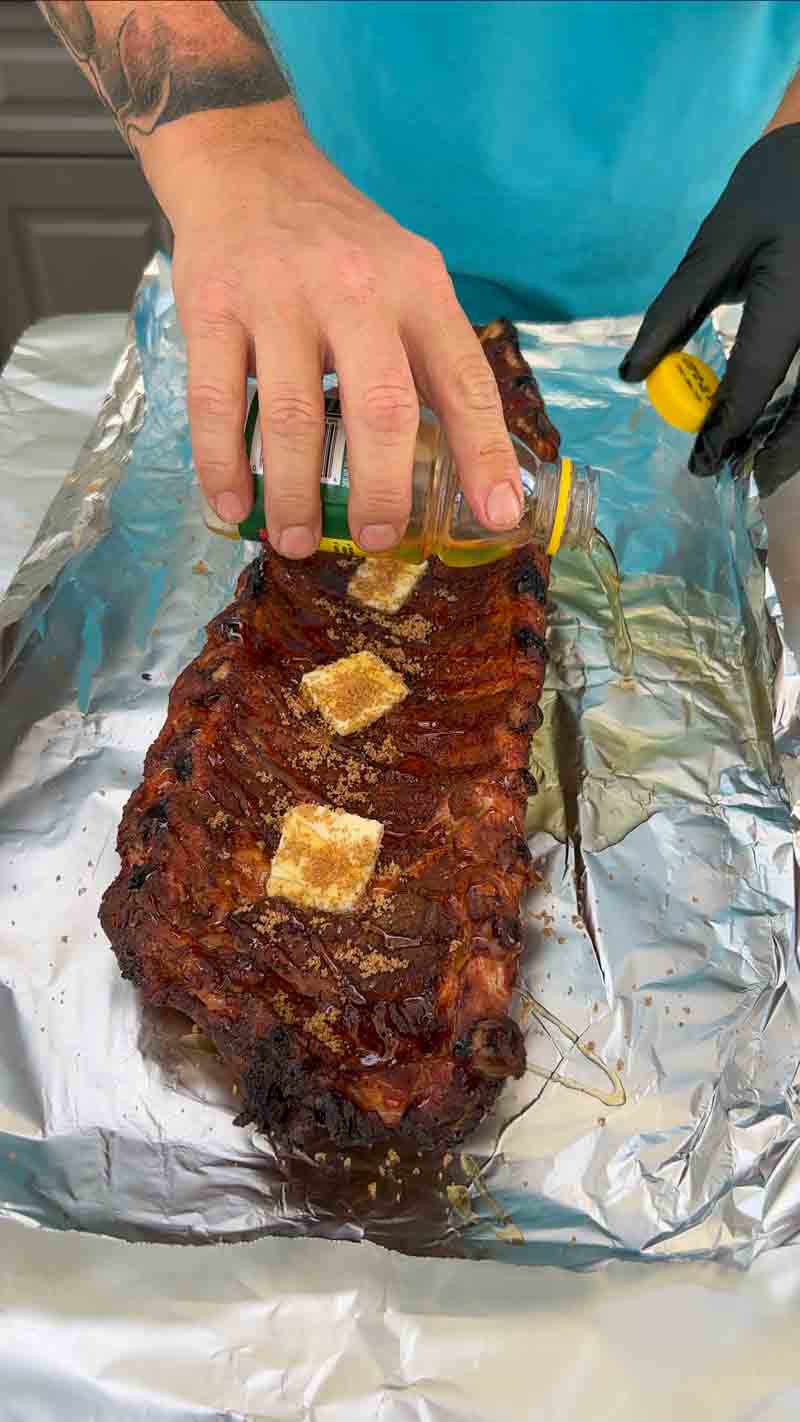
Place the rack of ribs meat-side down directly onto the butter, sugar, and honey. This ensures the most important part of the rib is submerged in the glaze. Now, repeat the process on the bone side (which is currently facing up): add more pats of butter, another sprinkle of brown sugar, and a final drizzle of honey.
The Braising Liquid
Before you crimp the foil shut, pour 1/2 cup of apple juice into the bottom of the packet. This liquid is the engine of the “Hot and Fast” method as it creates a pressurized steam environment that forces the meat to tenderize rapidly without drying out.
Product Alternatives & Homemade Swaps
You don’t have to stick strictly to the pantry staples; you can customize the braise based on what you have:
| Component | Alternative / Homemade |
| Butter | Margarine (often used in competitions for a higher shine) or Coconut Oil for a unique twist. |
| Brown Sugar | Maple Syrup or a homemade Simple Syrup (equal parts water and white sugar). |
| Honey | Agave Nectar or Apple Jelly. If you want heat, try a Hot Honey! |
| Apple Juice | Pineapple Juice (for extra tenderizing enzymes) or even a light beer like the PBR you’re drinking. |
The “Tight” Wrap
Crimp the edges of the foil tightly to create an airtight seal. You want to trap every bit of that steam inside. At 300°F, this “Texas Crutch” is going to act like a turbo-charger for your ribs.
The Braise: The One-Hour Turbo Charge
Now that your ribs are tucked into their “flavor sauna,” it’s time to head back to the Big Green Egg. Because we are cooking at 300°F, this stage moves quickly. We aren’t just heating the meat anymore; we are using the pressurized steam from the apple juice and the melting butter to break down the connective tissue at an accelerated rate.
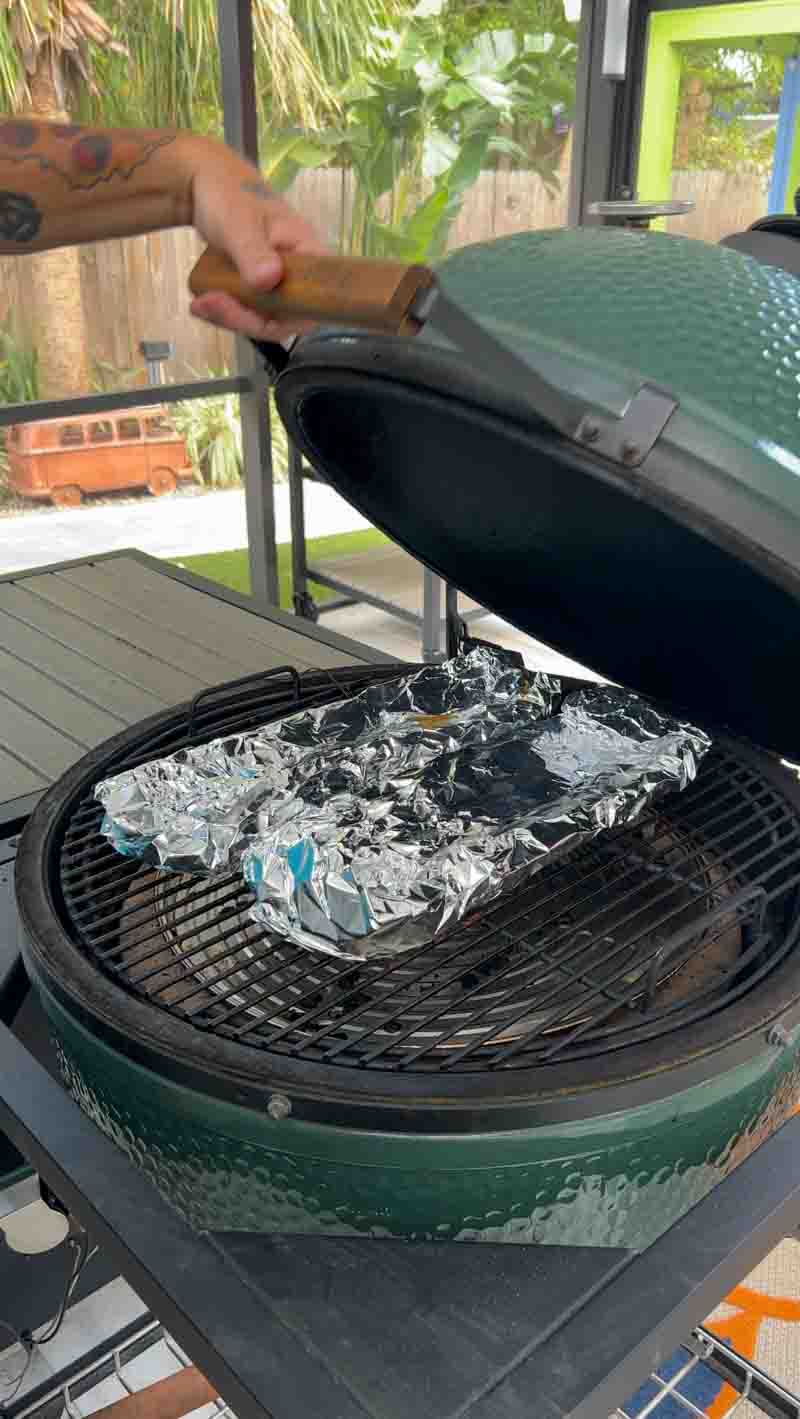
Placement: Meat Side Down
Carefully place the foil packets back onto the grill grates. Position them meat-side down. * Why meat-side down? This keeps the “money side” of the ribs fully submerged in the simmering pool of butter, honey, and brown sugar. It allows the meat to braise in its own juices and the added liquids, ensuring every fiber is infused with that sweet and savory profile.
- The Protective Bone: With the meat side facing the heat source (the convEGGerator), the liquid acts as a buffer, preventing the sugar in the rub from scorching while the bones on top stay relatively cool.
The 1-Hour Clock
Close the dome and let them ride for exactly one hour. At this temperature, an hour in the foil is roughly equivalent to two or three hours at a traditional “low and slow” pace.
Pitmaster Tip: Resist the urge to peek! Every time you open the dome, you lose that pressurized heat. Trust the process. This hour is when the ribs transform from “good” to “competition tender.”
What’s Happening Inside?
Inside that foil, the ribs are reaching the “stall” and pushing right through it. The 1/2 cup of apple juice is boiling, the butter is emulsifying with the pork fat, and the honey is creating a sticky, lacquered finish. By the time the hour is up, the meat should be pulling back from the bones by about 1/2 to 3/4 of an inch.
Preparation for the Reveal
While the ribs finish their hour in the foil, get your BBQ sauce (or your homemade glaze) ready. We are about to enter the final stage: the “Tack Up.”
The Final Stretch: The Glaze and the “Tack Up”
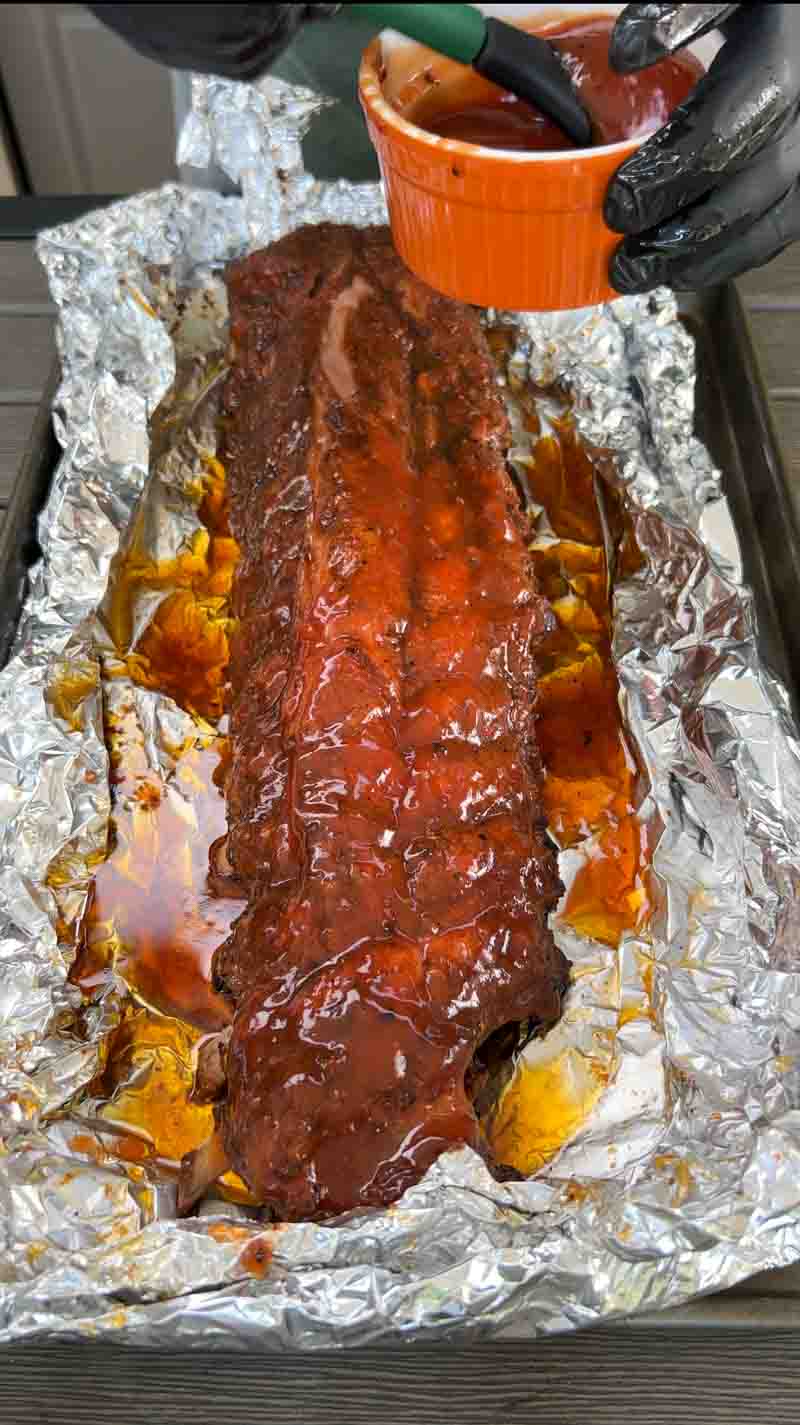
After one hour in the foil, your ribs have finished their “sauna” session. Carefully remove the packets from the Big Green Egg and be cautious of the hot steam when you open them! At this stage, the ribs should be incredibly tender, and the meat should have receded significantly, exposing the bone tips.
1. The Glaze: Adding the Finishing Shine
Now it’s time to transform that braised meat into a sticky, finger-licking masterpiece. Brush the ribs generously with your BBQ sauce of choice.
- The Product: I often reach for a classic like Blues Hog or Lillie’s Q for that perfect balance of sweet and tangy.
- The Alternatives: If you prefer something different, a Carolina Gold (mustard-based) sauce provides a great zing, or a Fruit-based BBQ sauce (like blackberry or peach) can complement the apple notes from earlier.
- Homemade “Quick Fix” Glaze: If you’re out of sauce, mix:
- 1 cup Ketchup
- 1/4 cup Apple Cider Vinegar
- 2 tbsp Brown Sugar
- 1 tbsp Worcestershire sauce
- A pinch of Black Pepper
2. Setting the Sauce
Place the ribs back onto the Big Green Egg grates, meat-side up this time. This final 30-minute stretch is crucial for two reasons:
- Caramelization: The 300°F heat bakes the sauce into the bark, turning it from a wet liquid into a tacky, shimmering glaze.
- Texture Recovery: After being in the foil, the bark can get a little soft. This final un-wrapped half-hour allows the exterior to firm up just enough to give you that perfect “bite.”
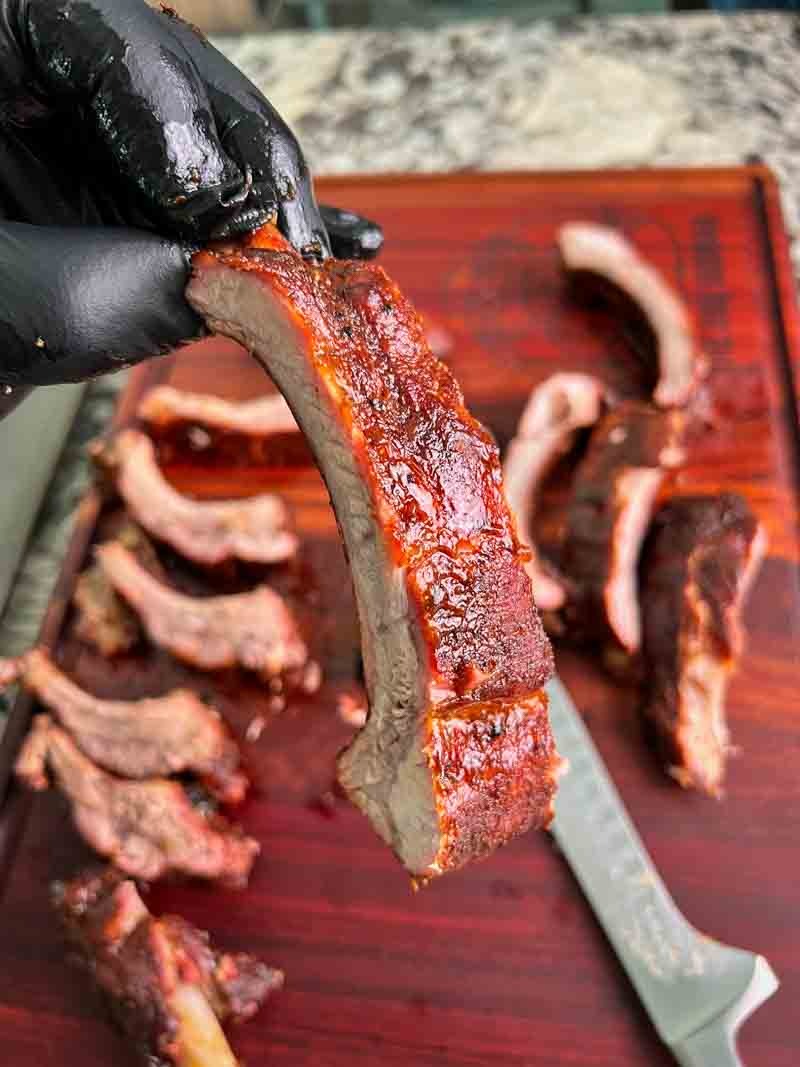
3. The “Bend Test” for Doneness
How do you know they are truly ready? Use a pair of tongs to pick up the rack from one end.
- The Goal: The rack should bend significantly, and the bark should start to crack slightly on the top surface. If it feels stiff, give it another 10 minutes. If it feels like it’s going to snap in half immediately, get them off the grill—they are perfect!
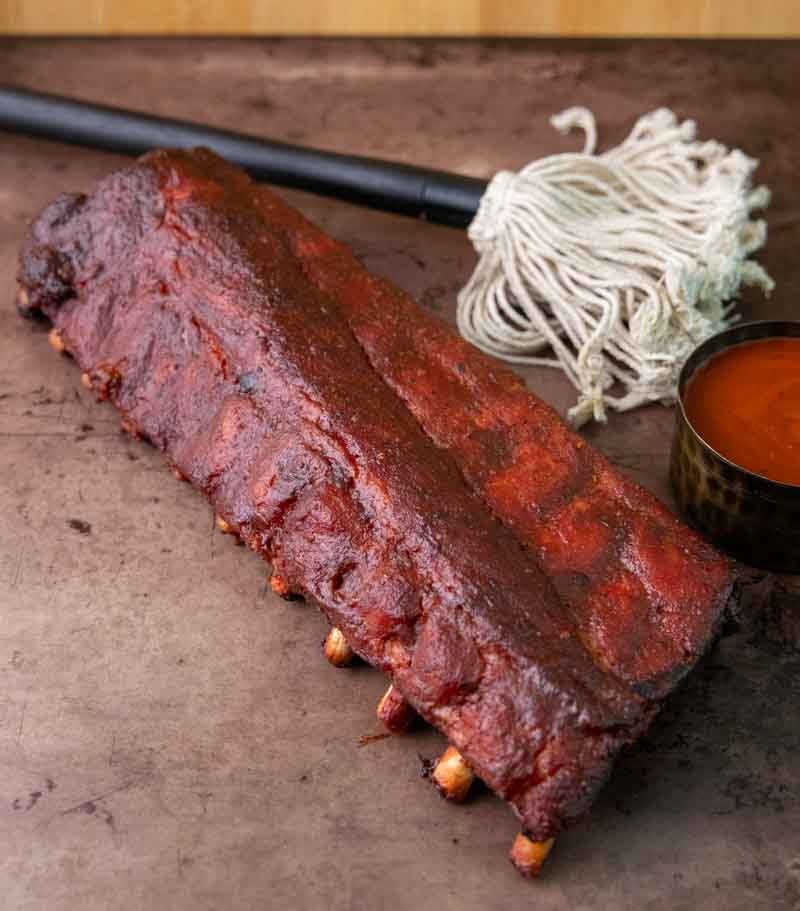
The Grand Finale
Once that sauce is tacky and “set” (it shouldn’t stick to your finger when you lighty tap it), pull the ribs off the Egg. Even with a “Hot and Fast” cook, a short 10-minute rest on the cutting board will help the juices redistribute.
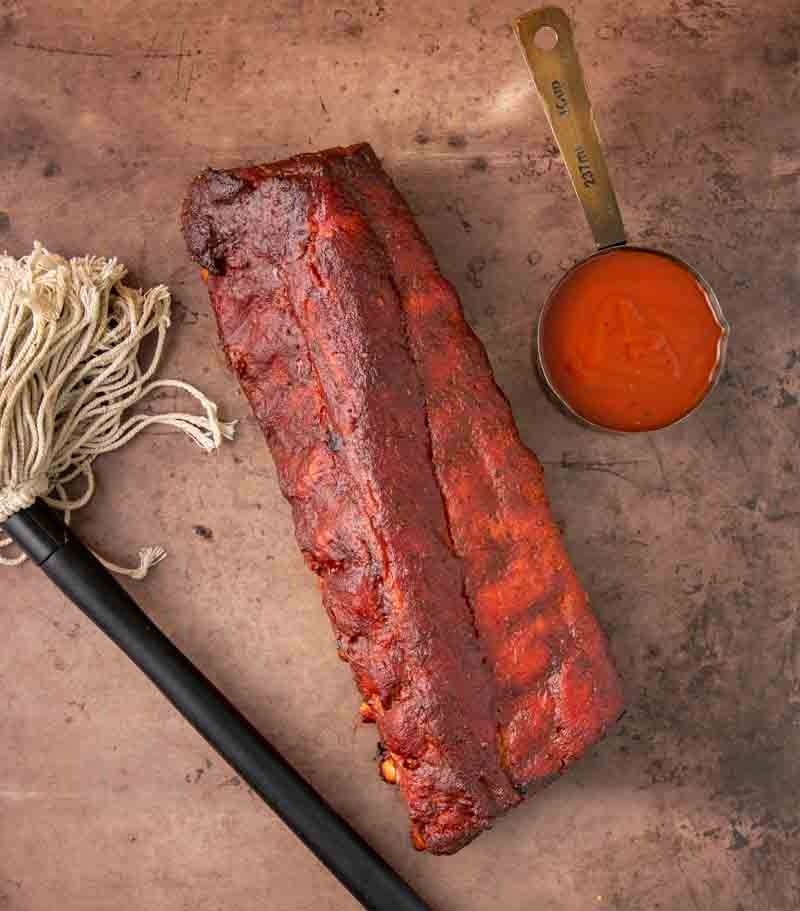
Slice between the bones, and look at that glistening, smoky, tender baby back ribs in about 3 hours. Who says you need all day to be a pitmaster?

Rest the Baby Back Ribs
The Finish Line: Resting and Slicing for the Perfect Bite
The temptation to slice into these ribs the second they hit the cutting board is real the smell of caramelized sugar and hickory smoke is incredible. But if you want that professional, juicy finish, you have to stick the landing with a proper rest.
1. The 10-Minute Rest
Transfer the glistening racks to a large cutting board or a room-temperature sheet pan. Let them rest, uncovered, for 10 minutes.
- Why it’s crucial: During the “Hot and Fast” cook, the internal pressure has pushed the juices toward the center of the meat. A brief rest allows the muscle fibers to relax and reabsorb those juices.
- The Result: If you slice too early, the moisture will run out onto the board, leaving the meat dry. By waiting, you ensure every rib is as succulent as the last.
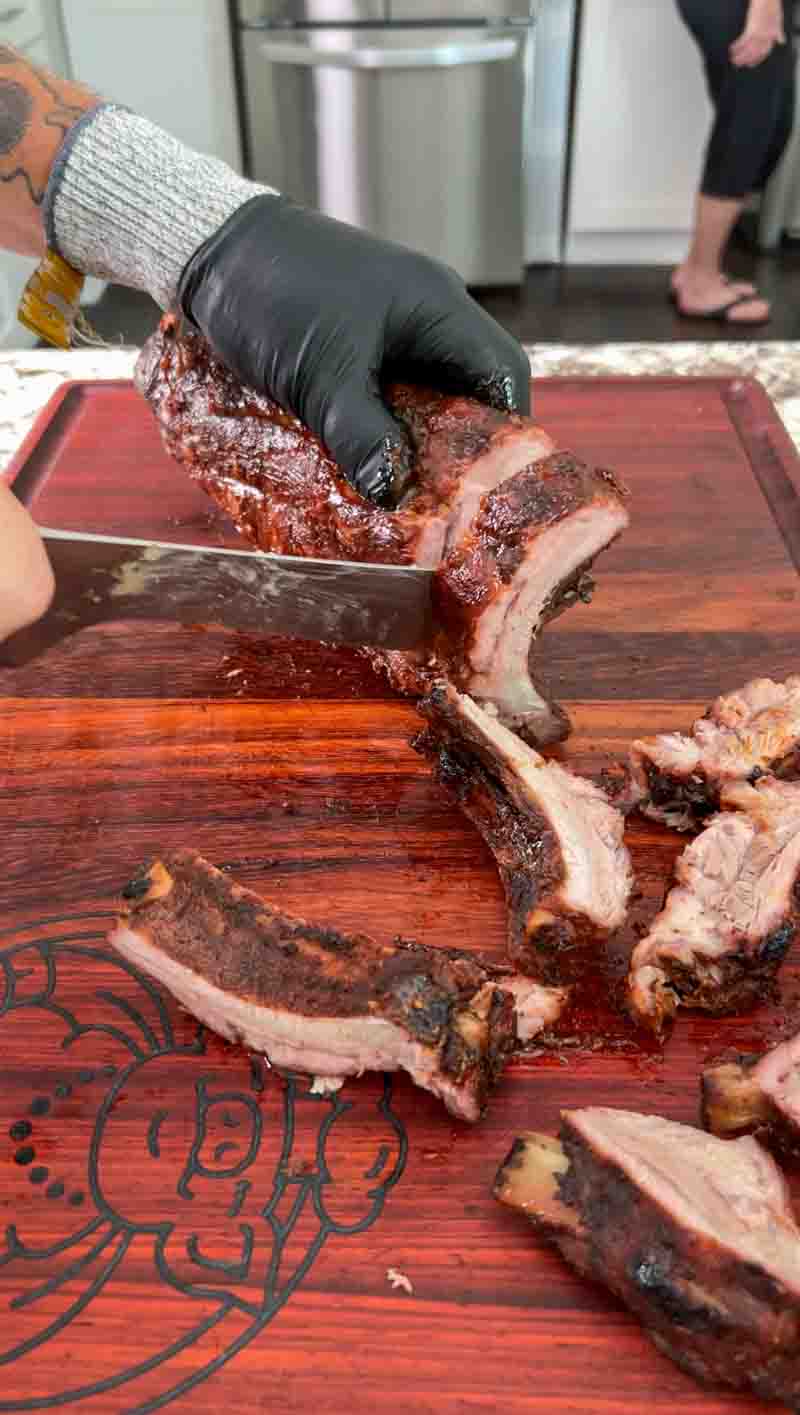
2. The Clean Slice
To get those “competition-style” clean cuts, flip the rack over so it is bone-side up on the board.
- Follow the Bone: It is much easier to see the path of the bones from the bottom. Use a sharp chef’s knife or a slicing knife to cut directly between the bones in one smooth, downward motion.
- The Look: You should see a beautiful pink smoke ring just beneath the mahogany bark, and the meat should be moist enough to glisten in the light.
3. Serving Suggestions
These ribs are the star of the show, but if you want to round out the meal, keep the “Hot and Fast” theme going with some quick sides:
- The Classic: A crisp, vinegar-based coleslaw to cut through the sweetness of the glaze.
- The Shortcut: Grilled corn on the cob (you can toss these on the Egg during the last 20 minutes of the rib cook!).
- The Homemade Dip: Take any remaining juices from the foil packets, skim off the excess fat, and serve it in a small ramekin for dipping.
Enjoy the Reward!
There you have it smoky, tender, “fall-off-the-bone” baby back ribs in roughly half the time of a traditional cook. You’ve mastered the Big Green Egg at 300°F and proved that you don’t need a 6-hour window to serve world-class BBQ.
Now, grab that second PBR, hand out the napkins, and dive in. You earned it!
Print
Big Green Egg Hot and Fast Baby Back Ribs
This recipe for Big Green Egg Hot and Fast Baby Back Ribs gets you to smoky rib perfection in half the time it normally takes.
Course Main
Cuisine American
Prep Time 15 minutes minutes
Cook Time 3 hours hours
Total Time 3 hours hours 15 minutes minutes
Servings 4
Author The BBQ Buddha
- 2 racks baby back ribs
- Yellow mustard
- BBQ Rub
- 1 1/2 cup Apple Juice
- 1/2 cup Cider Vinegar
- 1 stick Butter
- 3 Tbsp brown sugar
- Honey
- 1 cup BBQ sauce
Setup your Big Green Egg for indirect cooking using the ConvEGGtor or EGGspander base with (2) half moon ceramic inserts. Preheat to 300°F using 3-4 smoking wood chunks e.g., Apple Wood or Hickory
Trim your spare ribs and remove the membrane
Slather the ribs with yellow mustard and cover with the BBQ rub
When the Big Green
Egg is at temperature and the smoke is light gray in color, place the ribs inside
Let them smoke for 1.5 hours spritzing with a mix of 1/2 cup apple juice and 1/2 cup cider vinegar
At the 1.5 hour mark make sure the bark is set and looks good then remove ribs and place them meat side down in to an aluminum foil sheet lined with pats of butter, brown sugar and honey
Place butter, brown sugar, and honey on the rib side then pur 1/2 cup of apple juice in the bottom of the foil packet
Seal the ribs and place them back in the Big Green Egg meat side down for another 1-hour
After the hour wrapped, remove the ribs from the foil packet and glaze with the BBQ sauce
Place the ribs back in to the Big Green Egg and let cook for another 30 minutes allowing the sauce to set
Remove the ribs and let them rest 10-15 minutes before slicing and serving
The post Big Green Egg Hot and Fast Baby Back Ribs appeared first on The BBQ Buddha.
