The King of Steaks: Mastering the Reverse Seared Picanha
Have you ever experienced a cut of beef so flavorful and tender that it redefined your entire perception of a backyard cookout? If not, it’s time you met the Picanha. While it has been the undisputed star of Brazilian steakhouses (Churrascarias) for decades, this “prized possession” of the grill is finally taking center stage in American backyards.
I was lucky enough to get my hands on a stunning American Wagyu Picanha roast from Snake River Farms. If you aren’t familiar with Snake River Farms, they are the gold standard for American Wagyu, crossbreeding traditional Japanese Wagyu with high-quality Continental breeds to produce beef with incredible marbling and a robust, buttery flavor that is simply unmatched.
What Exactly is Picanha?
Depending on where you are in the world, this cut goes by many names. In the U.S., you might hear it called the Culotte, Top Sirloin Cap, or Rump Cap. As the name suggests, it is taken from the very top of the Sirloin Primal.
What makes the Picanha so unique, and so visually striking, is its composition. While the meat itself is remarkably lean and beefy, it is crowned with a distinct, thick fat cap. In most American butchery, this cap is trimmed away and lost, but in the world of traditional BBQ, that fat is the secret weapon. As it renders over the fire, it “self-bastes” the steak, infusing the meat with moisture and a rich, savory depth that you won’t find in a standard Ribeye or New York Strip.
Why Reverse Sear?
Because the Picanha has that heavy fat cap and a lean interior, the Reverse Sear method on the Big Green Egg is the absolute best way to handle it. We’ll start low and slow to bring the internal temperature up evenly, and then finish with a high-heat roar to transform that fat cap into a crispy, caramelized crust of gold.
Now sit back, grab a glass of your favorite Cabernet, the tannins are the perfect match for this rich Wagyu fat, and enjoy this post for Big Green Egg Reverse Seared Picanha.
Prepping the Picanha
Preparation: The Tempering Phase
Before the Picanha ever touches the cast iron or the charcoal, you need to manage its temperature. One of the most common mistakes in outdoor cooking is taking a cold, dense roast directly from the refrigerator and tossing it onto a hot grill.
Take the roast out of the packaging a full hour before you plan to cook it.
Why Timing Matters
This isn’t just about convenience; it’s about thermal equilibrium. When you let the meat rest on your counter (out of the direct sun, of course), you are “tempering” the beef.
- Even Cooking: A roast that is 38°F in the center will struggle to cook evenly. By the time the middle reaches your target temperature, the exterior “gray band” will be overcooked and tough. Bringing the roast closer to room temperature ensures the heat travels through the muscle fibers more uniformly.
- The Wagyu Factor: This is especially critical with American Wagyu from Snake River Farms. Wagyu fat has a lower melting point than traditional beef. Allowing the roast to sit out allows those intramuscular fats to begin softening, which leads to a superior, melt-in-your-mouth texture once it hits the Big Green Egg.
- Surface Moisture: This hour is also the perfect time to pat the roast completely dry with paper towels. Moisture is the enemy of a good sear. By drying the surface and the fat cap now, you’re setting the stage for a spectacular crust later.
A Note on Food Safety
Don’t worry about the “one-hour rule” regarding safety. Because the Picanha is a solid muscle (not ground beef), the interior is sterile. A sixty-minute rest at room temperature is perfectly safe and is actually the secret technique used by high-end steakhouses to ensure their roasts stay juicy from edge to edge.
Trimming, Scoring, and Seasoning
Refining the Roast: Trimming for Tenderness
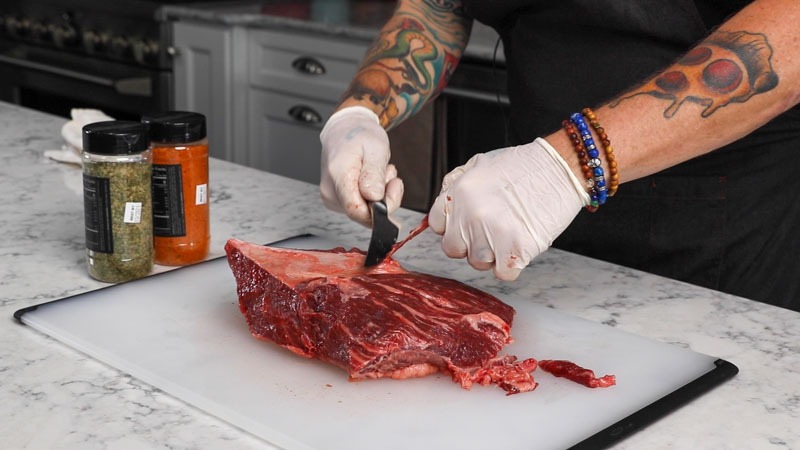
While the thick fat cap on top is the Picanha’s signature feature, the underside (the meat side) often requires a little bit of “surgery” before it’s ready for the Big Green Egg. To get that professional, steakhouse-quality result, you need to remove the silver skin and any excess, dangling fat from the meat side of the roast.
Eliminating the Silver Skin
Silver skin is that thin, pearlescent membrane you’ll often find clinging to the surface of the muscle. Unlike the fat cap, silver skin is made of elastin; it does not render or melt during the cooking process, no matter how long you leave it on the grill.
- The Texture Issue: If left intact, silver skin acts like a rubber band, shrinking as it heats up and causing the roast to curl. More importantly, it creates a tough, chewy barrier that is impossible to bite through.
- How to Remove It: Slide the tip of a sharp boning knife or paring knife just under the membrane, then angle the blade slightly upward against the silver skin and pull it away in strips. Your goal is to reveal the beautiful, deep red muscle fibers underneath without gouging the meat.
Cleaning the Under-Side Fat
While we want to preserve that glorious top fat cap, any loose or “raggedy” fat on the meat side should be trimmed away.
- The Bark Factor: Removing excess surface fat from the bottom allows your seasoning to make direct contact with the meat. This ensures that every bite has a concentrated “beefy” flavor and helps form a consistent bark during the low-and-slow portion of the reverse sear.
- Consistency: Cleaning the bottom side creates a uniform surface, which allows the heat from the Big Green Egg to penetrate the meat evenly from below while the fat cap protects it from above.
The Result
Once trimmed, you should have a “clean” side of ruby-red American Wagyu on the bottom and a pristine, uniform white fat cap on the top. This contrast is exactly what makes the Picanha one of the most visually stunning cuts you can cook.
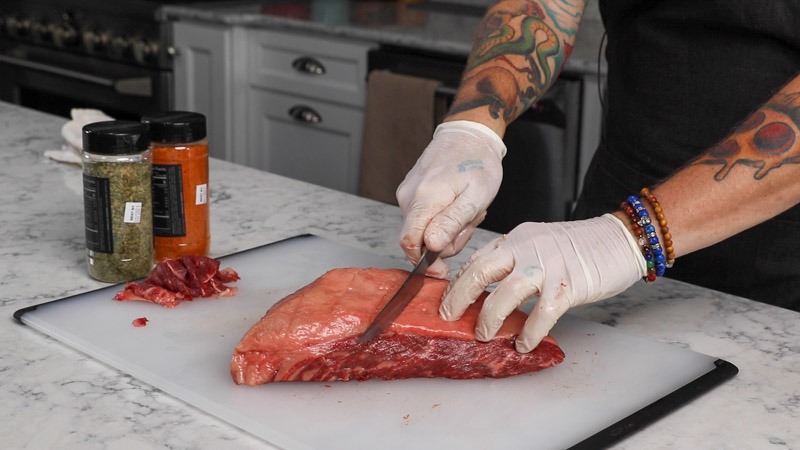
Scoring the Fat Cap—The Secret to Maximum Rendering
With the roast trimmed and tempered, it’s time to perform the most iconic step in Picanha preparation: scoring the fat cap. Using a very sharp knife, make crosshatch cuts (a diamond pattern) across the entire surface of the fat. Aim for cuts spaced about one inch apart. The goal is to slice through the thick white fat until you just reach the surface of the meat, but be careful not to slice deep into the muscle itself.
Why We Score the Fat
This isn’t just for the striking “steakhouse look”, it serves three vital culinary purposes:
- Accelerated Rendering: Picanha fat is famously thick. By scoring it, you create more surface area for the heat to penetrate. This allows the fat to “render” (melt) more efficiently. Instead of having a chewy layer of unrendered gristle, you end up with a crispy, buttery crust that melts in your mouth.
- Deep Seasoning: When you apply your salt and spices to an unscored fat cap, they sit on the surface. By crosshatching, you create channels that allow the seasoning to migrate down through the fat and make direct contact with the meat. This ensures the beef is flavored from the top down.
- Preventing “The Curl”: Fat and muscle shrink at different rates when they hit the heat. If left in one solid sheet, the fat cap can act like a drawstring, causing the entire roast to curl or bow. Scoring “relieves the tension,” allowing the roast to stay flat on the grill for an even cook and a better sear.
How to Do It Like a Pro
The Diamond: Once you’ve made one set of parallel lines, rotate the roast 45 degrees and repeat the process to create those beautiful diamond shapes.
The Angle: Hold your knife at a slight angle and use long, steady strokes. Don’t “saw” at the meat.
The Depth: You want to go about 1/4 to 1/2 inch deep, depending on the thickness of the cap. Stop the moment you see the pink of the Wagyu peeking through.
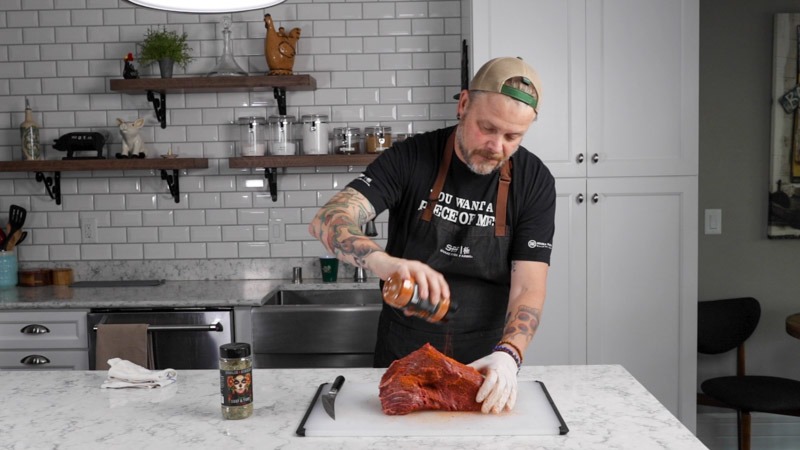
The Seasoning—Enhancing the Picanha
Now that you’ve opened up those channels in the fat cap, it’s time to layer in the flavor. Since we are working with an American Wagyu cut that already possesses an incredible buttery depth, the goal is to enhance the beef, not mask it.
Rub 1.5 tbsp of olive oil all over the roast as a binder. Next, apply your seasoning generously to all sides of the roast, including the sides. While a simple dusting of Kosher salt and freshly cracked black pepper works just fine and is the traditional way they do it in Brazil, sometimes you want a little more complexity to stand up to that rich fat.
My Top Seasoning Picks
If you want to move beyond basic salt and pepper, here are three ways to take this Picanha to the next level:
- Commercial Pick #1: Hardcore Carnivore Black: Created by Jess Pryles, this is a fan favorite for a reason. It contains activated charcoal which helps you achieve a stunning, jet-black crust (bark) almost instantly. The garlic and salt profile inside is perfectly balanced for a heavy hitter like Picanha.
- Commercial Pick #2: Raising the Steaks (Dizzy Pig): This is a coarse-grind seasoning that is tailor-made for the Big Green Egg. It has a “peppery” bite with notes of coriander and garlic that cut right through the richness of the Wagyu fat cap.
- The “Buddha’s House” Blend (Homemade): If you want to raid your spice cabinet, try this ratio for a classic steakhouse profile:
- 4 parts Coarse Kosher Salt (The foundation)
- 2 parts Coarse Black Pepper (For the “crust” bite)
- 1 part Granulated Garlic (For depth)
- 1 part Onion Powder (For a hint of sweetness)
The Application Technique
When seasoning the scored fat cap, don’t just sprinkle… massage. Use your hands to work the salt and spices down into those diamond-cut crevices we just made. This ensures that as the fat renders during the “low” part of our reverse sear, it carries that seasoning deep into the muscle fibers of the roast.
The Two-Zone Setup (The Strategy of the Reverse Sear)
For a cut as unique as the Picanha, where you have a lean muscle paired with a heavy fat cap, precision is everything. To master this cook, we are using the Reverse Sear method. Instead of searing first and hoping the middle cooks through, we do the opposite: we gently bring the internal temperature up in a low-heat environment first, then finish with a high-heat blast.
Configuring the EGGspander for 2-Zone Cooking
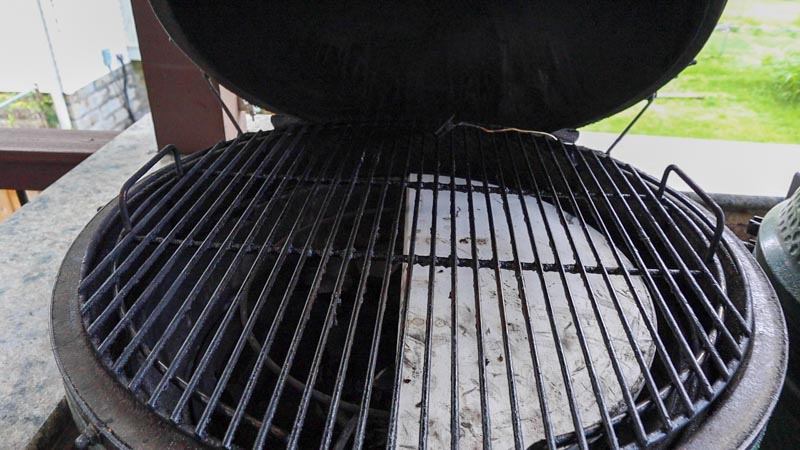
To do this efficiently, I’m using the Big Green Egg EGGspander System. This is the ultimate “utility belt” for the Egg because it allows for 2-zone cooking, meaning you have an indirect “cool side” and a direct “hot side” at the same time.
- The Indirect Zone: Place a Half Moon ConvEGGerator Stone (ceramic insert) into one side of the EGGspander base. This stone acts as a heat shield, blocking the direct flames from hitting the meat.
- The Direct Zone: Leave the other half of the EGGspander open. This allows the heat to rise directly from the coals, which will be our “searing station” later in the cook.
Preheating to 250°F
Set your vents to bring the Big Green Egg to a steady 250°F.
- Why 250°F? This temperature is high enough to begin the fat-rendering process, but low enough that it won’t “seize” the Wagyu muscle fibers. By “roasting” the Picanha at 250°F on the indirect side of the grill, we ensure the roast cooks perfectly even from edge to edge, avoiding that unappealing “gray ring” often found in high-heat cooking.
- The Heat Soak: Make sure your ceramic stone is in the Egg while it preheats. You want the entire environment inside the dome to be stabilized before the meat goes on.
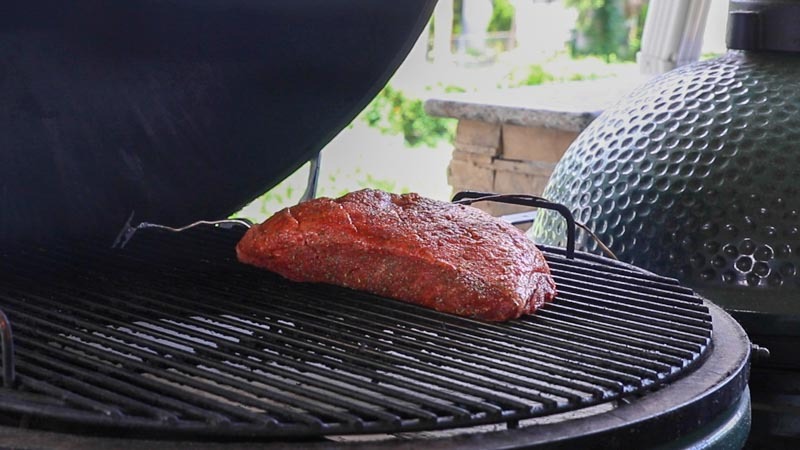
Placement Strategy
Place your seasoned Picanha on the indirect side (over the ceramic stone) with the fat cap facing up. In this position, the fat cap acts as a natural insulator, and as it begins to warm up, those seasoned juices will start to run down the sides of the roast, basting the meat in a bath of Wagyu gold and steakhouse spices.
The Transition—When to Pull and Pivot
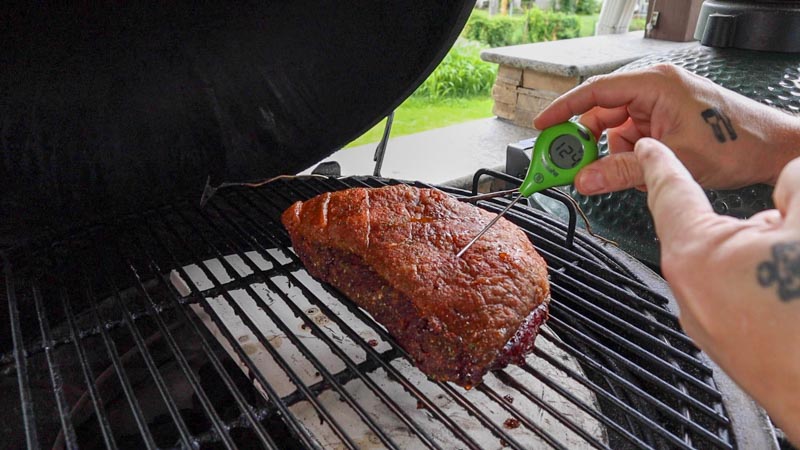
In the world of the reverse sear, the internal temperature is your only true north. Since we are aiming for a perfect medium-rare finish, we aren’t looking for the meat to be “done” during this first phase. Instead, we are looking for the “Target Transition Temp.”
When the internal temperature measures 120°F, it is time to pull the roast from the Egg.
At this stage, your Picanha will look somewhat “underwhelming”, it will be a dull brown color and the fat will look soft. Don’t worry; the magic is about to happen. Move the roast to a cutting board and tent it loosely with foil while you crank the heat up to 500°F. By opening your vents fully, you are transforming the Egg from a gentle oven into a high-powered infrared broiler.
What to Expect: Size vs. Time
While we always cook by temperature, it helps to have a “ballpark” idea of how long this low-heat phase will take so you can timed your side dishes. Because Snake River Farms Picanhas are Wagyu, they are often more marbled and denser than choice supermarket cuts, which can affect the pace.
| Weight (lbs) | Approx. Low & Slow Time (at 250°F) | Target Pull Temp |
| 2.0 - 2.5 lbs | 45 - 60 minutes | 120°F |
| 3.0 - 3.5 lbs | 70 - 90 minutes | 120°F |
| 4.0+ lbs | 100+ minutes | 120°F |
Pitmaster Note: Factors like the ambient outdoor temperature and how many times you “peek” at the meat will affect these times. Use a reliable leave-in thermometer like a Meater or a Thermoworks DOT to ensure you don’t overshoot that 120°F mark.
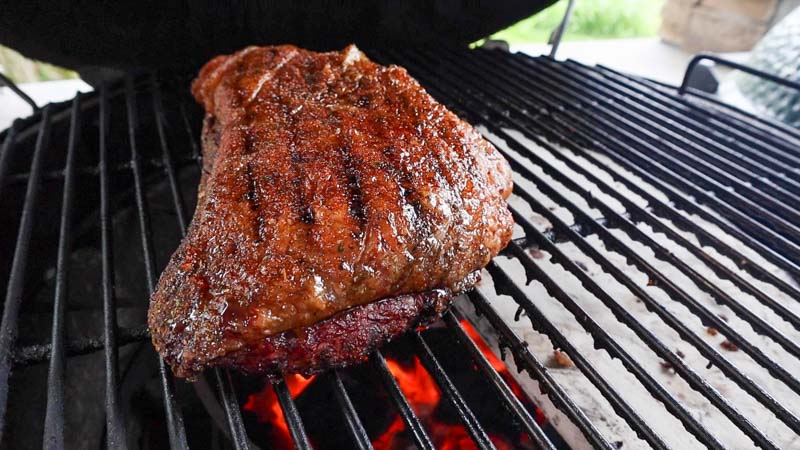
The Final Sear (The “Money” Phase)
Once the Egg has reached 500°F, it’s time for the grand finale. This is where we take that soft fat cap and turn it into a crispy, caramelized delicacy.
The Fat-Side Finish
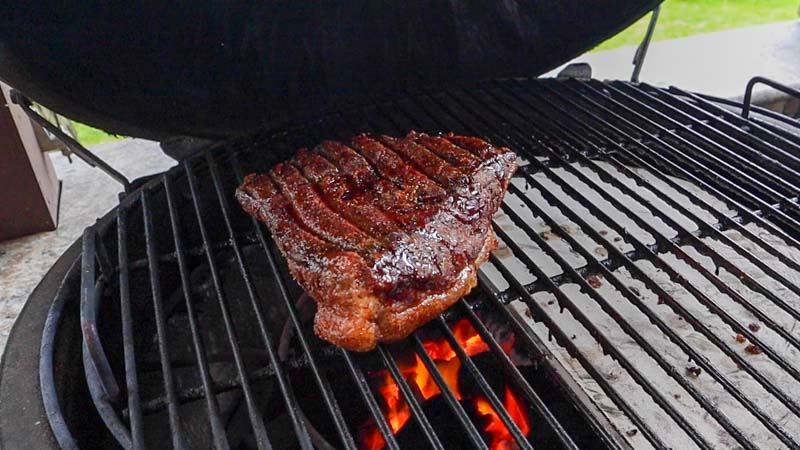
Place the roast back on the direct side of the grill (the side without the stone). Start with the fat cap facing down.
The Goal: You only need 60 to 90 seconds per side. We are looking for a deep mahogany crust on the meat and a charred, “brittle” texture on the fat cap.
Warning: Be prepared for some “fireworks.” As that Wagyu fat hits the 500°F coals, it will flare up. This is exactly what we want, but keep your grill tongs ready.
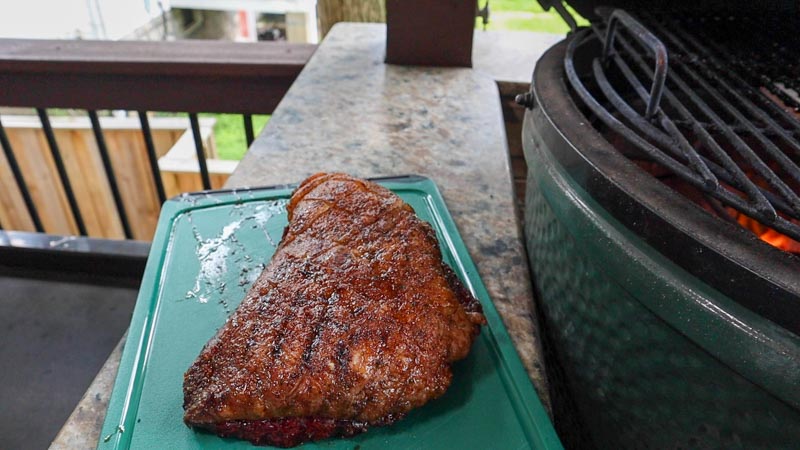
The Rest and the Reveal
After the high-heat intensity of the sear, your Picanha is glowing, charred, and smelling incredible. But there is one final, non-negotiable step before you pick up your carving knife: The Rest.
Pull the roast and let it rest for at least 10 minutes before slicing and serving.
Why the Rest is Vital
During the 500°F sear, the muscle fibers on the exterior of the Wagyu contract tightly, pushing all the internal juices toward the center of the roast. If you were to slice into it immediately, those juices would come rushing out onto your cutting board, leaving the meat dry and the fat cap less flavorful.
- The Redistribution: A 10-minute rest allows the muscle fibers to relax and reabsorb those precious juices.
- Carry-over Cooking: During this window, the internal temperature will likely “carry over” and rise another 5°F - 10°F, landing you perfectly in the Medium-Rare range 130°F - 135°F.
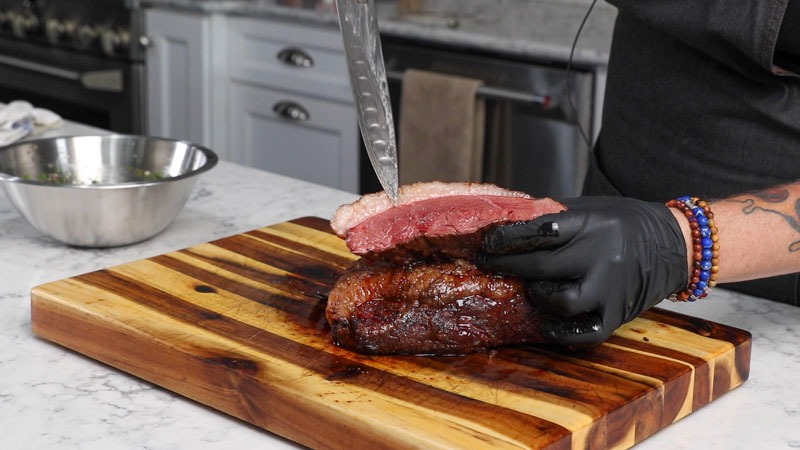
How to Slice Picanha for Maximum Tenderness
When the rest is over, it’s time to slice. Because Picanha is part of the Sirloin Primal, it has a very distinct grain structure. How you cut it will determine whether the meat is “melt-in-your-mouth” or “chewy.”
1. Identify the Grain
Look closely at the meat side of the roast. You will see long, parallel lines running through the muscle. This is the “grain.” To get the most tender bite, you must slice against the grain.
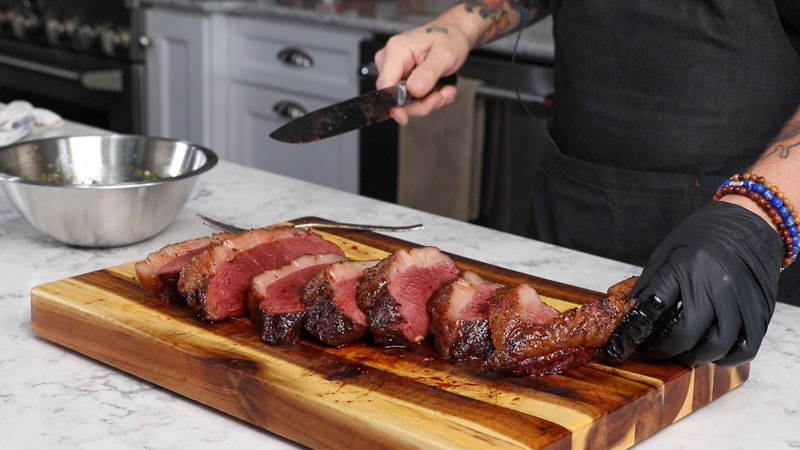
The Slicing Technique
- The Thickness: Use a long, sharp carving knife to cut the roast into roughly 1/2 inch to 3/4 inch thick slices.
- The Angle: By cutting across those muscle fibers, you are shortening them, which means your teeth have to do much less work.
- The Fat-to-Meat Ratio: Ensure every slice includes a portion of that beautifully rendered Wagyu fat cap. The contrast between the crunchy, salty fat and the buttery, lean beef is the hallmark of the Picanha experience.
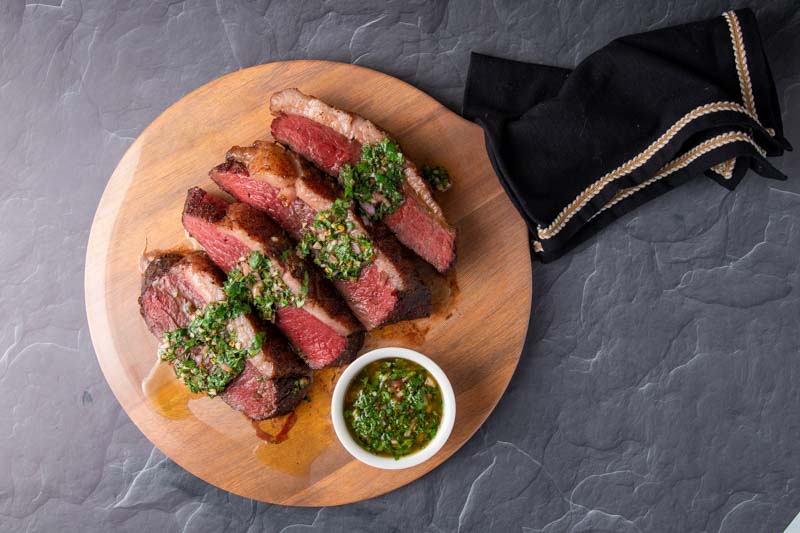
Final Presentation
Fan the slices out on a wooden board to show off that edge-to-edge pink center. If you want to go full Brazilian steakhouse style, serve it alongside some Chimichurri or a side of Farofa.
The result of the reverse sear on the Big Green Egg is a roast that is smoky, perfectly rendered, and incredibly juicy, a true testament to why the Picanha is the king of the Churrascaria.
You can serve this roast with my homemade chimichurri sauce.
Print
Big Green Egg Reverse Seared Picanha
This recipe for Big Green Egg Reverse Seared Picanha gets you that Brazillian steakhouse experience right in your backyard.
Course Main
Cuisine Brazillian
Prep Time 10 minutes minutes
Cook Time 40 minutes minutes
Total Time 50 minutes minutes
Servings 8
Author The BBQ Buddha
- 2.5 lbs picanha roast
- 1 tbsp olive oil for slather
- 3 tbsp Your favorite BBQ rub or Buddha Blend below
Buddha Rub Blend
- 4 tbsp Coarse Kosher Salt
- 2 tbsp Coarse black pepper
- 1 tbsp Granulated garlic
- 1 tbsp Onion powder
Preheat the Big Green Egg to 250°F using the EGGspander for 2-zone grilling
Trim the silverskin and extra fat off the meat side of the picanha
Crosshatch cut the fat cap side
Add olive oil all over the roast to help as a binder for the seasoning.
Work the rub in to the fat cap and on the meat side
Grill the roast on the indirect side until the internal temperature is 120°F
Open the bottom and top vents to get the direct side up to 500°F
Grill the picanha roast fat side down for 90 seconds then fat side up for 90 seconds
Pull and let rest 10 minutes before slicing and serving
The post Big Green Egg Reverse Seared Picanha appeared first on The BBQ Buddha.
