If you are looking for the quintessential backyard BBQ experience, look no further than the spare rib. While many beginners start with baby backs, the seasoned pitmaster knows that spare ribs are where the real flavor lives.
For this cook, we are focusing on the St. Louis Style cut. If you aren’t familiar with the terminology, a St. Louis cut is simply a spare rib that has been trimmed down into a clean, uniform rectangle. We remove the chewy brisket flap and the gristle-heavy rib tips, leaving you with a beautiful rack of “long bones” that cooks evenly and looks incredible on a platter.
Spare Ribs vs. Baby Back Ribs
A common question is what actually separates these from baby backs. Baby back ribs are taken from high up on the hog near the spine. They are smaller, leaner, and cook quickly. Spare ribs, however, come from the belly area. Because of where they sit on the hog, they are larger, flatter, and contain a much higher fat content. This extra intramuscular fat is the secret weapon of the spare rib. As it renders down over the charcoal, it bastes the meat from the inside out, resulting in a much deeper, richer pork flavor than you can get from a baby back.
How to Think About This Cook
When you fire up your Big Green Egg for spare ribs, you have to approach it with a bit more patience. Because spare ribs are meatier and higher in fat than baby backs, they require a longer stay in the smoke to properly render and reach that perfect “bite through” tenderness.
You aren’t just cooking meat here; you are managing a transformation. You want to utilize the incredible thermal mass of the Egg to maintain a rock steady temperature, allowing the smoke to penetrate deep into the fibers while the rub sets into a beautiful, mahogany bark.
So, sit back, grab an ice cold Lone Star, and enjoy this guide on how to master St. Louis Style Spare Ribs on the Big Green Egg.
Step 1: Trim, Slather, and Season
Before the ribs ever touch the grill, the prep work determines the quality of your final product. This stage is all about creating a uniform shape and building a foundation of flavor.
The St. Louis Trim
Start by laying your spare ribs on a large cutting board meat-side up. You want to trim away the “brisket flap” (the boney, cartilage-heavy strip along the bottom) and the small, tapered ends of the rack. This creates a clean rectangle. Not only does this look professional, but it ensures every rib on the rack finishes at the exact same time. If you have never done this before, don’t throw away the scraps! Those “rib tips” make for a great snack when seasoned and smoked right alongside the main racks.
The Slather
Once trimmed, pat the ribs completely dry with a paper towel. Apply a light coating of yellow mustard to both sides of the rack. This is your binder. It won’t add a mustard flavor to the ribs, but it provides a tacky surface that allows your dry rub to adhere to the meat without washing away during the cook.
Choosing Your Rub
For this cook, I am using SuckleBusters Hog Waller. It is easy to see why this rub is so popular. It contains a blend of sea salt, turbinado sugar, brown sugar, chile peppers, and spices. The color is absolutely beautiful and provides that classic sweet and heat profile that spare ribs crave.
If you don’t have Hog Waller in your pantry, here are a few other excellent options:
- Meat Church Holy Gospel: A great “all-purpose” BBQ rub that balances salt and sweetness.
- Killer Hogs BBQ Rub: A competition favorite that delivers a deep, mahogany color.
DIY Buddha Rub Option
If you prefer to make your own at home, try this simple but effective “Buddha Blend” that hits all the right notes for a spare rib:
- 1/4 cup Brown Sugar (packed)
- 2 tablespoons Kosher Salt
- 1 tablespoon Coarse Black Pepper
- 1 tablespoon Smoked Paprika
- 1 teaspoon Garlic Powder
- 1/2 teaspoon Cayenne Pepper (adjust for your preferred heat level)
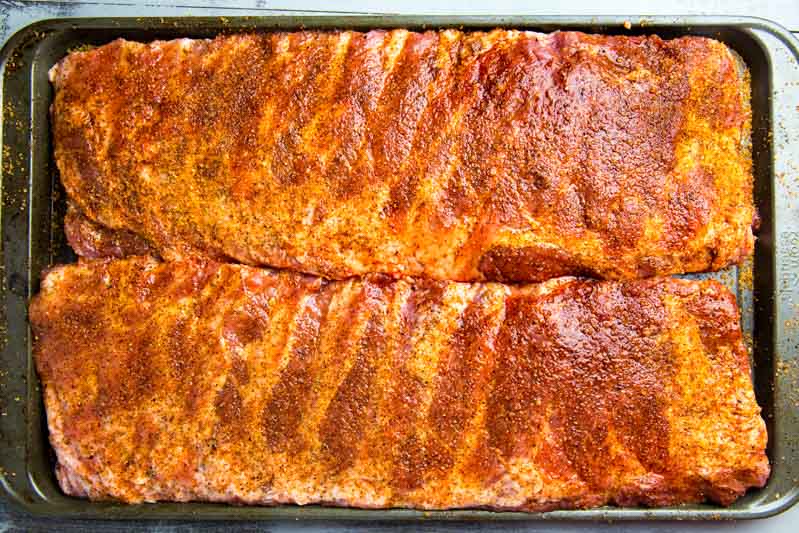
Apply your chosen rub liberally to both sides of the ribs. I always start with the bone side first, then flip and finish with the meat side. Let the ribs sit for about 15 to 20 minutes to “sweat” while you get the Big Green Egg fired up.
Step 2: Big Green Egg Setup: The Low and Slow Foundation
With your ribs prepped and the rub starting to tack up, it is time to prepare the Big Green Egg. For a traditional spare rib cook, we are looking for a steady, gentle environment that allows the fat to render slowly and the smoke to do its magic.
Configuring for Indirect Heat
Just like with the turbo method, you must use an indirect setup for this cook. Place your ConvEGGtor (Plate Setter) inside the Egg with the legs facing up. This creates a heat shield between the fire and the meat. Without it, the bottom of your ribs would burn long before they became tender. I also recommend placing a disposable drip pan on top of the ConvEGGtor to catch the rendering fat and keep your ceramic clean.
Wood Choice: The Power of Hickory
For this cook, I chose a few large chunks of Hickory. Hickory is a classic BBQ wood for a reason. It provides a robust, pungent smoke that stands up perfectly to the rich, fatty profile of pork spare ribs.
When you add your wood, make sure to nestle the chunks into the lump charcoal rather than just tossing them on top. This ensures a clean, consistent burn throughout the first few hours of the cook when the meat is most receptive to smoke.
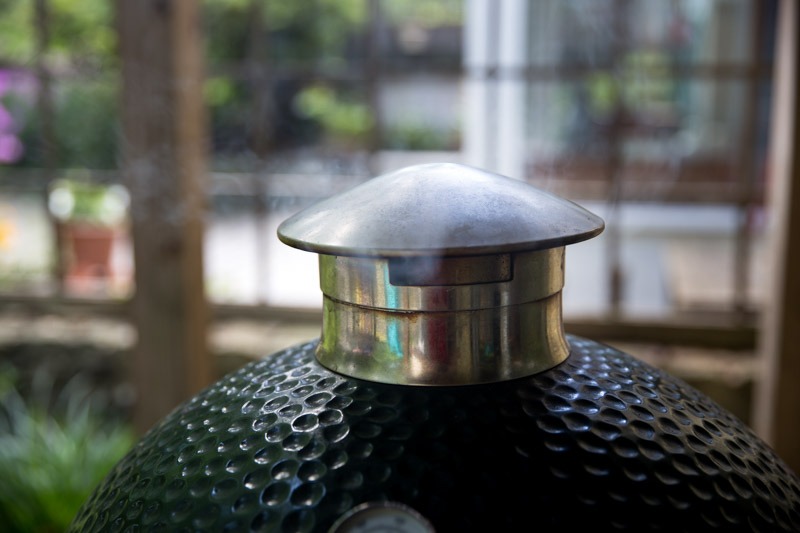
I started the Big Green Egg and stabilized it at 200°F.
While some pitmasters prefer 225°F or 250°F, starting a bit lower allows the meat to spend more time in that crucial smoke window. This low temperature helps develop a deep smoke ring and prevents the sugars in the Hog Waller rub from caramelizing too quickly. Once you see that thin, blue smoke rising from the top vent, you are ready to place your ribs on the grate.
Step 3: The Smoke Bath
Once the Big Green Egg stabilized and I saw that beautiful, thin blue smoke, it was time to get the ribs onto the grate. This initial phase of the cook is where the most important work happens. It is the time when the smoke penetrates the meat and the rub begins to set into a firm, flavorful bark.
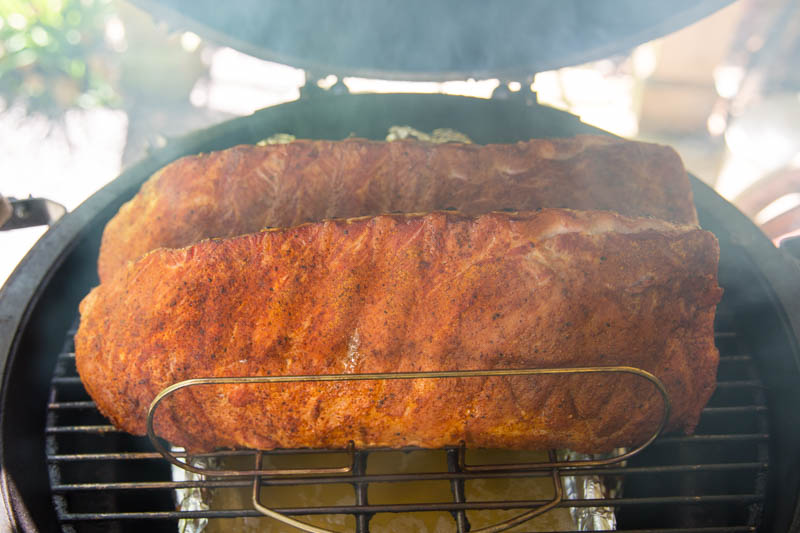
Placement in the Rib Rack
I placed the racks into a rib rack positioned in the center of the cooking grate. While I often prefer to lay ribs flat, using a rack is a great way to maximize space if you are cooking for a crowd or have a smaller Big Green Egg. When using a rib rack, make sure there is enough space between each rack so the air can circulate freely. You want the Hickory smoke to touch every surface of the meat. If the racks are touching, you will end up with “steamed” spots that lack that perfect bark. Once they were securely in the rack, I closed the dome and let the Big Green Egg work its magic.
Why the First 2 Hours Matter
During the first part of the cook, the meat is cool and moist, which makes it a magnet for smoke particles. At 200°F, the process is gentle. You aren’t rushing the meat. Instead, you are allowing the Hickory smoke to slowly work its way into the outer layers of the pork. This is how you achieve that deep, pink smoke ring that everyone looks for when they pull a rib apart.
Resist the Urge to Peek
The biggest mistake you can make during this phase is opening the dome too often. Every time you lift the lid, you lose that carefully managed heat and humidity. Trust your Big Green Egg to do its job. For the first two hours, your only task is to monitor the temperature and ensure it stays steady. You want the surface of the ribs to gradually darken from a bright red to a deep, mahogany color as the sugars in the rub react with the heat and smoke.
Step 4: The Wrap and the Glaze
After the ribs had bathed in that Hickory smoke for 3 hours at 200°F, the bark was beautifully set and the color was exactly where I wanted it. At this point, the meat has taken on all the smoke flavor it needs. Now, the focus shifts from flavor to texture.
The Foil Wrap
I pulled the racks from the Big Green Egg and wrapped them tightly in heavy duty aluminum foil. This is a technique often called the “Texas Crutch.” By wrapping the ribs, you trap the natural moisture and steam, which breaks down the tough connective tissues much faster than dry heat alone.
I let them braise in the foil for one hour. This step is the secret to getting that tender, succulent meat that pulls cleanly away from the bone. If you want to add a little extra moisture, you can add a small splash of apple juice or a few pads of butter inside the foil, but with ribs this high in quality, their own juices are often enough.
Bumping the Heat and Saucing
Once the hour in the foil was up, it was time for the home stretch. I carefully unwrapped the ribs and noticed the meat had started to pull back from the bone ends. This is the perfect sign of progress.
I made two key moves for the final phase:
- The Temperature: I opened the vents slightly and brought the Big Green Egg up to 250°F. This extra heat helps the fat finish rendering and sets the final texture.
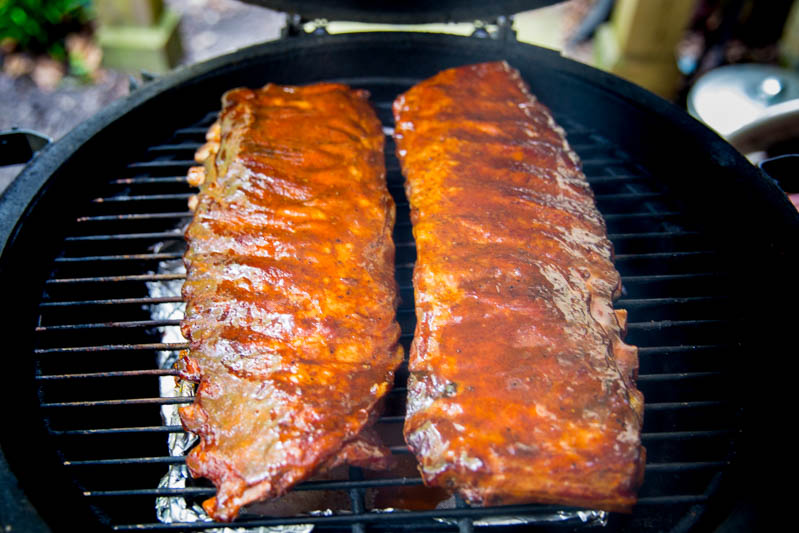
- The Sauce: I placed the ribs back on the grate, meat-side up, and brushed them with a generous coating of SuckleBusters Original BBQ Sauce.
This sauce is all natural with no preservatives, and it has a fantastic balance of sweetness and tang. By applying it now and letting it cook for another 30 to 45 minutes, the sauce “tacks up,” transforming into a sticky, translucent glaze that shimmers under the light.
If you aren’t using SuckleBusters, here are a few other incredible sauces that pair perfectly with the St. Louis cut:
- Blues Hog Original: A thick, sweet, and spicy competition staple that creates a legendary shine.
- Kosmos Q Apple Cherry BBQ Sauce: A fruit-forward option that complements the natural sweetness of the pork.
- Lillie’s Q Smoky: A great choice if you want a classic Memphis-style finish with a hint of liquid smoke and spice.
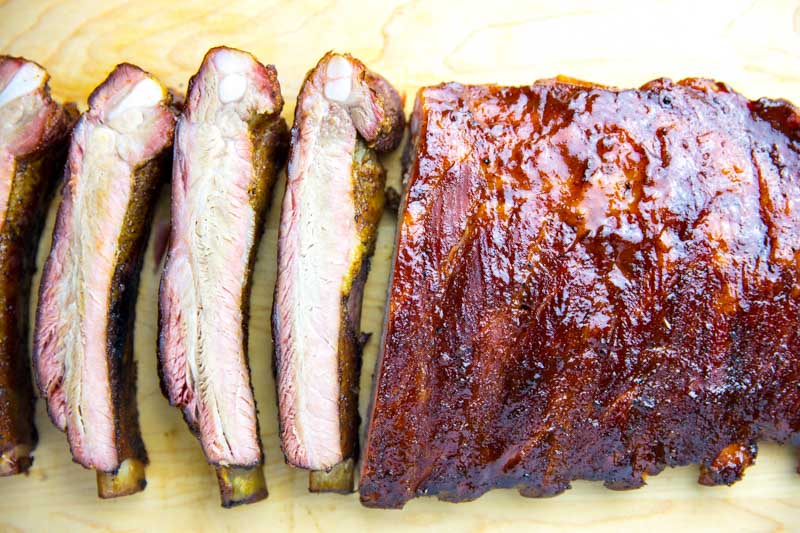
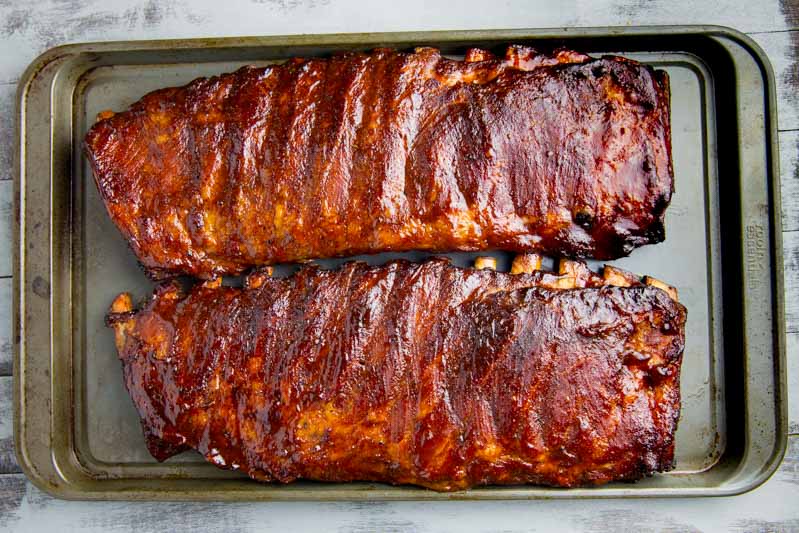
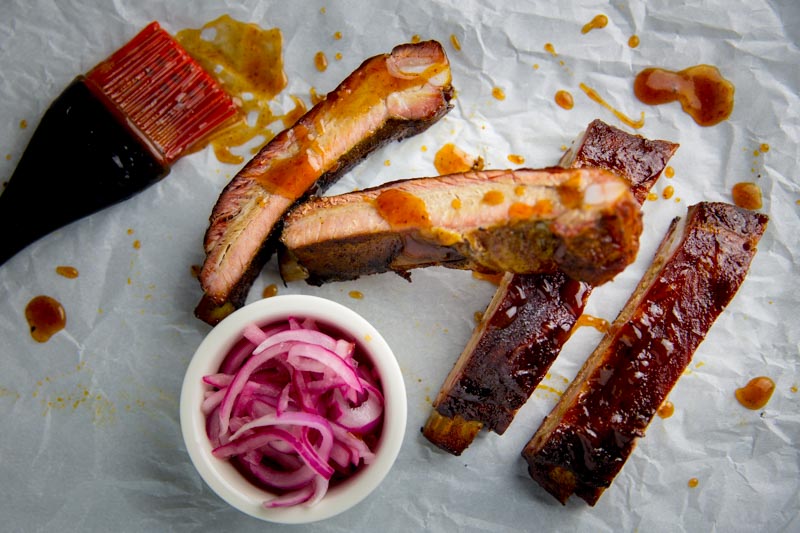
Step 5: The Final Result - A Perfect Texas Finish
After an hour at 250°F, the SuckleBusters Original BBQ Sauce had tightened into a beautiful, sticky glaze. The ribs passed the bend test with flying colors, showing a slight crack in the bark when lifted with tongs. That is the signal that the connective tissue has fully rendered and the ribs are at their peak.
How to Know They Are Done
While the bend test is my go-to, you can also look for these indicators:
- The Pullback: The meat should have retracted about half an inch from the bone tips.
- The Probe: If you use a thermometer, the meat between the bones should feel like soft butter when probed, typically reading around 203°F.
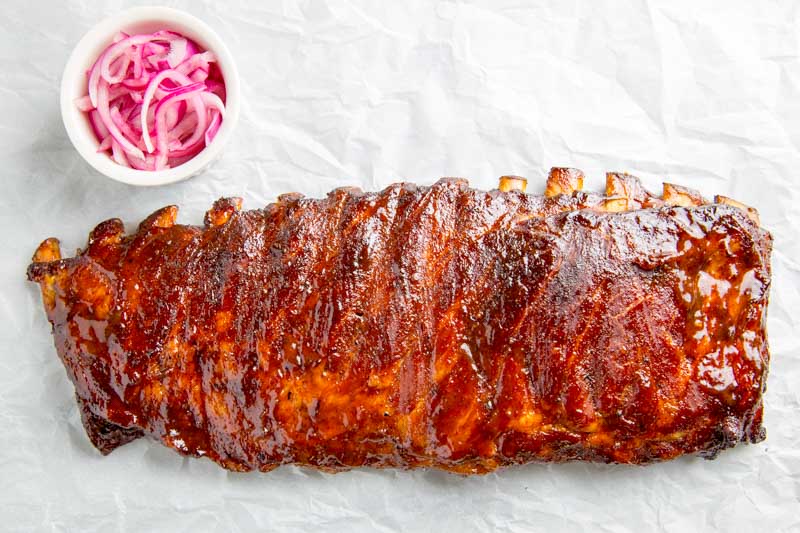
- The Crust: Just look at the perfect crust these ribs had! The combination of the Hog Waller rub and the sauce created a layered, complex bark that was both sweet and savory.
The Crucial Rest
As tempting as it is to eat them the second they leave the Big Green Egg, you must let them rest. Place the ribs on a cutting board and tent them loosely with foil for about 15 minutes. This allows the internal temperature to stabilize and the juices to redistribute. If you cut into them too soon, all that moisture you worked so hard to preserve will run out, leaving the ribs drier than they should be.
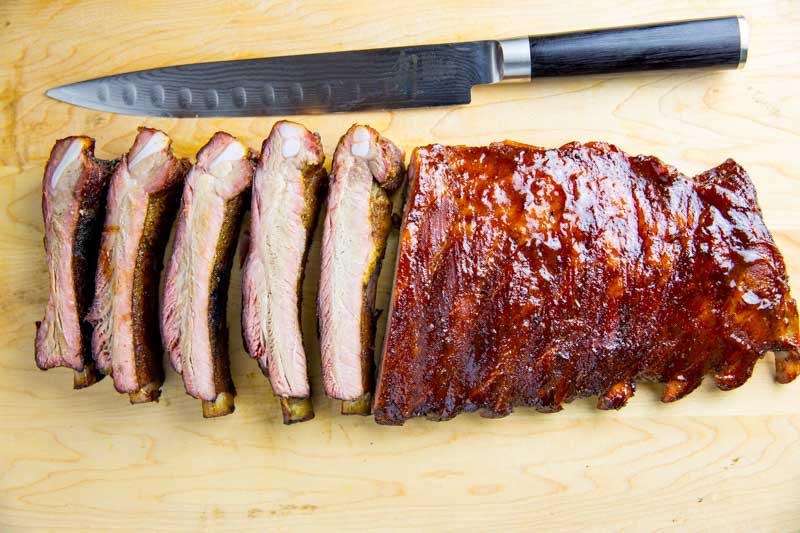
Slicing and Serving
When you are ready to serve, flip the rack over so the bone side is facing up. This allows you to see exactly where the bones are positioned so you can slice clean, even portions without hitting any bone.
The SuckleBusters products really shined here. Both the rub and the sauce worked perfectly for this cook, providing a competition-level appearance and a deep, Texas-inspired flavor. Whether you are a seasoned pro or a first-timer on the Big Green Egg, this method delivers a world-class rib every time.
Final Thoughts: The King of the Grill
Smoking spare ribs on the Big Green Egg is more than just a cook; it is a ritual. While the “Turbo” method is great when you are in a pinch, there is something deeply rewarding about the low and slow process. Taking the time to trim a St. Louis cut, managing a clean Hickory fire, and watching that sauce transform into a sticky glaze is what backyard BBQ is all about.
The transition from a raw rack of ribs to this mahogany masterpiece proves that the right tools and the right ingredients make all the difference. Whether you are using a dedicated Texas rub like Hog Waller or mixing up your own “Buddha Blend,” the goal is the same: tender, juicy pork with a flavor that lingers long after the meal is over.
If you have been intimidated by spare ribs in the past, I hope this guide gives you the confidence to fire up your Egg and give them a shot. Just remember to watch your temperatures, trust the bend test, and always… always… let your meat rest before you dive in.
Print
Big Green Egg Spare Ribs
This recipe for Big Green Egg Spare Ribs will deliver great results every time! Be the BBQ Hero you were meant to be.
Course Main Course
Cuisine BBQ
Keyword Baby Back Ribs, BBQ, Big Green Egg, Spare Ribs
Prep Time 20 minutes minutes
Cook Time 5 hours hours
Servings 6 people
Spare Ribs Ingredients:
- 2 racks St. Louis Style Spare Ribs
- 4 tbsp Yellow Mustard for binder
- 1/2 cup BBQ Rub
- 1 cup BBQ sauce for glaze
Spritz Ingredients:
- 1 cup Apple Juice
- 1/2 cup Apple Cider Vinegar
- 4 dashes Hot Sauce
- 3 dashes Worcestershire Sauce
Prepare the Ribs: Trim the spare ribs into a uniform St. Louis rectangle by removing the brisket flap and rib tips.
Apply the Binder: Pat the meat dry with paper towels and apply a thin layer of yellow mustard to all sides of the racks.
Season: Apply a heavy coating to the ribs, starting with the bone side.
Setup the Grill: Prepare your Big Green Egg for indirect cooking with the ConvEGGtor (legs up) and preheat to 200°F.
Add Smoke Wood: Place 3 to 4 large chunks of Hickory wood into the hot coals and wait for the smoke to run thin and blue.
The First Smoke: Place the ribs into a rib rack on the grate and smoke at 200°F for 3 hours to set the bark.
The Wrap: Remove the ribs from the grill and wrap each rack tightly in heavy duty aluminum foil.
The Braise: Place the foiled ribs back on the grill and continue cooking at 200°F for 1 hour to tenderize.
Bumping the Heat: Remove the ribs from the foil, discard the liquid, and increase the Big Green Egg temperature to 250°F.
The Glaze: Place the ribs back on the grate meat-side up and brush a generous layer of BBQ sauce over the top.
The Set: Cook for an additional 45 to 60 minutes until the sauce is tacky and the ribs pass the bend test.
Check for Doneness: Ensure the meat has pulled back from the bones and the internal temperature is between 203°F and 205°F.
The Rest: Remove the ribs from the grill and let them rest on a cutting board for 15 minutes before slicing.
Serve: Slice the ribs between the bones and serve immediately while warm.
The post Big Green Egg Spare Ribs appeared first on The BBQ Buddha.
