Grilled Pork Loin after Brining: I bought an entire pork loin, carved half of it into pork chops, then brined the other half in a combo of apple, peach, and mango fruit juice and salt. After 6 hours in the brine, the pork loin is removed from the salty fruit juice and patted off with a paper towel. It’s then slathered in a garlic aioli and seasoned with a sweet BBQ rub. The seasoned pork loin is grilled indirect over charcoal for about 80 minutes before being seared to 145F. After resting about 20 minutes, the pork loin is sliced and served.
Pork loin is such a wonderful protein. Carve into pork chops and cook them all sorts of ways from shakin’ and bakin’ to simply seasoned and seared hot and fast. Or leave the loin whole and allow for it to take on a nice amount of smoke flavor low and slow before finishing off over a hot fire like we do here.
My family mows down some pork loin over the course of a year. With a family of 6, I need budget proteins and this fits the bill.
And here at Grillin’ Fools, we have done pork loin quite a bit because we absolutely love it.
One of my favorite recipes is this bone in pork loin James Boatright and I did a couple years ago on the rotisserie.
This spiral sliced, tomahawk beauty is a little more work, but is quite impressive.
And this crusted, bone in pork loin is fabulous.
Quick heads up. I partnered with the Missouri Pork Producers on this recipe and the accompanying video.
Grilled Pork Loin after Brining Ingredients
- 1 pork loin, 3-5 pounds.
- 2 cups non citrus fruit juice (substitute cider)
- 2 tablespoons table salt
- 1/4 cup mayonnaise for the binder (substitute garlic aioli)
- 1/4 cup your favorite BBQ Seasoning** – I used Meat Church Honey Hog
**Reserve a half teaspoon of seasoning to dust on at the end.
What is a Brine?
A brine is a salty liquid solution that we soak meat in to make the meat juicier, more tender and, if the brine has some flavor, taste better. See, we can get the first two results with a saltwater solution. To get the latter, we need to use a liquid that is tasty like apple juice, cranberry juice or cider.
The brine
Pork and chicken are excellent candidates for brining. Particularly chicken breast. Why? Both pork loin and white meat chicken are very lean and easily dried out. Let me sum it up more succinctly in this paragraph that helps the SEO of this recipe:
Why Should I Brine my Pork Loin
Pork loin is just a bunch of pork chops that haven’t been carved yet. They are generally fairly lean and thus have a somewhat narrow window to cook them through without drying them out. What if we could make that window larger and make the pork tastier?
Brining, in a liquid salt solution, will push liquid out of the solution and into the cell membranes of the meat. Makes the meat juicier. The salt in the brine starts breaking down connective tissue. Makes the meat more tender (tender-er?). And if that liquid is something tasty like apple juice or cider (never citrus), then that liquid that enters the cell membranes will also add flavor. Makes the pork more flavorful. Juicier, more tender, and more flavorful!? Win, Win, WIN!
Before we brine, let’s prep the pork loin.
This is super easy.
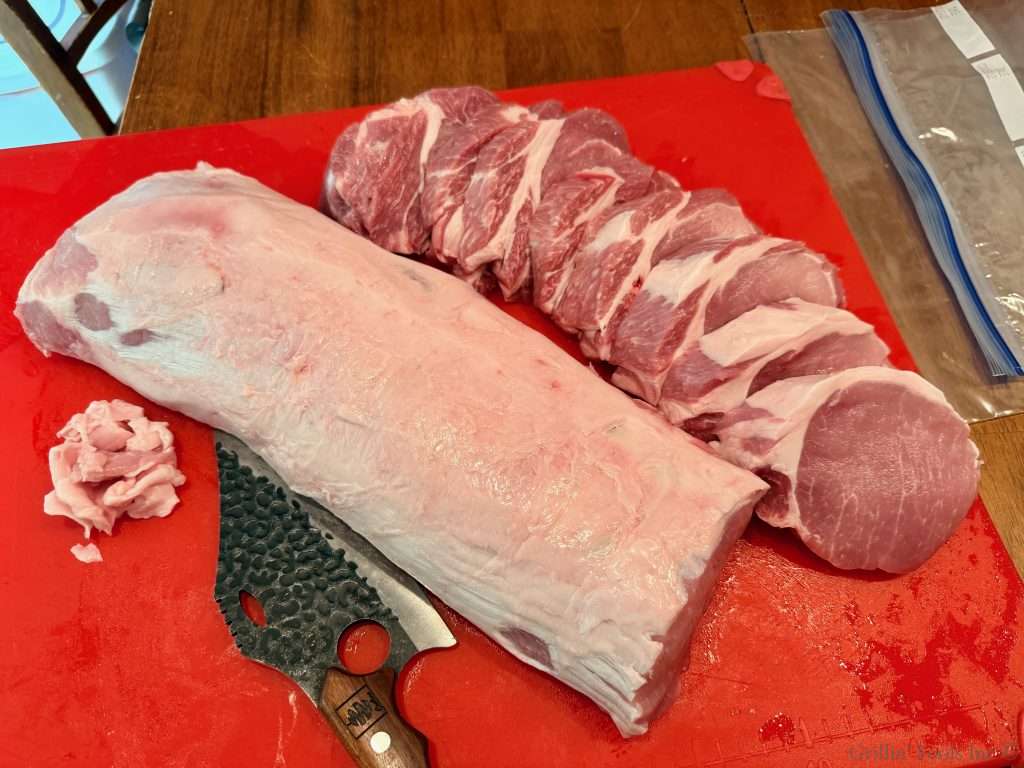
An entire pork loin is more than my family can eat and we have 6 people including THREE teenage boys:
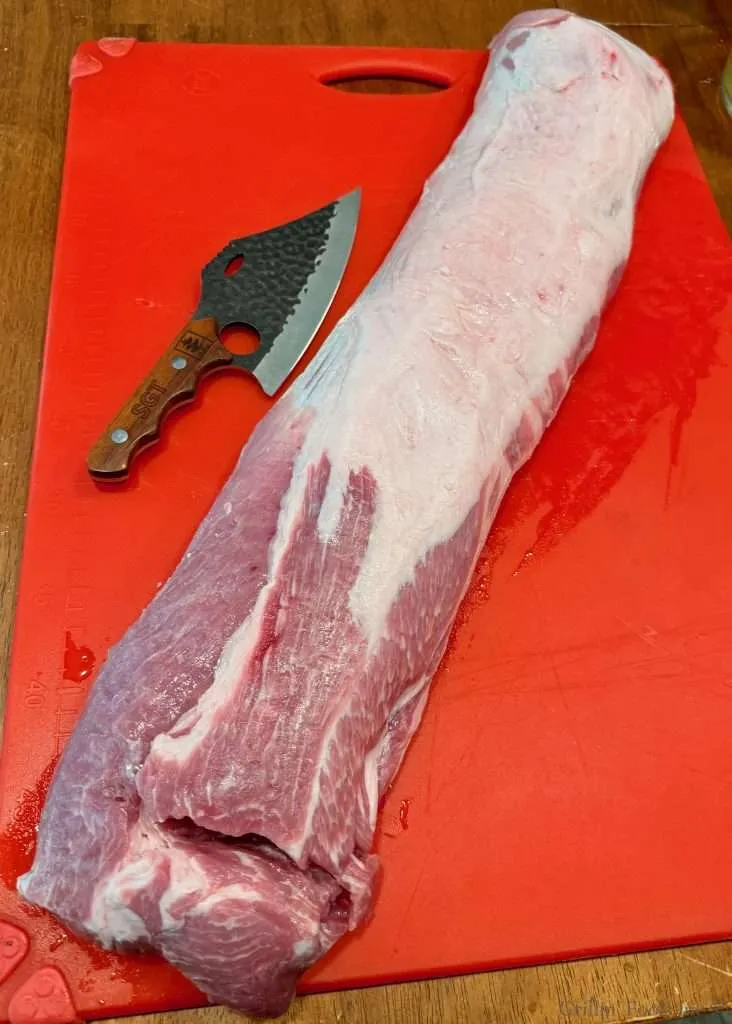
A whole pork loin
I like to picture the pork loin as just a series of pork chops that haven’t been sliced yet, which it is, and cut it where I think I would have enough pork chops to feed my crew. In this case, about half of this is more than enough.
Let’s back up and check out what that entails:

Price and Weight
For my family of 6, this is plenty for 2 full meals and some leftovers. For a family of four, you could get 3 or even 4 meals out of this.
If you could get four meals out of this, that would be about $6 for the protein per meal. That’s pretty outstanding.
For us, it was $12, but I also had a full meal of the leftovers the following day, as did my 18-year-old son.
How?
I just started carving pork chops:
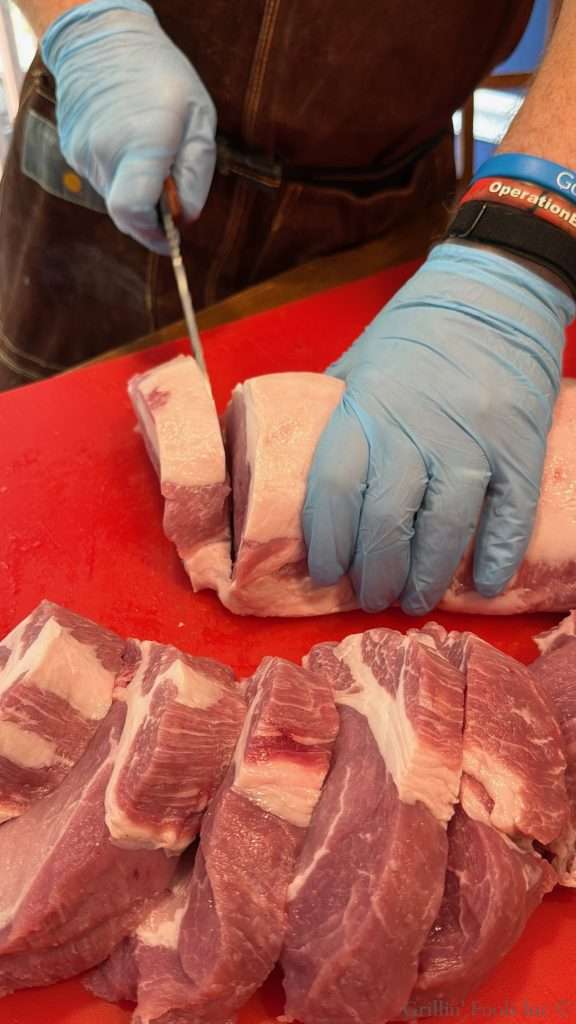
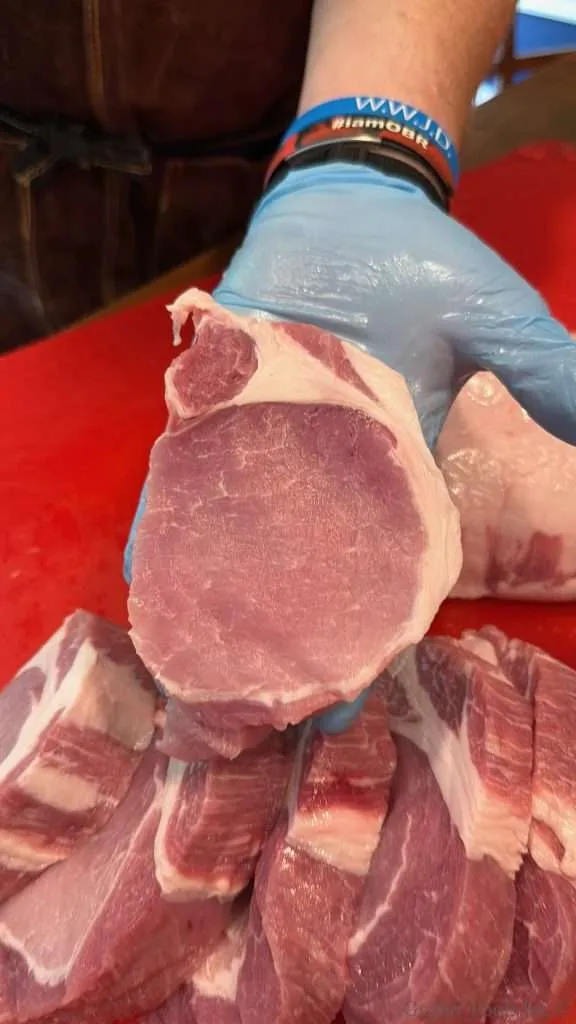
Pork Chop (which was my nickname in highschool)
Plenty for two meals for my big family
The chops went into the freezer for a meal the following weekend and the other half of the pork loin is ready for a sweet, salty bath
Create a Brine for our Pork Loin:
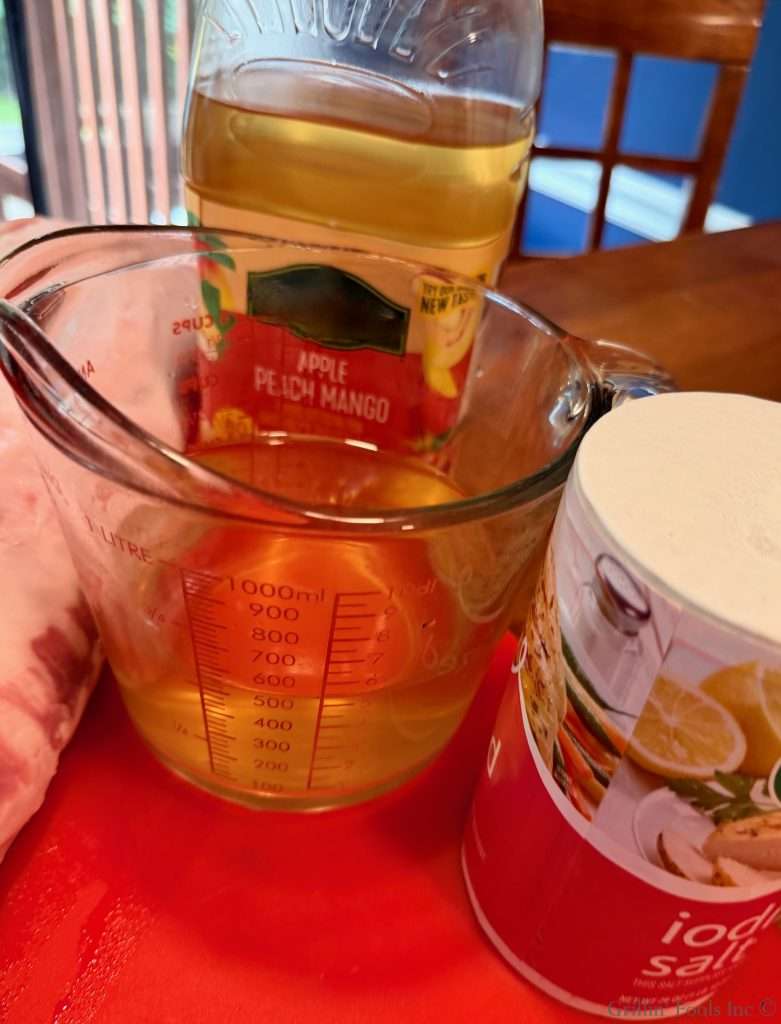
The golden ratio here is 1 cup of salt per 1 gallon of liquid. In this case, I used 2 cups of juice (1 pint) and thus 1/8 of a cup of salt, which is 2 tablespoons. Combine the two and stir until the salt is completely dissolved. Then place the pork loin in a resealable plastic bag, pour the brine into the bag, seal it, and set it in the fridge for 2-12 hours.
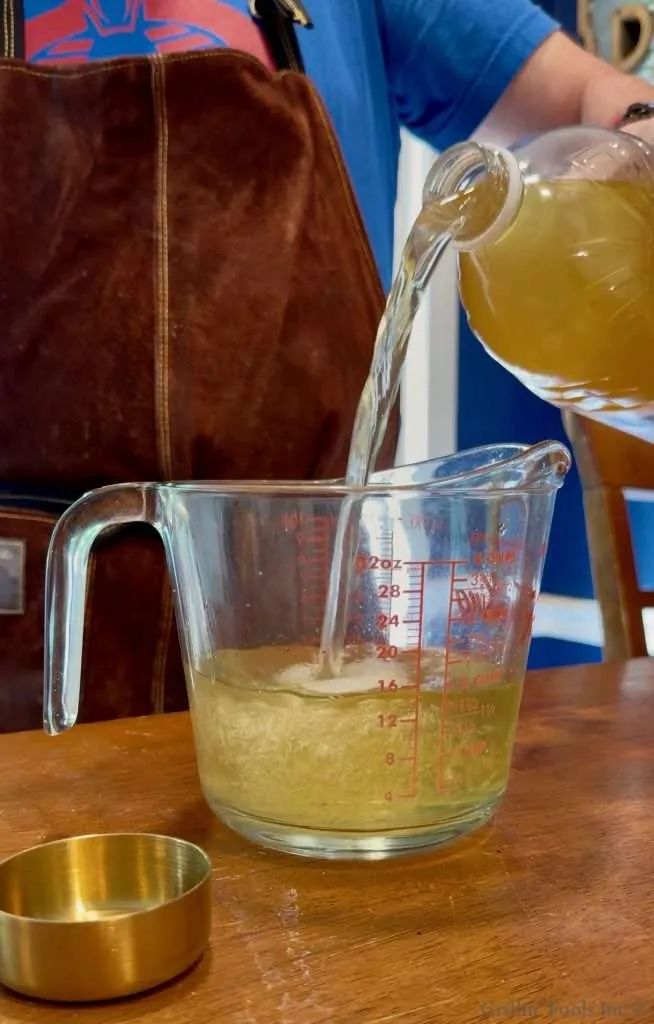
Pour juice into a measuring bowl
I used this combo fruit juice:

Apple, Peach, Mango Juice
We want lots of sugars. So cocktail from concentrate is just fine. We aren’t making a healthy smoothie here.
x Pour juice into a measuring bowl
I just went with a fruit juice I knew my kids would like.
Avoid citrus fruits like orange juice. The citrus acid can cook the meat while it’s in the fridge. x

Add the salt

Stir till the salt completely dissolves
Then put the pork loin in a 2 gallon resealable bag with the brine:
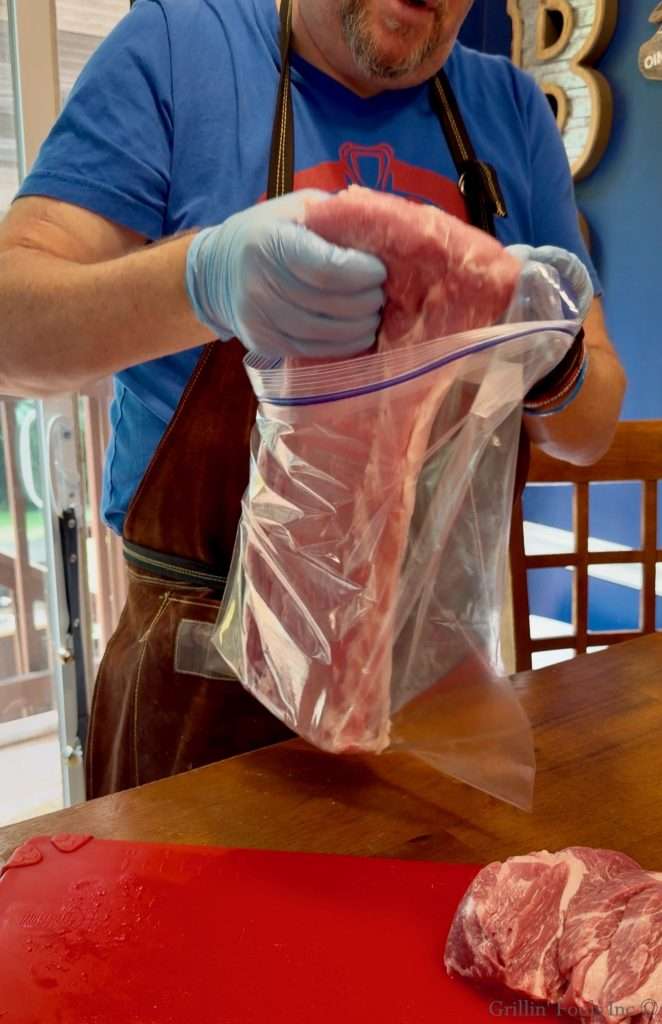
Into the bag

Add the brine
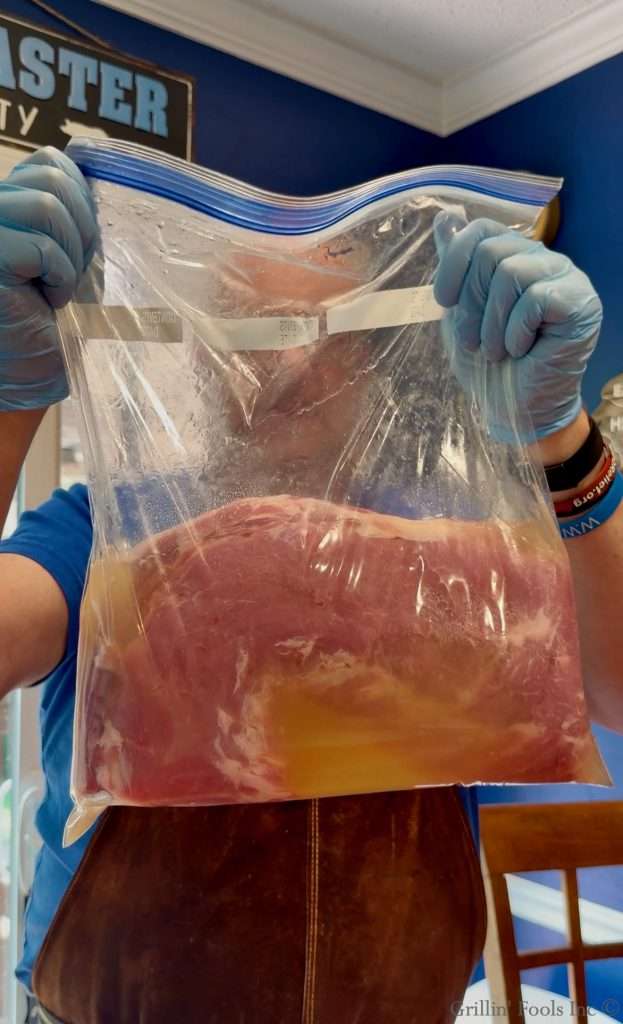
Seal the bag
Into the fridge for 2-12 hours.
Don’t think that if you brine it longer, the flavor will be even better. Soaking the meat in a salt solution for more than 12 hours crosses the line from brining and into curing. It will start to feel like ham in terms of texture if you brine for too long.
I brined for about 6 hours.
Remove the Pork Loin from the Brining Bag:
The outside of the pork loin is going to be pretty salty at this point, so I like to pat the meat down with a paper towel to remove any excess salty liquid:
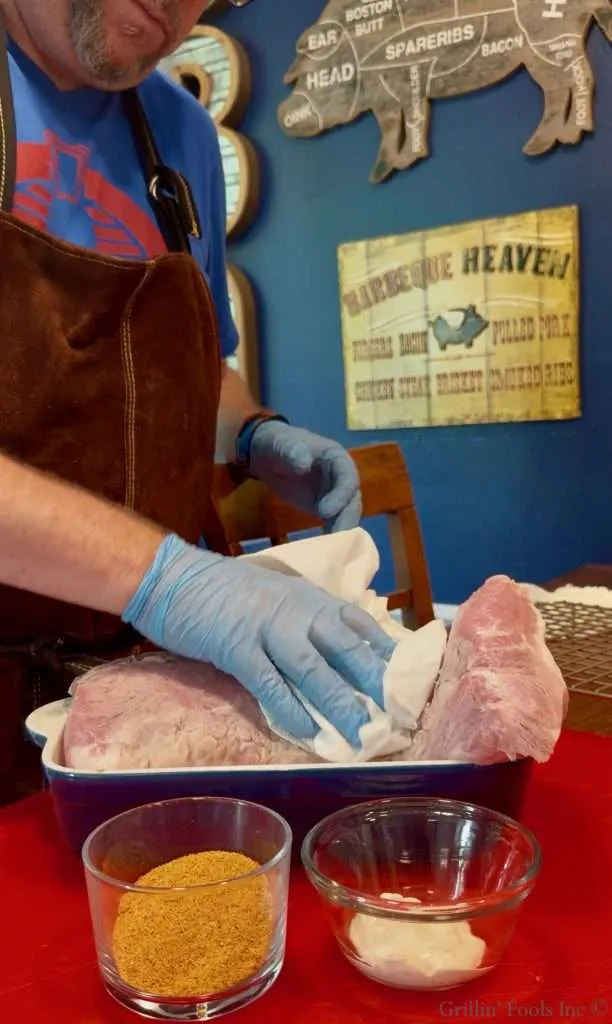
Pat dry
I also like to put this on a raised cookie cooling rack:
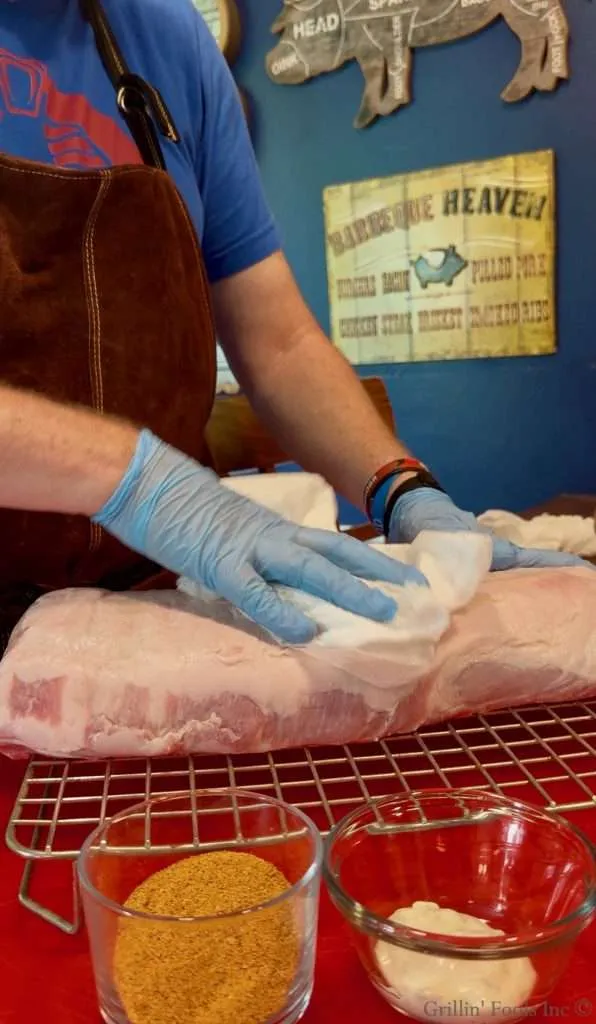
On a cookie cooling rack
The rack will make it easier to transport without it slip/sliding around, which will cause some of the binder and seasoning to have to be replaced.
Speaking of binder and seasoning…
Slather and Season
This is super simple. Simply slather the top and ends of the pork loin with a thin layer of mayonnaise, or in this case, garlic aioli:
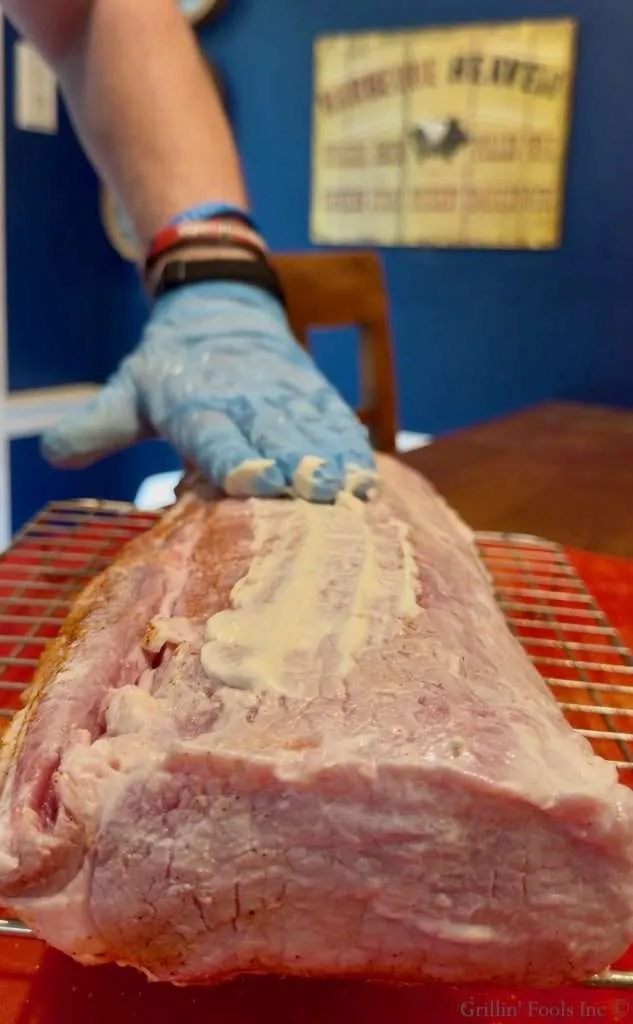
Slather

Slathered
Then hit it with your favorite BBQ seasoning:
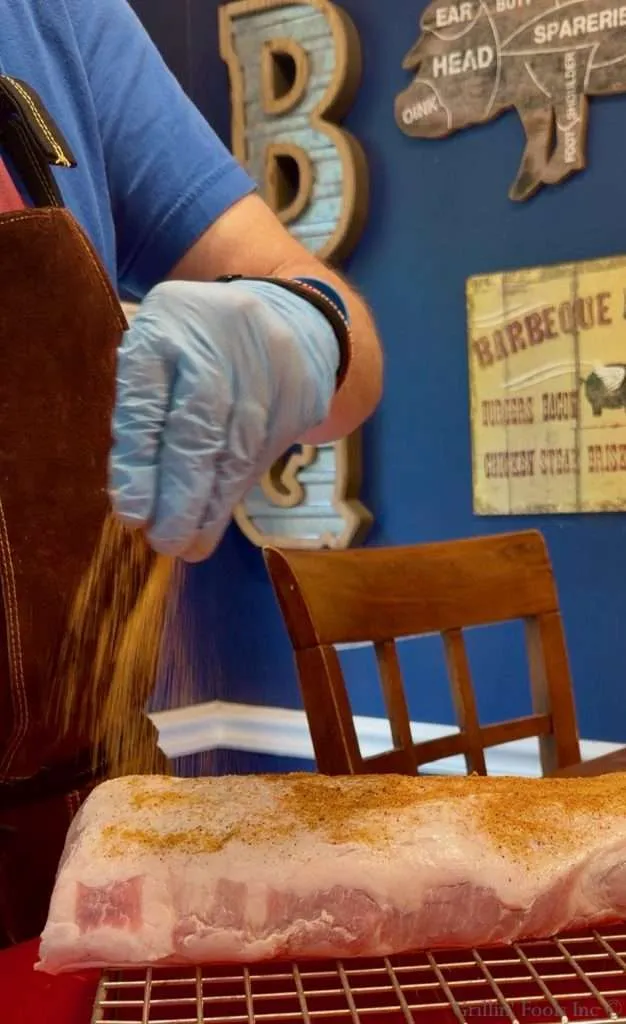
Season
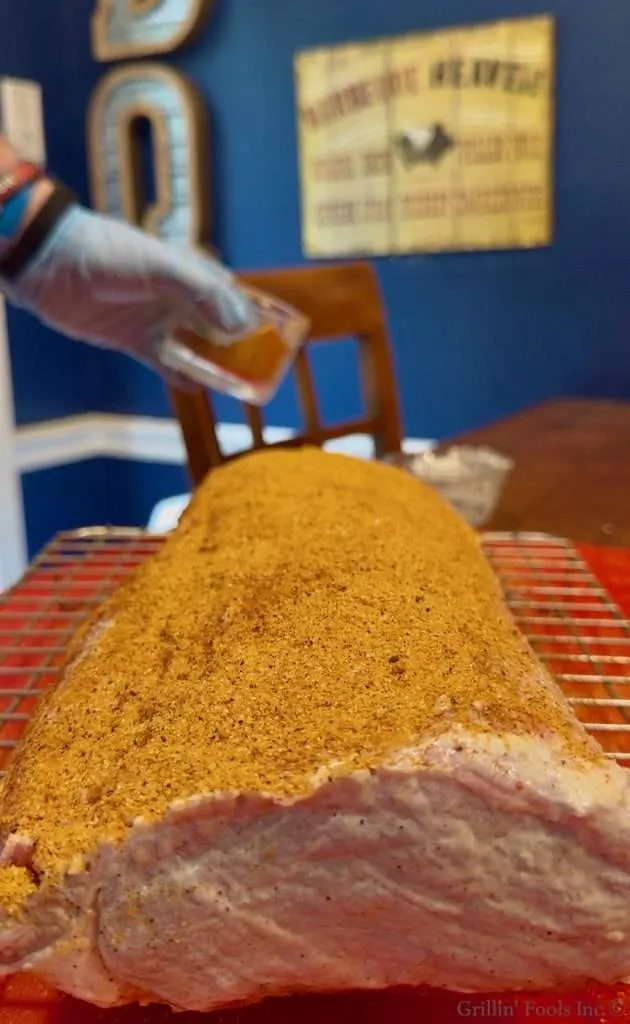
Seasoned
Don’t forget the ends. Simply dab those slathered ends in the seasoning that didn’t make it onto the pork roast:
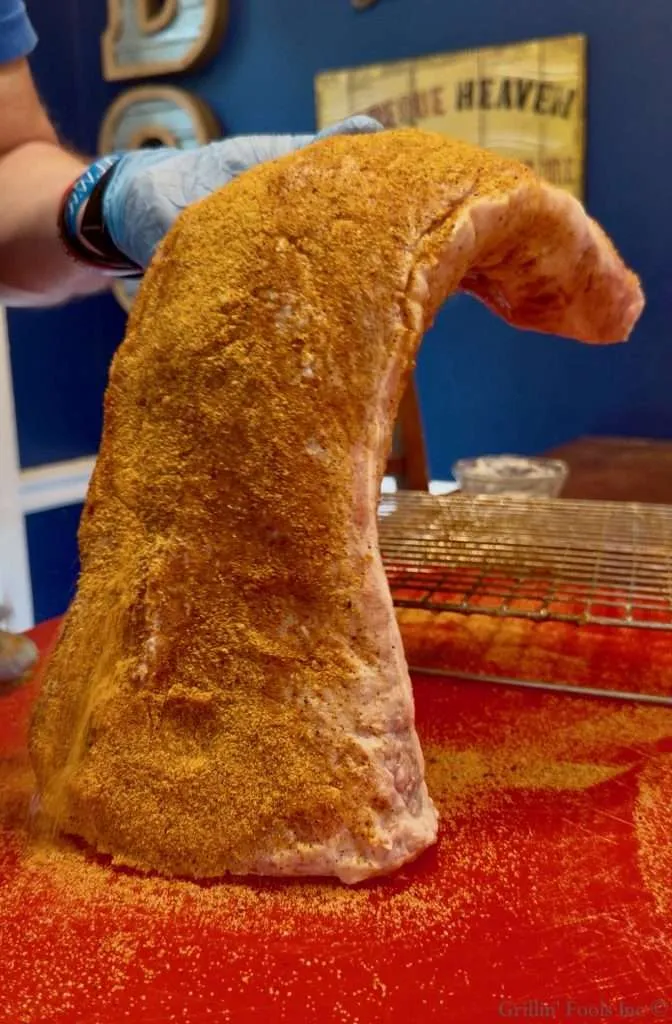
Season those ends
Prepare the Grill
We are two zoning this bad boy. Coals on one side, meat on the other. Target temp inside the grill is 250F.
Drop a chunk of smoke wood on the coals, and when the lid is closed, instant smoker.
Grill the Pork Roast
And I just put that cookie cooling rack right on the grill across from the coals:
Two-Zone or Indirect Grilling
This grill has a charcoal basket that I can raise and lower. So not only is the pork roast off to the side, but it’s also elevated away from the heat.
I used a chunk of pecan wood for the smoke, a very versatile wood that works well with pork and beef.
For a list of smoke woods and what they pair with, check out the best list of smoke woods on the internet.
The only time I moved the pork loin was to rotate it 180 degrees so the far side was closer to the heat after about an hour. At which point we were only at about 100F:

One hour in.
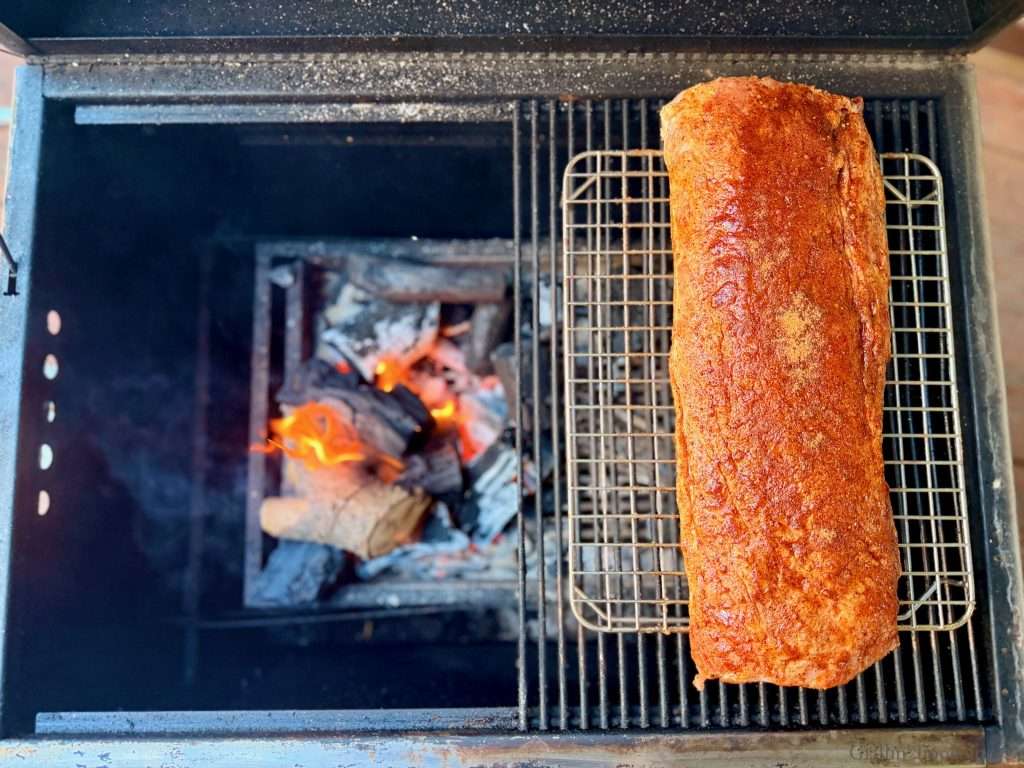
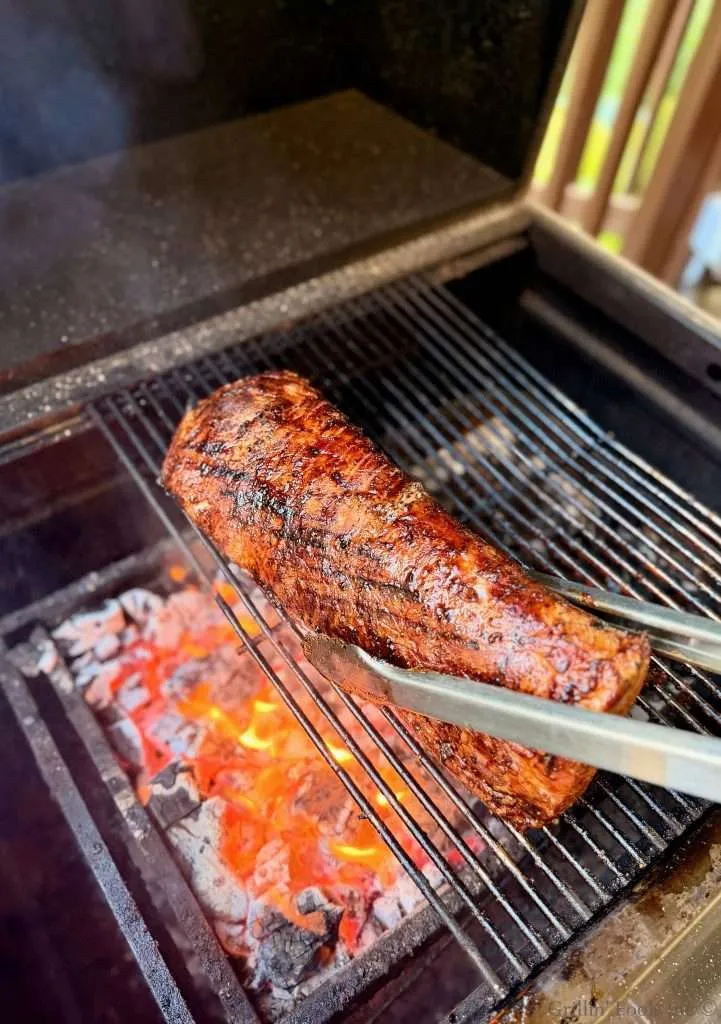
Once the pork loin reached 130ish, it was time to give it a sear:
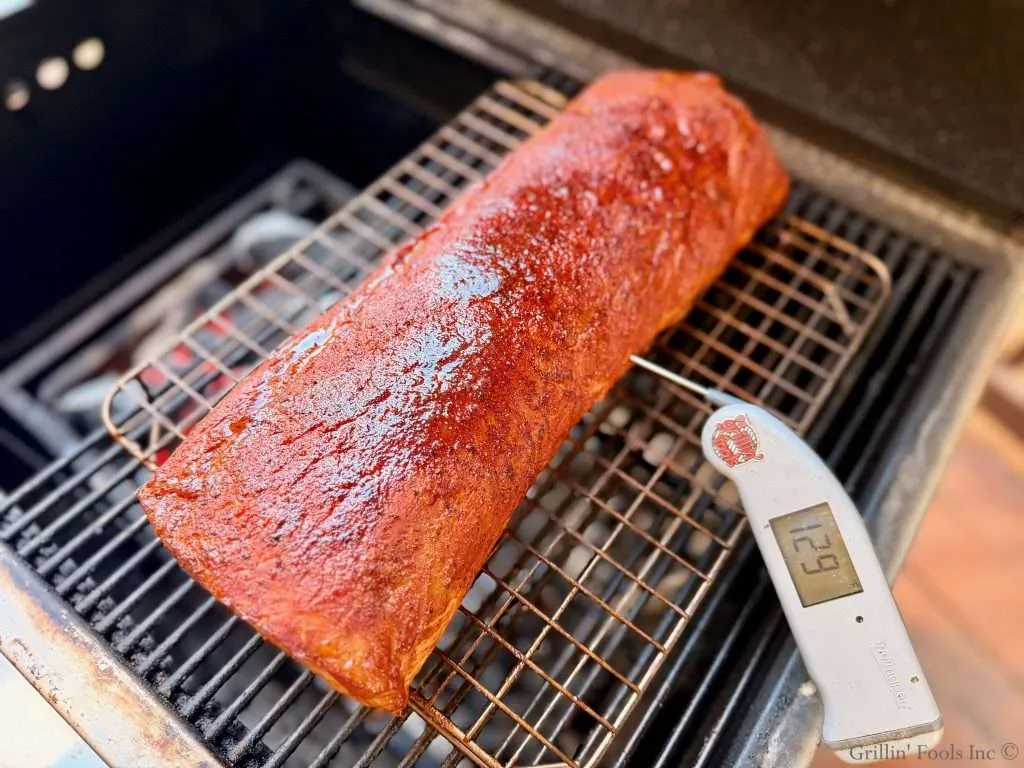
Ready to sear
I cranked the grill basket up near the top and took the pork loin off the cookie cooling rack and dropped it right over the hot coals, which were indeed very hot:

Flame on!
I placed this fat cap down, and that fat liquified in moments and turned into an inferno:

FIRE IN THE HOLE!
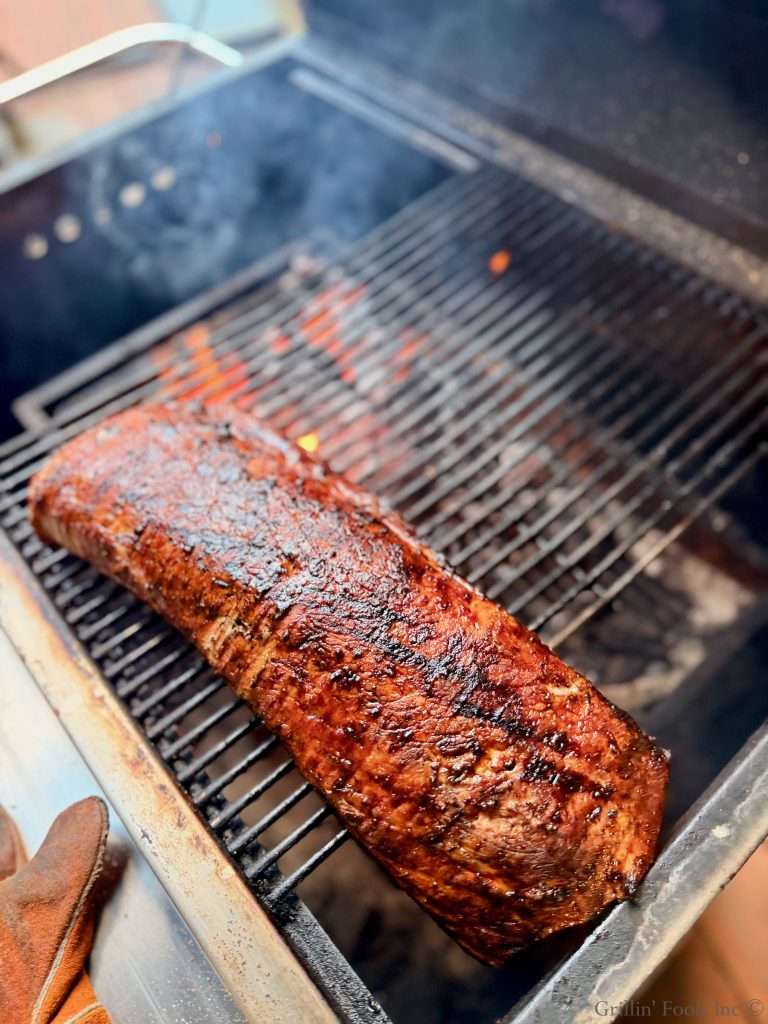
The fire was hottest in the back of the grill, so I place the pork loin near the front and used the grill grates to slide back and forth to sear the pork loin and at the same time keep it from burning:

Over the heat
Then I slid that grill grate over to the side of the grill without direct heat or the safe zone. It was easier to slide it back and forth than grabbing that five pound chunk of pork with tongs:
Off the heat and over the safe zone
Here’s a better view of that pork loin over the side with no coals, also, I dropped the fire basket down a few inches as it was just too hot:
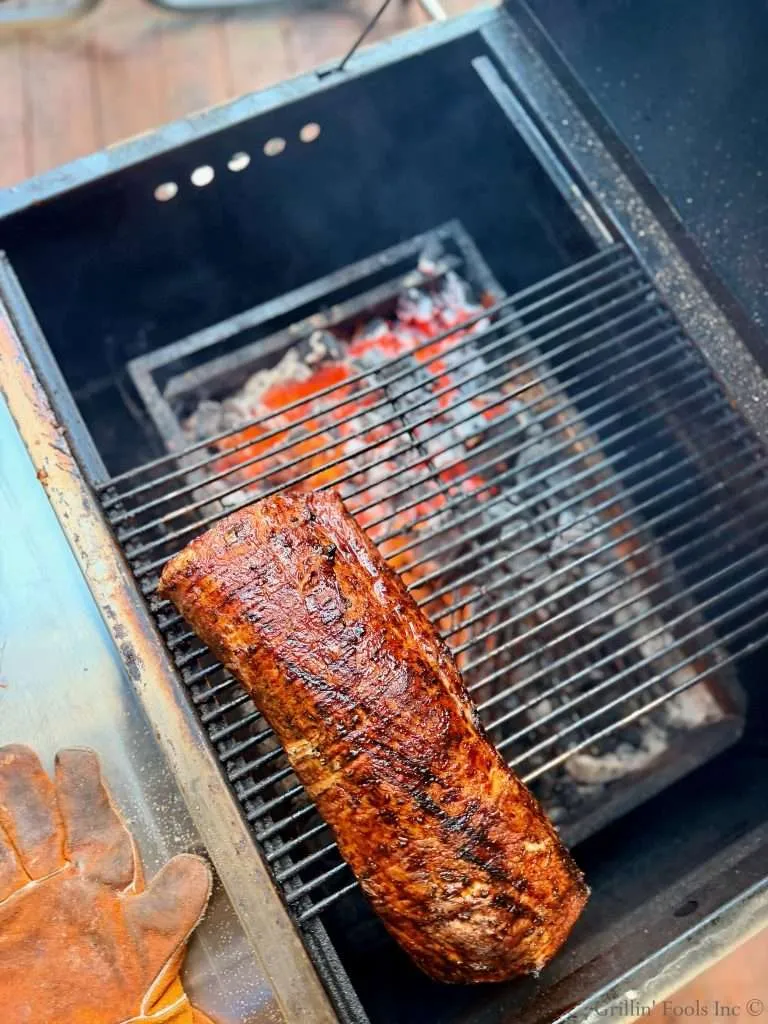
Better view
Keep in mind that this is a thick piece of pork. We want to char it all the way around, not just the top and bottom. What about the sides? Well, just hold it propped up on the sides over the coals:

Char the sides.
And the other side
When I got done searing this monster, due to the sheer size it was still only about 139F so I put it back to the indirect side of the grill and closed the lid till it hit 146F:
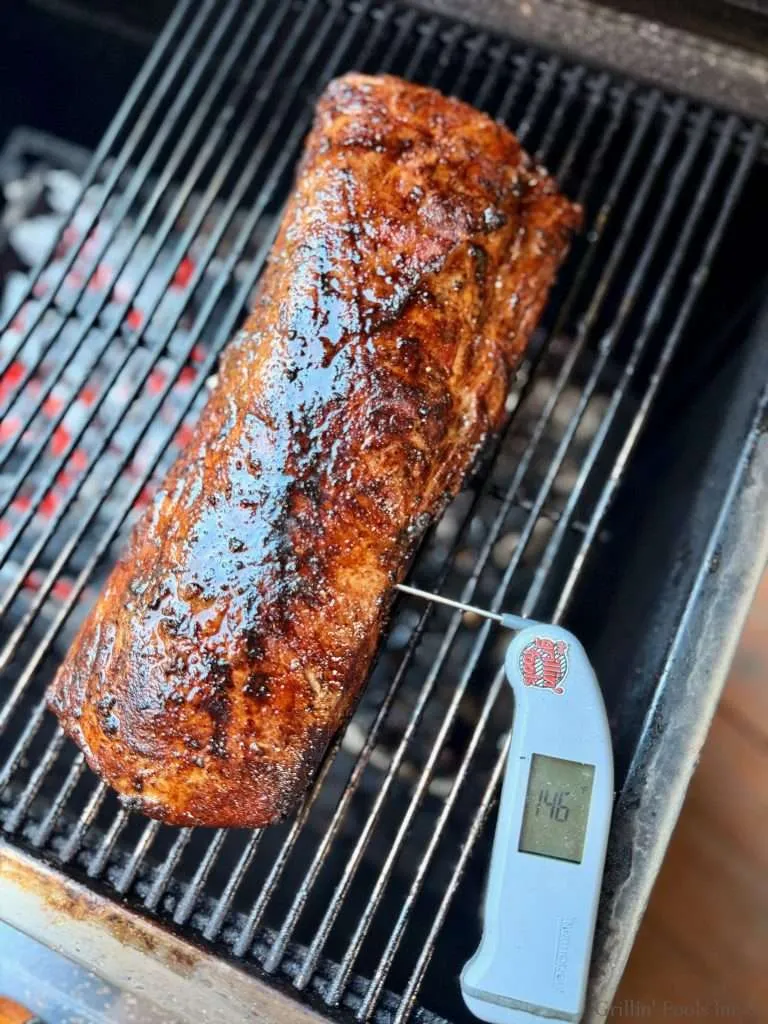
Ready to rest before slicing
Off the grill and resting:
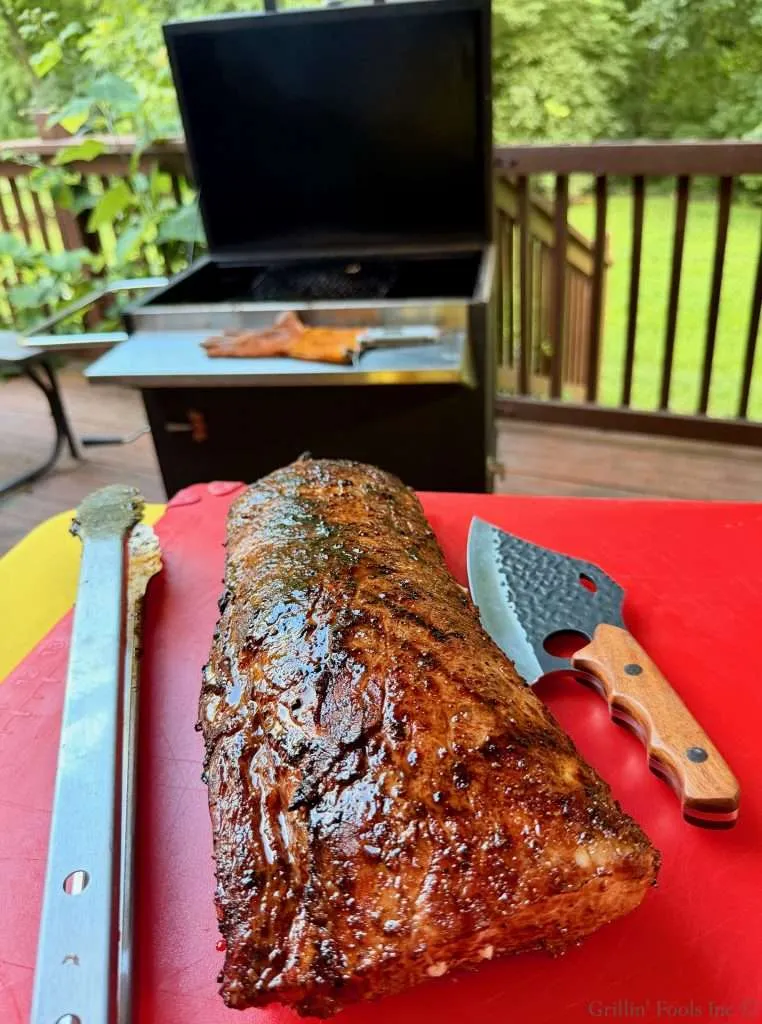
Resting
I’m not a big believer in resting steaks, but roasts like pork shoulder or brisket or pork loin here, need a few minutes rest. This one got about 20 minutes while I prepped the sides for dinner. Carryover cooking is a thing as you are about to see. Had I cut into it after maybe 10 minutes, it still would’ve been a little pink. But with the extra time resting, the roast went past pink, which is fine as most people prefer it that way. PLUS, with the extra liquid infused from the brining process, we still have super juicy and ultra tasty pork
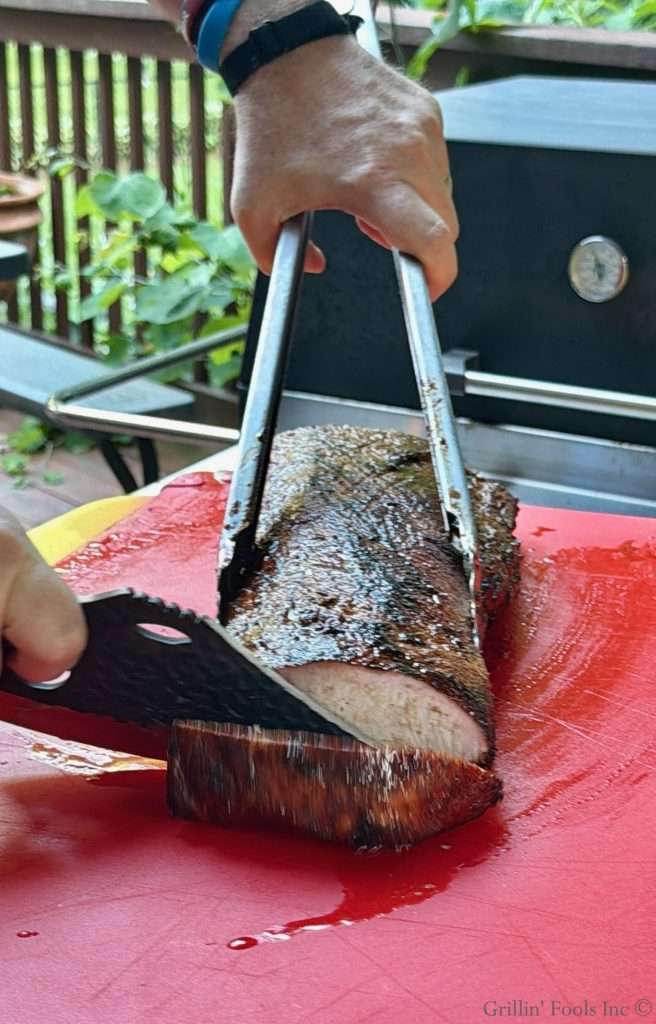
Carving

More juicy shots
Remember that last 1/2 teaspoon of seasoning I told you to pull back. Now’s the time for that.
The outside of the pork loin is well seasoned, infused with smoke and nicely charred. But the inside is a little bland. Give it a dusting:

Dusted with the extra BBQ Rub
But what if you need to cook it inside for whatever reason? That’s not hard at all. You won’t get the smoke flavor but it will still taste fantastic.
Oven Cooked Pork Roast after Brining
In order to achieve outstanding results inside, simply place the pork roast, cooling rack and all, on a lipped baking sheet and put it into an unlit oven. Turn the oven up to 250F and check the internal temp after about an hour. Take the roast to 135F then pull it out of the oven and grab one of those counter top griddles. Have that thing ripping hot and sear the pork roast all the way around and the ends. Once the roast is browned all the way around, it will be close to the magic 145F. If it’s a little short, place back into the oven till it reaches your desired doneness.

MmmmmmMmmmmm
Grilled Pork Loin Recap
I sliced the pork thick like chops and thin like say at a carving station at a high-end buffet. Either way the pork was uber tender and super juicy. And I warmed some slices up the next day in a skillet and they were still ultra juicy. HUGE fan of brining and using mayo or aioli as a binder, and of the reverse-sear method to cook it. And not just me, but my four kids, wife and even the battle axe.
If you have any questions or comments about brining or the reverse sear, feel free to leave them below or send me an email.
Also, if you could leave us a great review with lots of stars ⭐️⭐️⭐️⭐️⭐️ that would be most appreciated!
Additionally, you can follow us on our GrillinFools Facebook, Instagram, Pinterest, Twitter/X and YouTube feeds
Recipe Card:
Print
Grilled Pork Loin after Brining
Grilled Pork Loin after Brining: A pork loin, brined in juice before being smoked indirect until 130F. We finish with a hot sear to bring the pork to 145F
Course Entree, Main Course, Pork Loin Roast, Pork Roast
Cuisine American, American Fare, Grilling, Pork
Keyword Aioli, Barbecue, BBQ, BBQ Rub, BBQ Seasoning, Binder, Brine, Brined, Brining, Charcoal, Garlic Aioli, Grill, Grilling, Indirect Grilling, Juicy, Mayo, Mayonnaise, Pork, Pork Loin, Pork Loin Roast, Pork Roast, reverse sear, Reverse Sear Method, reverse seared, Super Juicy, Two Zone Grilling
Prep Time 15 minutes minutes
Cook Time 1 hour hour 30 minutes minutes
Resting Time 10 minutes minutes
- 1 Pork Loin Between 3-5 pounds
- 2 cups Fruit juice or cider Non citrus juice
- 2 tablespoons Salt
- ¼ cup Mayonnaise for a binder Substitute garlic aioli
- ¼ cup Your favorite BBQ seasoning (We used Meat Church Honey Hog) Reserve 1/2 teaspoon for after slicing
Place the pork loin in the plastic bag.
Pour the fruit juice or cider into a measuring bowl and add the salt. Stir thoroughly until all the salt is dissolved. Pour the brining liquid over the pork loin, seal the bag and place in the fridge for 2-12 hours
Remove the pork loin from the fridge and the brine and pat dry with paper towels to remove any excess brine. Place the pork loin on the cookie cooling rack and slather with the mayonnaise binder (or garlic aioli) and then season the top and the ends. Flip over and season the bottom and head out to prepare the grill.
Set up the grill for indirect or two-zone grilling with coals on one side and no coals on the other. Target temperature inside the grill is 250F. Drop a chunk of smoke wood on the hot coals and place the pork loin on the side with no direct heat. Close the lid and enjoy a cold beverage.
After 45-60 minutes, rotate the pork loin 180 degrees so the outside of the pork is now facing the fire to ensure even cooking.
Once the pork loin reaches 130F-135F, place it over the hot coals and sear not just the top and bottom, but the sides and ends as well. Once the outside is charred nicely, the pork roast should be close to 145F. If it is still short, or you want to cook it a little longer because you prefer it that way, place the loin back over the side with no direct heat, close the lid and allow it to cook indirect until it hits your desired doneness.
Once it reaches your desired doneness, remove from the grill and allow it to rest for about 10 minutes. Finally, slice and dust with the remaining seasoning. Serve and enjoy.
The post Grilled Pork Loin after Brining first appeared on GrillinFools.
