Chicken wings are arguably the ultimate “Egghead” food. They are versatile, easy to share, and they take on the smoke of the Big Green Egg perfectly. While I have cooked countless variations over the years, I keep coming back to this specific recipe for Honey Sriracha Chicken Wings. It hits every single note you want in a great wing because it is sweet, tangy, and carries just enough heat to keep things interesting.
Since I first started making these, I have refined my process to ensure the skin is perfectly crispy every single time. There is nothing worse than a rubbery wing, so we are going to focus on the technique that delivers that satisfying crunch without needing a deep fryer. The sauce is a simple but powerful combination that glazes the wings into a beautiful mahogany color.
So, let’s get the charcoal lit and the temperature stabilized. Grab an ice-cold Singha beer and enjoy this updated guide to making the best Honey Sriracha Chicken Wings on your Big Green Egg.
Step 1: The Dry Brine (The Secret to Crispy Skin)
The biggest lesson I have learned since the original 2016 post is that moisture is the enemy of crispiness. If you want that perfect “snap” when you bite into a wing, you have to prep them well before they ever touch the grill.
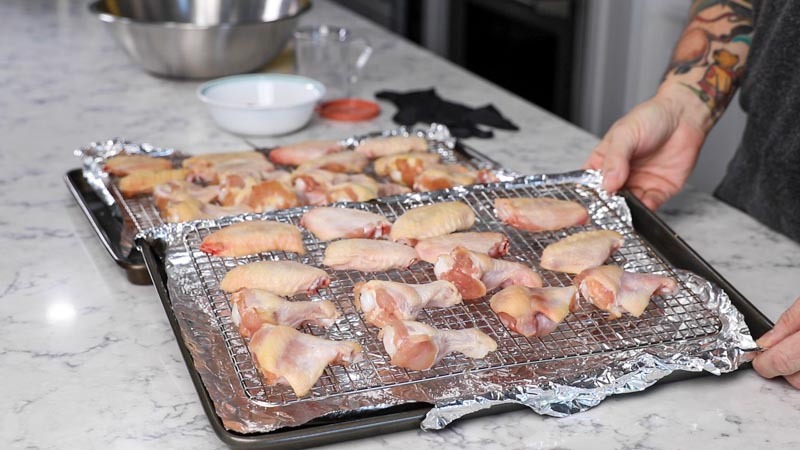
I now start by patting the wings completely dry with paper towels. Once they are dry, I toss them in a mixture of Kosher salt and a little bit of baking powder (not baking soda). Use about 1 teaspoon of baking powder per pound of wings. The baking powder raises the pH level of the skin, which breaks down the proteins and allows it to crisp up and brown much faster.
Once coated, place the wings on a wire rack set over a baking sheet and put them in the fridge, uncovered. I recommend letting them sit for at least 4 hours, but overnight is even better. This “cold air” treatment dries out the exterior of the skin while the salt penetrates deep into the meat to keep it juicy. By the time you are ready to light the Big Green Egg, the skin will look slightly translucent and feel like parchment paper. That is exactly what you want.
Step 2: Seasoning the Chicken Wings
After the dry brine has done its work in the fridge, your wings are ready for the grill. Because the salt in the brine has already seasoned the meat from the inside out, you must be careful with your choice of rub. You want to avoid “salt-stacking,” which can make the final result too salty.
For these wings, I prefer a savory base that provides a nice color and a subtle aromatic layer. Since the Honey Sriracha sauce is the star of the show, the dry rub should act as a supporting player.
Rub Options for Your Wings
If you want to use a high-quality store-bought rub or mix your own “Buddha-style” blend, here are the best paths to take:
- Commercial Options: Look for a rub that emphasizes garlic and onion over salt. Lane’s BBQ Q-Nami is the top pick here because its ginger and star anise notes perfectly complement the Sriracha. If you want a more “Asian-fusion” vibe to match the Sriracha, Meat Church Holy Voodoo has a great savory profile with a hint of jalapeño that works beautifully here.
- The DIY “Wing Base” Rub: If you want to make your own at home, this is my go-to ratio for wings that have already been dry-brined:
- 2 tablespoons Smoked Paprika (for that deep red color)
- 1 tablespoon Granulated Garlic
- 1 tablespoon Onion Powder
- 1 teaspoon Cracked Black Pepper
- 1/2 teaspoon Ground Ginger (to hint at the Asian flavors in the sauce)
Application Tip
Since we spent hours drying out that skin in the fridge, do not use an oil binder. Applying oil now would simply re-moisturize the skin and prevent it from crisping up. The seasoning will stick just fine to the dry-brined skin. Dust them lightly and evenly on both sides right before you head to the grill.
Step 3: The Big Green Egg Setup
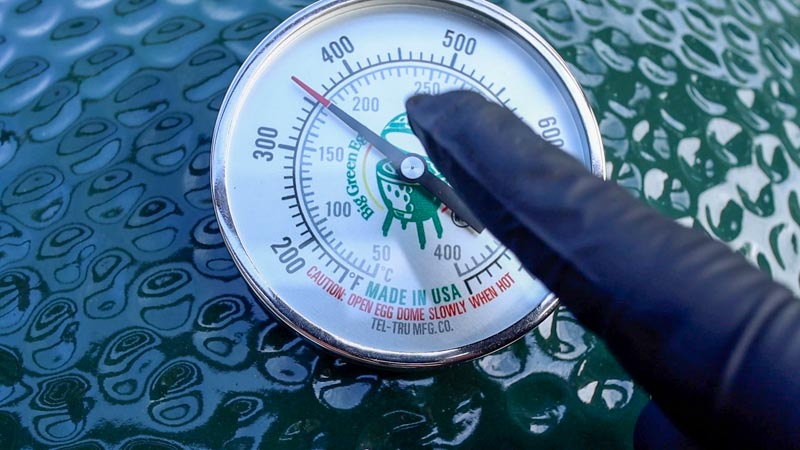
Setting up the Big Green Egg correctly is the difference between a soggy wing and a crispy one. For this cook, we are going indirect at 350°F. This temperature is the “sweet spot” for wings. It is hot enough to render the fat under the skin and create a crunch, but not so hot that the honey in the sauce will burn instantly when we glaze them later.
To get started, load your Egg with high-quality lump charcoal and light it. Once the coals are established, insert the convEGGtor in the legs-up position. I recommend placing a drip pan on the convEGGtor to catch any rendering chicken fat. This keeps your grill clean and prevents acrid “grease smoke” from affecting the flavor of the meat.
Wood Choice and Airflow
- Wood Selection: For Honey Sriracha wings, I prefer a lighter fruitwood like Apple or Cherry. These woods provide a subtle sweetness that complements the Sriracha without overpowering the delicate flavor of the chicken. One or two medium-sized chunks are all you need.
- Stabilizing the Temp: Bring the Egg up to 350°F slowly. Once the dome thermometer is steady and the smoke running out of the top vent is thin and clear, you are ready to cook.
- The Grid: Place your stainless steel grid on top of the convEGGtor. Ensure the grid is clean so the wings do not stick when it comes time to flip or move them.
Step 4: Crafting the Honey Sriracha Glaze
While the Big Green Egg is preheating and stabilizing, it is time to build the glaze. This sauce is the soul of the recipe, and the goal is to create a balance between the sharp heat of the chili, the floral sweetness of the honey, and the rich fat of the butter.
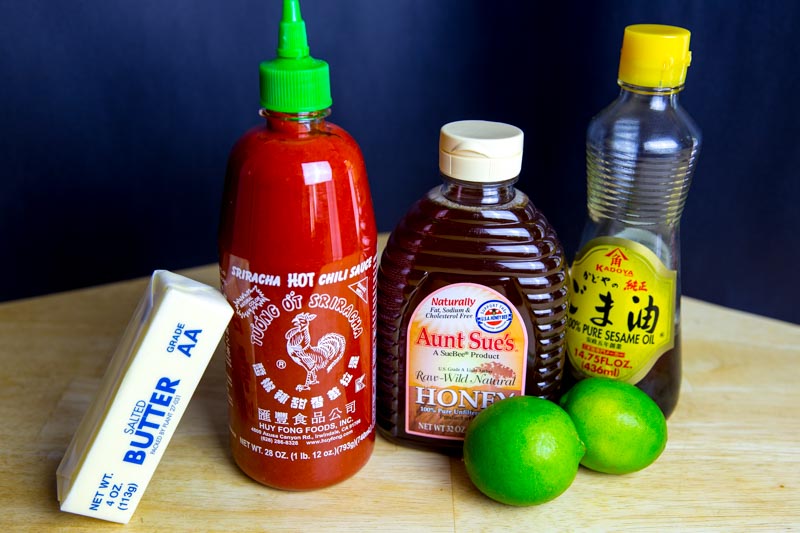
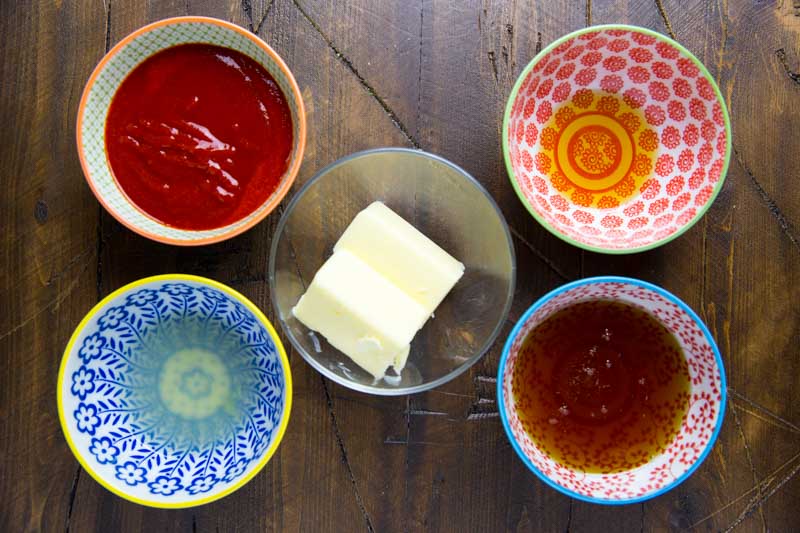
To make the glaze, combine the following in a small saucepan over low heat:
- 1 stick of Butter: This provides the richness and the “velvet” texture that helps the sauce coat the wings evenly.
- 2/3 cup Sriracha: This is your primary heat source and gives the sauce its signature bright red color.
- 1/2 cup Honey: The sugar in the honey balances the vinegar in the Sriracha and allows the sauce to caramelize on the grill.
- 1 tbsp Sesame Oil: This adds an essential layer of toasted, nutty aroma that elevates the “Asian-fusion” profile.
- Fresh Lime Juice: Use the juice of half a lime to add a hit of acidity. This brightens the entire flavor profile and cuts through the richness of the butter.
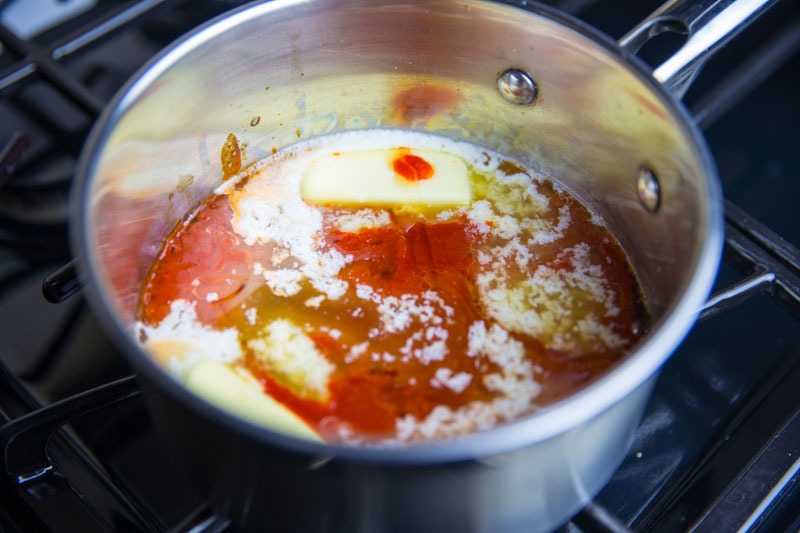
Simmer and Emulsify
Gently whisk the ingredients together until the butter is completely melted and the sauce is smooth. You do not want to bring this to a rolling boil; a gentle simmer is all you need to marry the flavors together.
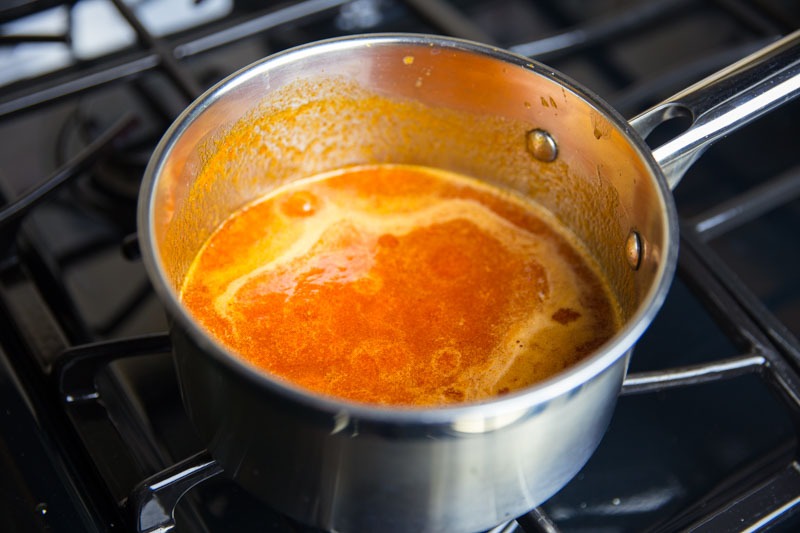
Once the sauce is uniform, remove it from the heat and set it aside. As it cools slightly, it will thicken into a perfect lacquer. If you find the sauce is too thick, you can add another squeeze of lime juice or a splash of water to reach your desired consistency.
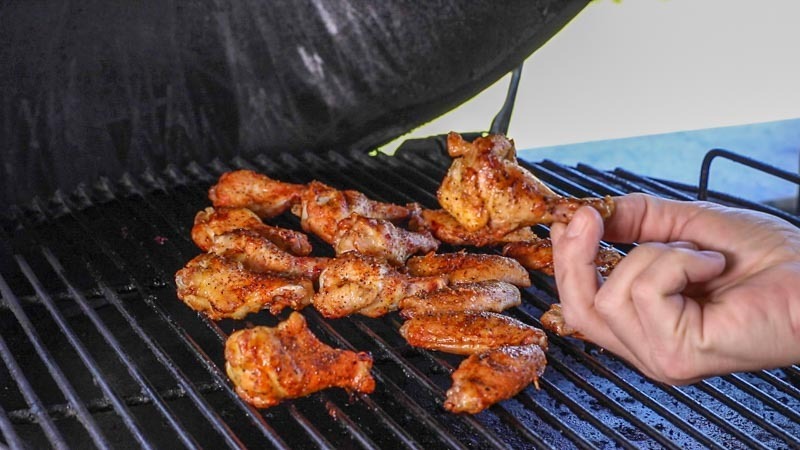
Step 5: Cook the Chicken Wings
With the Big Green Egg stabilized at 350°F, place the wings on the grid. Spread them out evenly to ensure the heat can circulate around each piece; this airflow is vital for achieving a uniform crunch.
Let the wings cook for approximately 45 to 60 minutes. About halfway through the process, flip the wings to ensure the skin crisps up on both sides. While many people pull chicken at 165°F, wings are much more satisfying when cooked to an internal temperature of 185°F to 190°F. This higher temperature allows the fat to fully render and the connective tissue to break down, resulting in a wing that is juicy on the inside and crispy on the outside.

Once the wings have reached their target temperature and the skin is golden brown, it is time to apply the Honey Sriracha glaze.
Monitor Closely: Keep the dome open or watch through the vent during these final minutes. The honey can move from caramelized to charred quickly, so pull them as soon as the sauce is bubbling and beautiful.
The Toss: Remove the wings from the Egg and place them into a large bowl. Pour the warm glaze over the wings and toss them until every piece is thoroughly coated in the sticky, red sauce.
The Set: Return the sauced wings to the grill for an additional 5 to 10 minutes. This final stage is essential because it “sets” the glaze. The heat allows the sugars in the honey and the butter in the sauce to caramelize, creating a tacky, professional-grade finish.
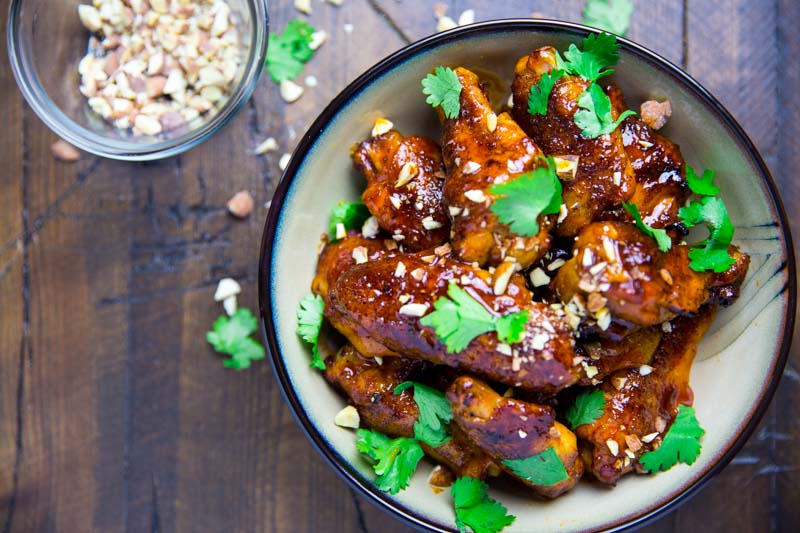
The Final Result: Plating and Serving
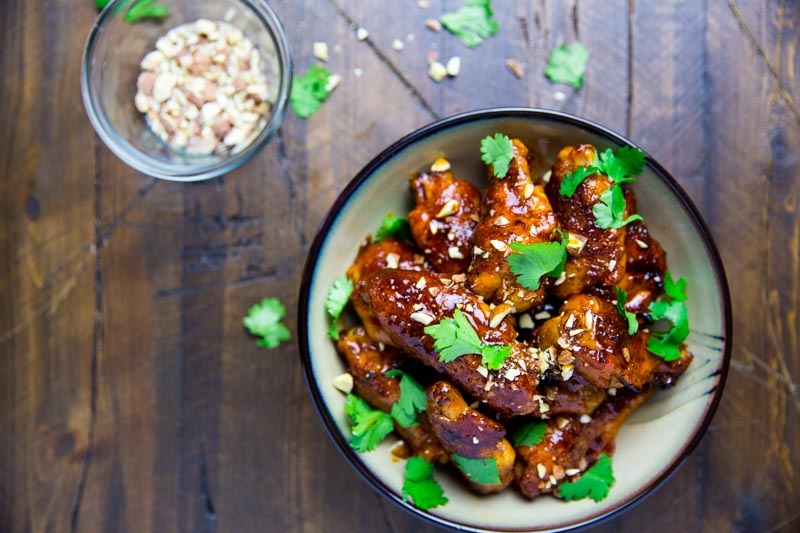
Once the glaze has set into a beautiful, sticky lacquer, remove the wings from the Big Green Egg. The color should be a vibrant, deep mahogany that practically glows.
To serve, pile the wings high on a large platter. I like to finish them with a few garnishes that provide a professional contrast to the sweet heat of the sauce. A handful of chopped peanuts adds a satisfying, salty crunch that pairs perfectly with the honey, while fresh cilantro provides a bright, herbaceous finish.
For the full experience, serve these with plenty of napkins and an ice-cold Singha beer. The crisp lager is the perfect companion to the “slow burn” of the Sriracha. These wings are always a crowd-pleaser, and the updated dry brine technique ensures they stay crispy even under that thick, delicious glaze.

Print
Honey Sriracha Chicken Wings: Crispy Big Green Egg Wings
This recipe for Honey Sriracha Chicken Wings: Crispy Big Green Egg Wings is fantastic. The perfect balance between heat and sweat this recipe is sure to please.
Course Main Course, Poultry
Cuisine Asian, BBQ
Keyword Big Green Egg, chicken wings
Prep Time 15 minutes minutes
Cook Time 1 hour hour
Total Time 1 hour hour 15 minutes minutes
Servings 4
Author The BBQ Buddha
Chicken Wing Ingredients:
- 3-4 pounds Chicken Wings
- 1 tbsp Kosher Salt
- 1 tbsp Baking Powder
- 1/2 cup Savory BBQ rub e.g., Lane's BBQ Qnami or Meat Church Holy Voodoo
Honey Sriracha Glaze Ingredients:
- 1 stick Butter
- 2/3 cup Sriracha
- 1/2 cup Honey
- 1 tbsp Sesame oil
- 1 Lime juiced
- 1/4 cup Cilantro chopped garnish
- 1/4 cup Roasted peanuts chopped for garnish
The Dry Brine: Pat the wings completely dry with paper towels. Toss them in a large bowl with the salt and baking powder. Place the wings on a wire rack set over a baking sheet and refrigerate uncovered for at least 4 hours (overnight is best) to dry out the skin.
The Seasoning: Remove the wings from the fridge. Dust them lightly and evenly with your BBQ rub. Do not use an oil binder, as the dry-brined skin is ready to go as is.
The BGE Setup: Prepare your Big Green Egg for indirect cooking using the convEGGtor at 350°F. Add 1 or 2 chunks of Apple or Cherry wood for a light smoke profile.
The Cook: Place the wings on the grid and close the dome. Roast for 45 to 60 minutes, flipping once halfway through. Pull the wings when they reach an internal temperature of 185°F to 190°F for the best texture.
The Glaze: While the wings are cooking, combine the butter, Sriracha, honey, sesame oil, and lime juice in a small saucepan. Simmer over low heat until the butter is melted and the sauce is smooth.
The Toss and Set: Remove the wings from the Egg and toss them in a large bowl with the warm glaze. Return the coated wings to the grill for 5 to 10 minutes to allow the sauce to caramelize and "set" into a tacky lacquer.
Serve: Remove from the grill and garnish immediately with chopped peanuts and fresh cilantro. Serve with sticky rice or alongside a cold beer.
The post Honey Sriracha Chicken Wings: Crispy Big Green Egg Wings appeared first on The BBQ Buddha.
