Cleaning your pellet grill is hands-down the worst job in barbecue, but it has to be done if you want to avoid flare-ups, wild temperature swings, or grease fires.
In this guide, I’ll walk you through the exact process I use to bring my grills back from the brink, covering everything from routine maintenance to a full teardown and deep clean.
How often should you clean your pellet grill?
There are three types of pellet grill cleaning, depending on how often you cook and how dirty things get:
- Light Clean (every 2–3 cooks): Scrape the grates, empty the fire pot, and check the grease tray.
- Deep Clean (every few months): Remove and scrub grates and drip pan, clean out ash and grease buildup, no chemicals needed.
- Full Tear-Down (1–2 times a year): Soak and degrease all internal parts, deep clean the chamber, and finish with a burn-off.
If you want more step-by-step detail or prefer to watch the process in action, this video covers the exact process I used on my Traeger Timberline XL and Lone Star Grillz pits after smoking over 500 lbs of pork for an event I was catering.
The cleaning tools I recommend
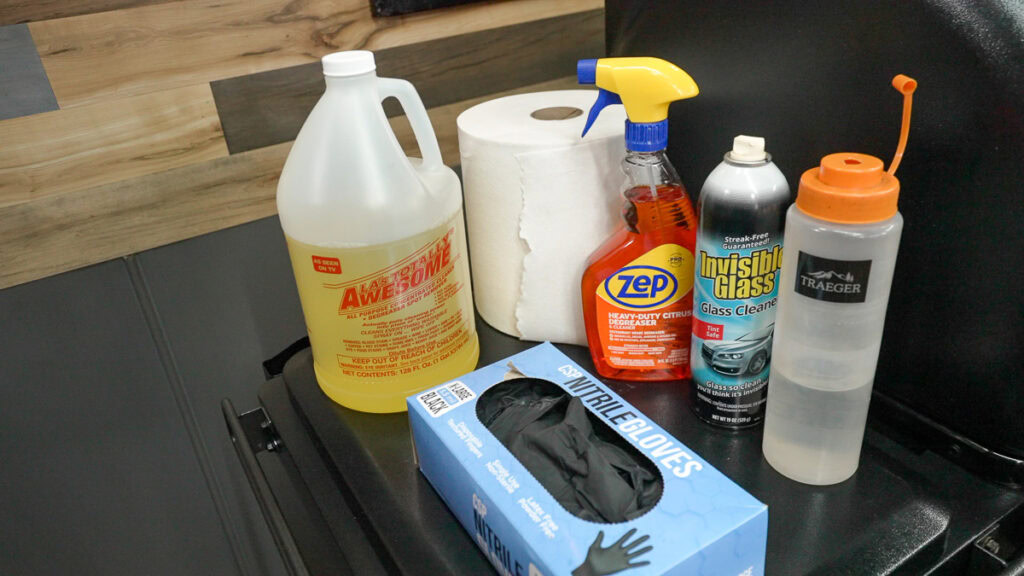
To get the job done right, here are the tools and products I use during every level of pellet grill cleaning:
- Wire grill brush
- Plastic scraper
- Putty knife (optional, for heavy buildup)
- Shop vac or ash vacuum
- Nitrile gloves
- Large plastic tub (for soaking grates and parts)
- LA’s Totally Awesome degreaser (best for soaking grates and internal parts)
- Zep Citrus Degreaser (for spraying down the inside and outside of the grill for wipe-down cleaning)
- Invisible Glass cleaner (for controllers or glass surfaces)
- Paper towel roll
- Cooking spray (like Pam, for re-seasoning)
How to do a maintenance clean on your pellet smoker
Regular pellet grill maintenance is quick and easy if you stay on top of it. It should be done every 2-3 cooks to prevent bigger problems like grease fires or poor temperature control. It takes 10–15 minutes and keeps your grill running smoothly between deep cleans.
Here’s how to do it:
- Let the grill cool completely. Never clean while it’s hot. Make sure everything has cooled down before you start.
- Remove the cooking grates. Scrape off any food residue or stuck-on bits using a wire brush or scraper.
- Empty the drip tray and grease bucket. Check for buildup and wipe out any loose grease. If you use foil liners, now’s a good time to swap them out.
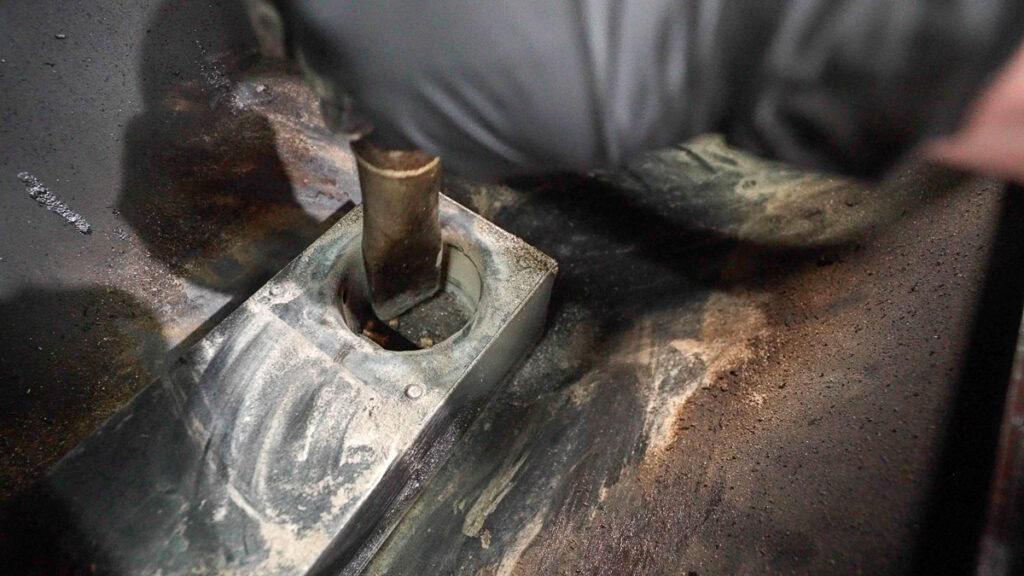
- Vacuum the fire pot and ash from the chamber. Use a shop vac or ash vacuum to remove leftover ash and debris. Focus on the fire pot and the surrounding area.
- Check for grease or buildup around the igniter and vent holes. Clear any blockages that might affect ignition or airflow.
- Wipe down the exterior. Use a damp cloth or a grill-safe cleaner to remove dust and grease from the outside surfaces.
That’s it. No chemicals or soaking required.
How to clean your grill grates
After a few long cooks, your grates will be coated with bits of charred meat, burnt sauce, and sticky fat baked in tight.
It might look seasoned, but it’s just buildup that will mess with airflow, stick to fresh food, and flare up when you don’t want it to.
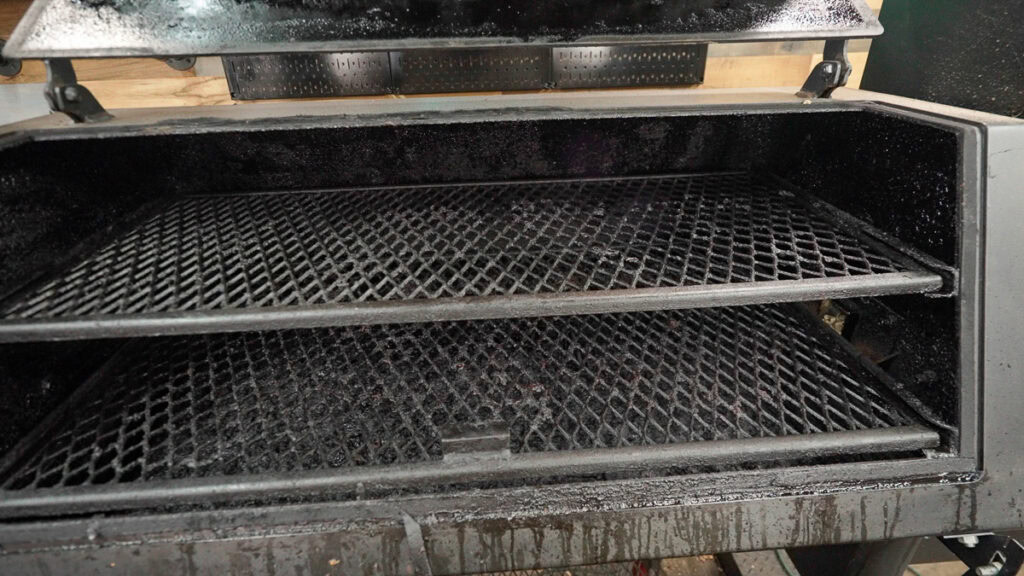
Trust me, those blackened bits clinging to the grates aren’t adding anything good to your BBQ.
Whether you’re doing a basic scrape-down or a full deep clean, here’s how to get your grill grates back in shape:
1. Remove the grates from the grill and scrape them down
If it’s just a quick clean, you can leave the grates on the grill, but when I’m doing a deep clean, I prefer to place the grates inside a large plastic tub to catch any debris.
Use a wire brush or scraper, and make sure to flip the grates and get the underside too, as this is where a lot of the worst buildup hides.
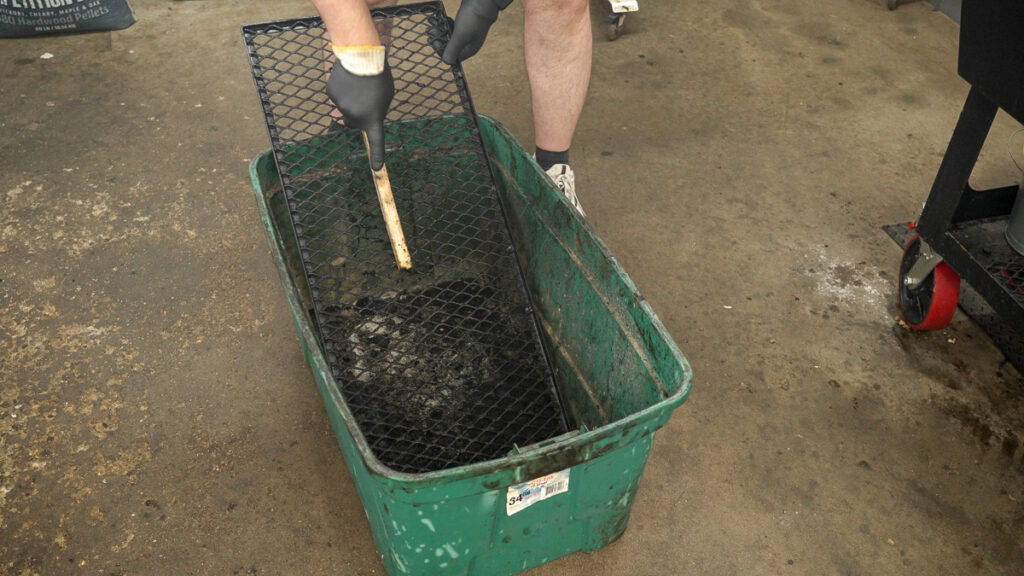
2. Soak for deep cleaning
For heavy buildup, soak the grates in hot water mixed with a degreaser like LA’s Totally Awesome. Let them sit overnight if needed, then scrub again to lift the remaining grease and grime.
3. Rinse and dry
Rinse the grates thoroughly with clean water, dry them completely with a towel, or leave them out in the sun.
4. Re-season if needed
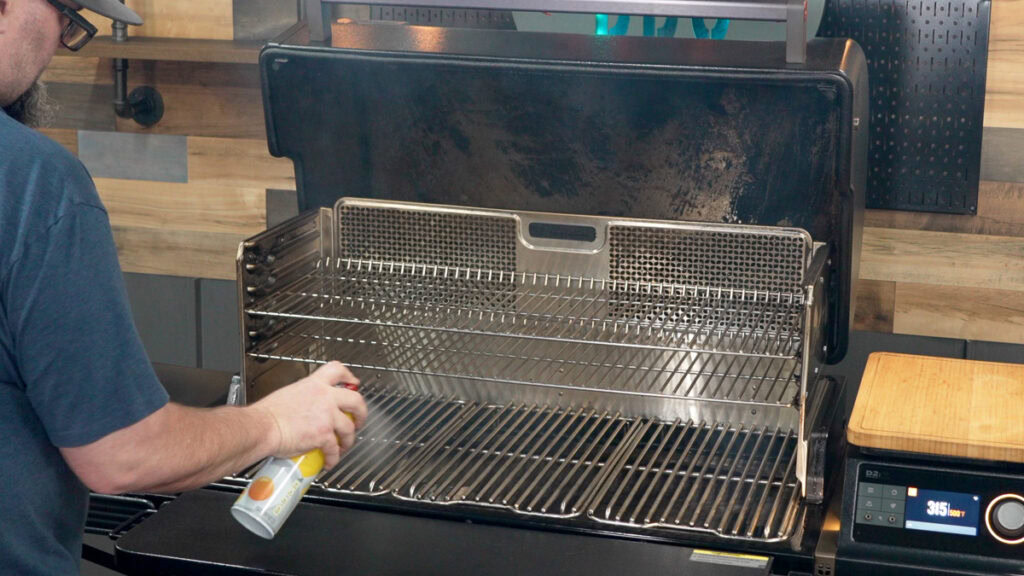
If you’ve soaked or degreased the grates, you’ll want to re-season them before cooking. Once completely dry, spray them with a light coat of cooking oil like Pam. Then fire up the grill to 350°F and let it run for an hour. After that, crank it up to 500°F and run it for another hour and a half.
How to Deep Clean the Inside of Your Pellet Grill
The maintenance steps above (vacuuming ash, checking the grease tray, and keeping your grates clean) will go a long way toward keeping your pellet grill running smoothly. But every few months, or after several long cooks, I like to go a step further with a proper deep clean.
Here’s how I tackle a deep clean without using any chemicals:
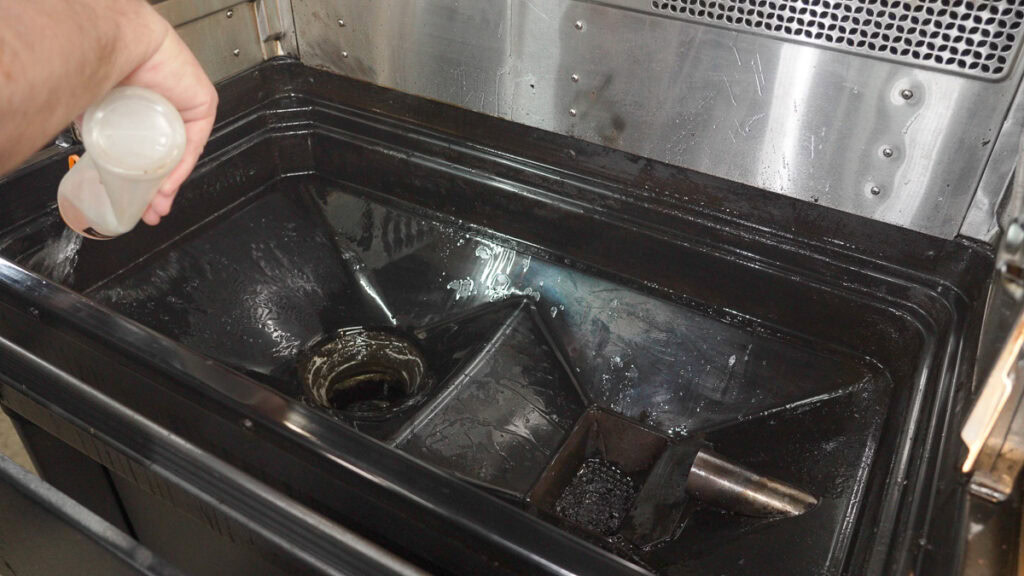
1. Start with the drip tray
Use a plastic scraper to remove the thick layer of fat and burnt-on buildup. This part will be ugly if it’s been a while since your last clean. Scrape off as much as possible before moving on.
If you prefer to wrap your drip tray with aluminum foil or the trays that the manufacturer sells, then you can simply replace that.
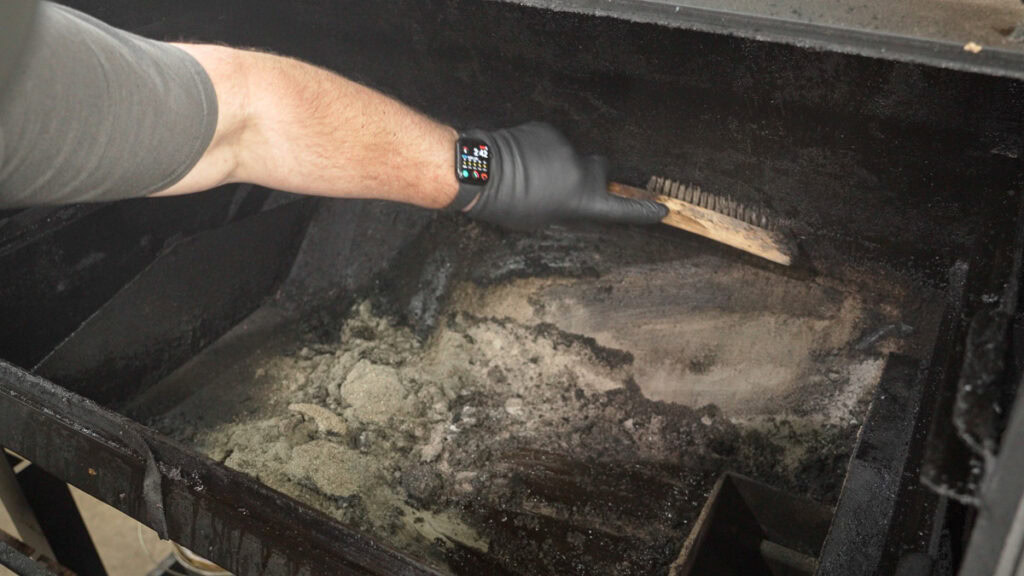
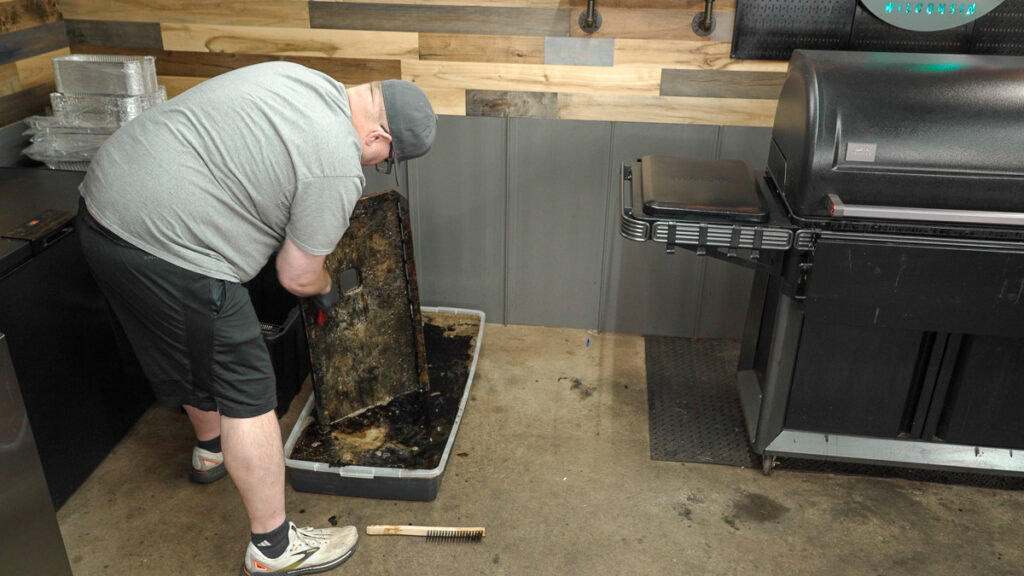
2. Clean the heat deflector and chamber
After the drip tray is out, lift out the heat deflector and give it a once-over with the scraper. This part takes a beating during long cooks and is usually loaded with crusted-on grease.
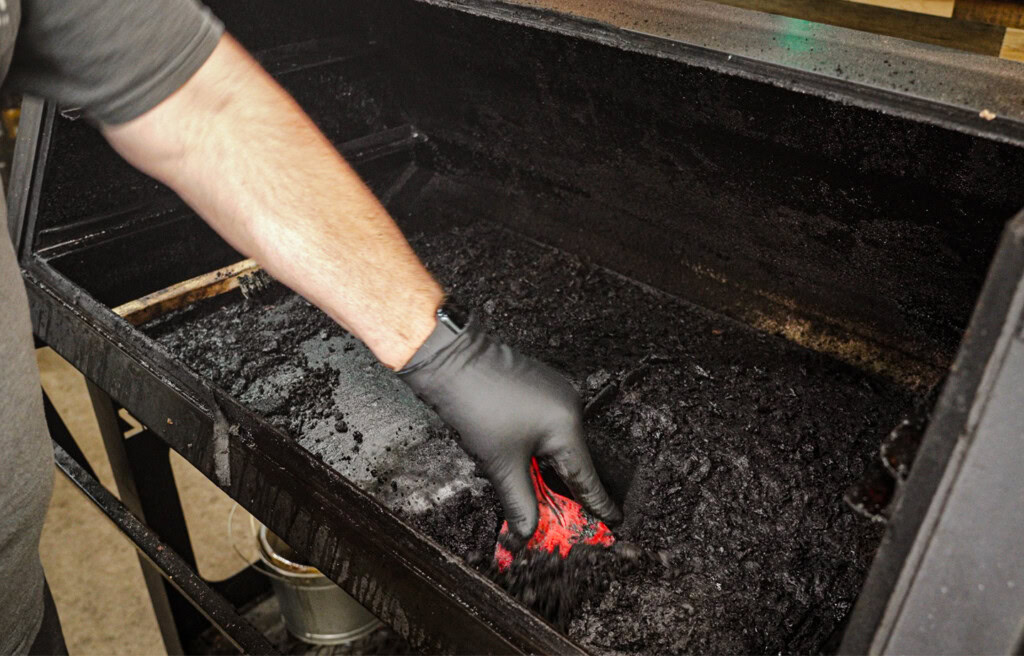
Use a wire brush to remove loose flakes from the lid and walls. Then, use your scraper to go after the base of the chamber. This is where all the ash, grease, and meat debris collects. Work gently if you’re cleaning a thinner box-store grill to avoid scratching the interior.
3. Vacuum everything out
Once the bulk is scraped up, vacuum out the fire pot and chamber using a shop vac or ash vacuum. If you notice your grill struggling to ignite, it’s probably because ash is blocking the igniter.
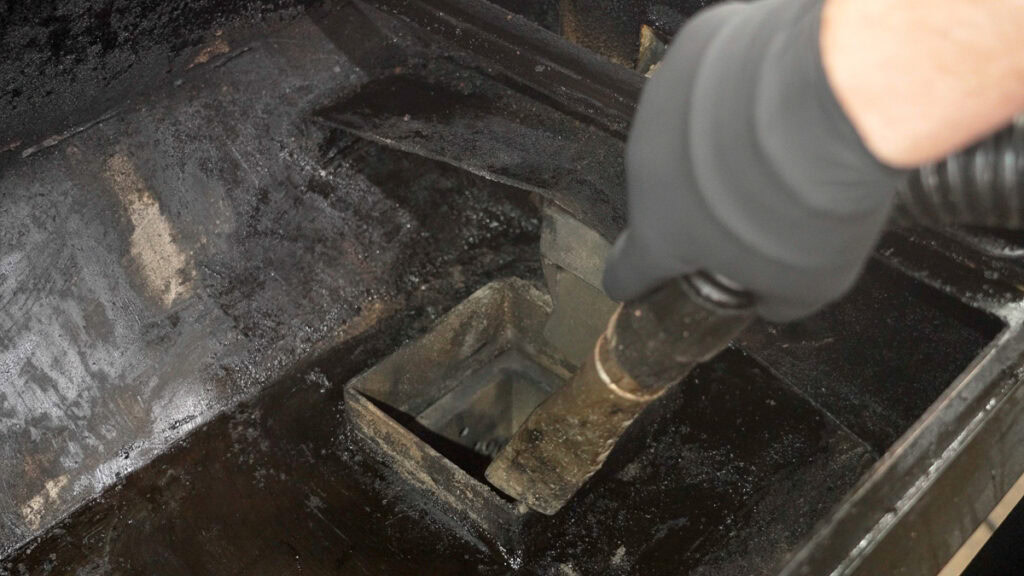
Dumping and clearing the fire pot usually solves it.
4. Wipe down the interior walls
Take some paper towel and give the chamber a final wipe to remove leftover dust and grease. No need for chemicals here, just remove as much residue as possible.
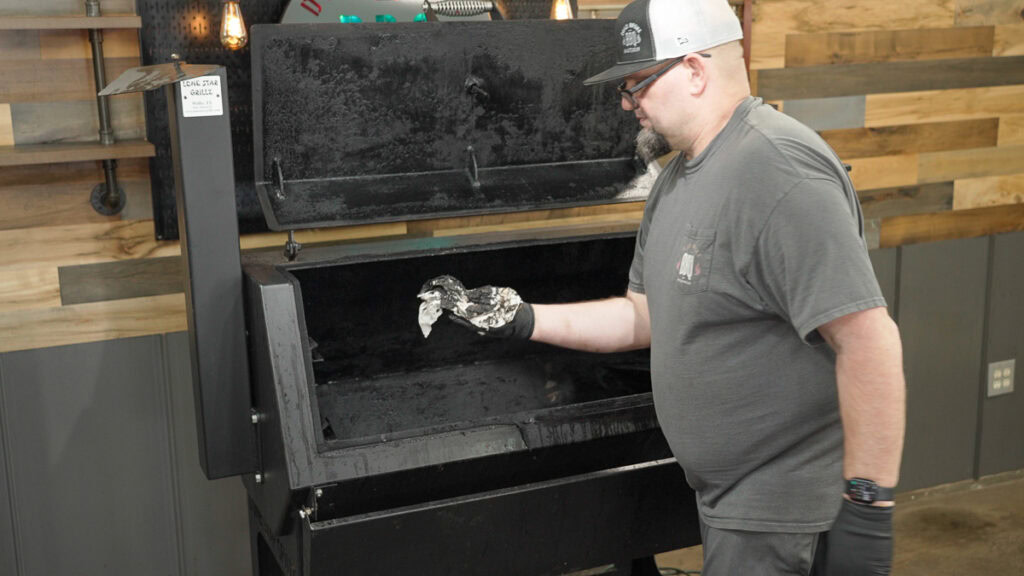
At this stage, the grill’s internals should be clean enough for a few more cooks. If you’re planning to do a full tear-down with degreasers and soaking, this is your halfway mark. If not, you’re almost ready to reassemble. Either way, you’ve just knocked out the messiest part of the job.
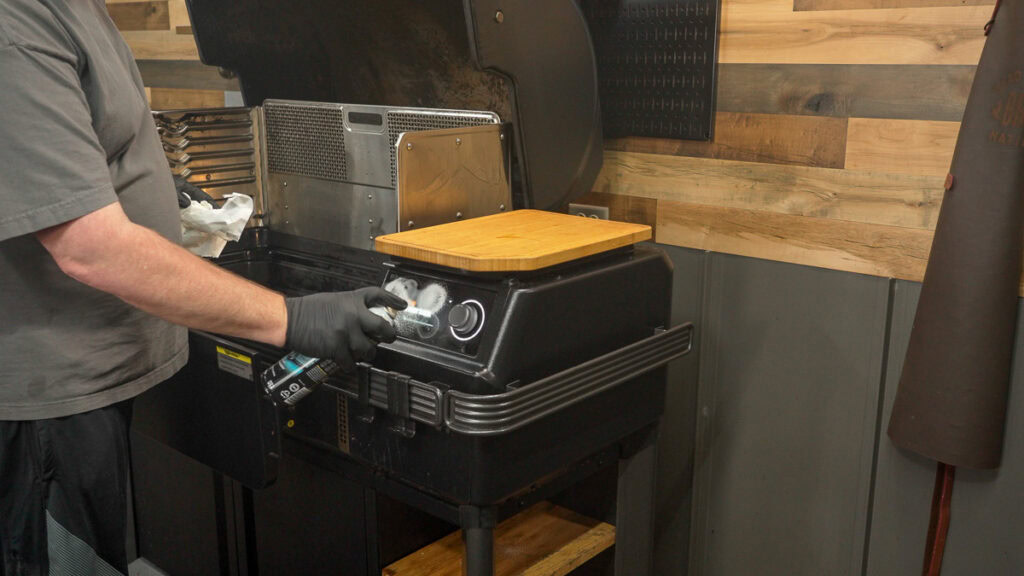
5. Clean the exterior
Before reassembling, take a few minutes to clean the outside of your grill. Spray it down with a degreaser like Zep Citrus, wipe away grease and smoke stains, then give it a quick rinse with water to remove any chemical residue.

It’s a small step, but it keeps your pit looking good and prevents buildup from getting worse.
At this stage, the inside and outside of your grill should be in solid shape. If you’re planning to do a full teardown and soak your parts, keep going. If not, you’re ready to reassemble and fire it back up.
How to Do a Full Tear-Down Deep Clean
If your grill has been through dozens of cooks or you’ve just finished a big job like we did with 500 lbs of pork, it’s time for a full tear-down. This is the deep, dirty clean where you soak your grates, degrease the cooking chamber, and restore the inside of the pit as close to new as it’s going to get.
1. Soak the grates and internal components
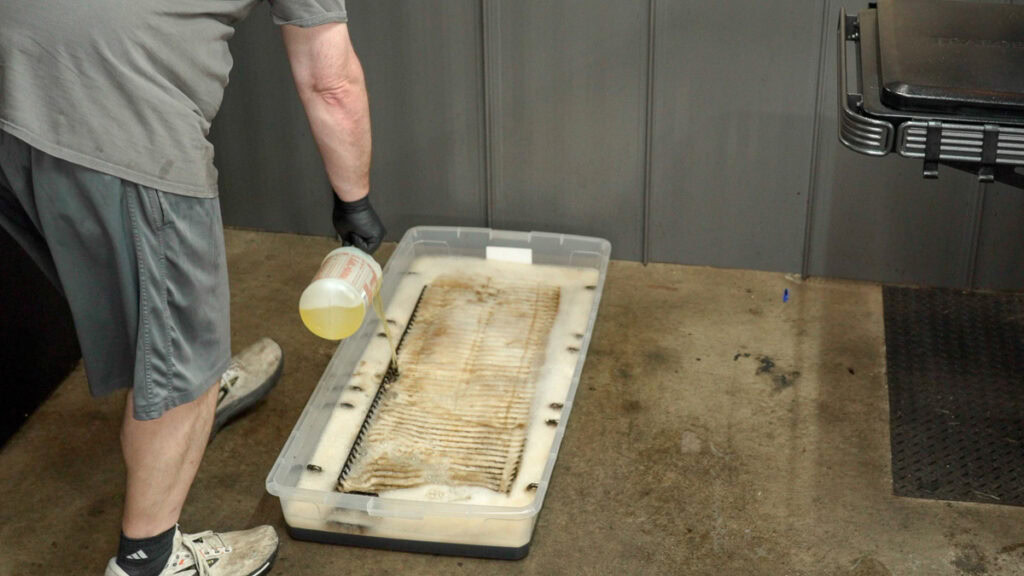
Start by removing all the grates, drip tray, and heat deflector from the grill. Place them in a large tub or bin that can handle soaking. I use LA’s Totally Awesome, a degreaser concentrate you can get cheap. I don’t measure, I just use the “glug glug gluggity glug” method and add hot water until everything’s submerged.
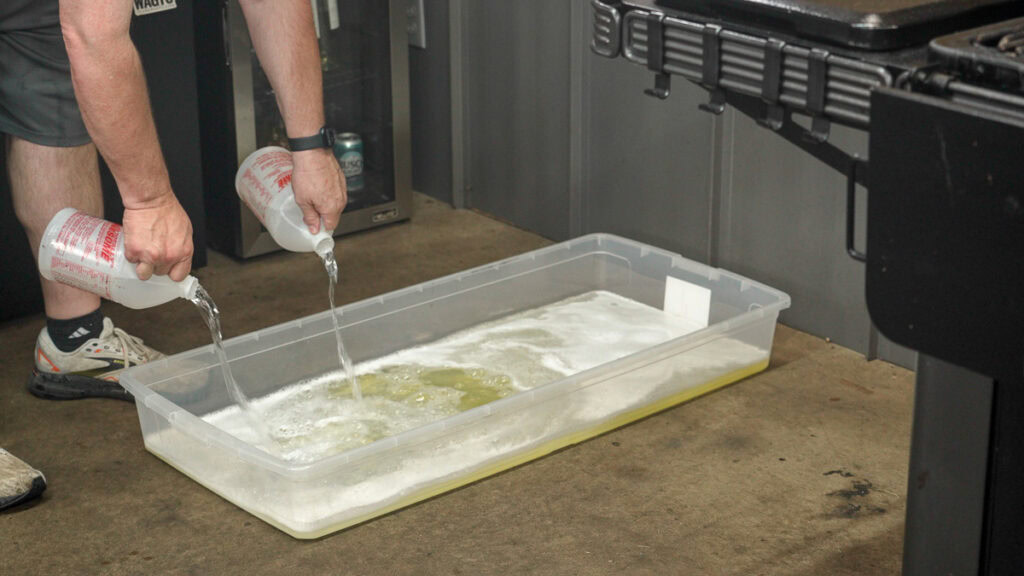
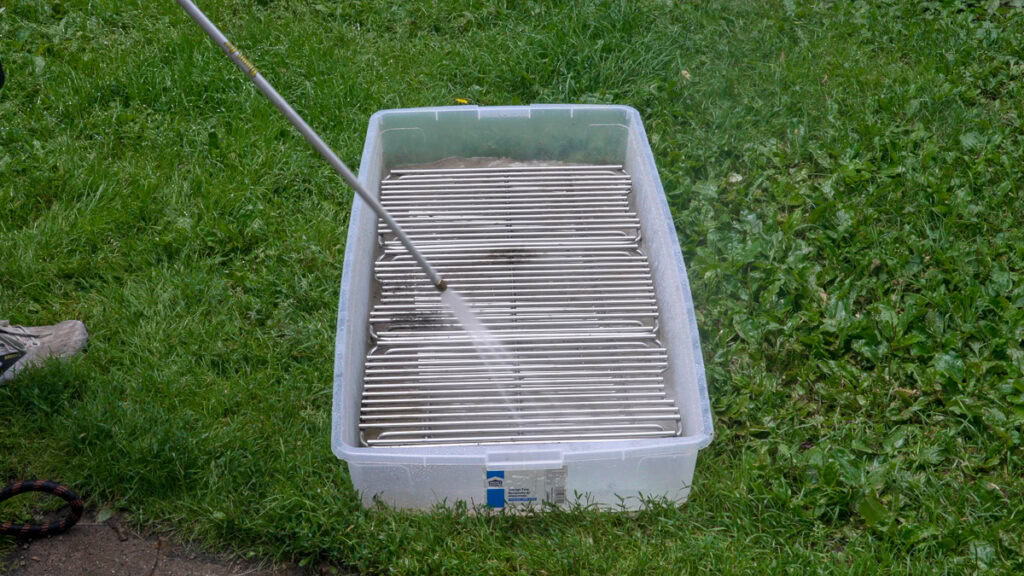
Let the grates soak for at least a day. After that, rinse them well and let them soak again in clean water for a few hours to flush out any leftover cleaner.
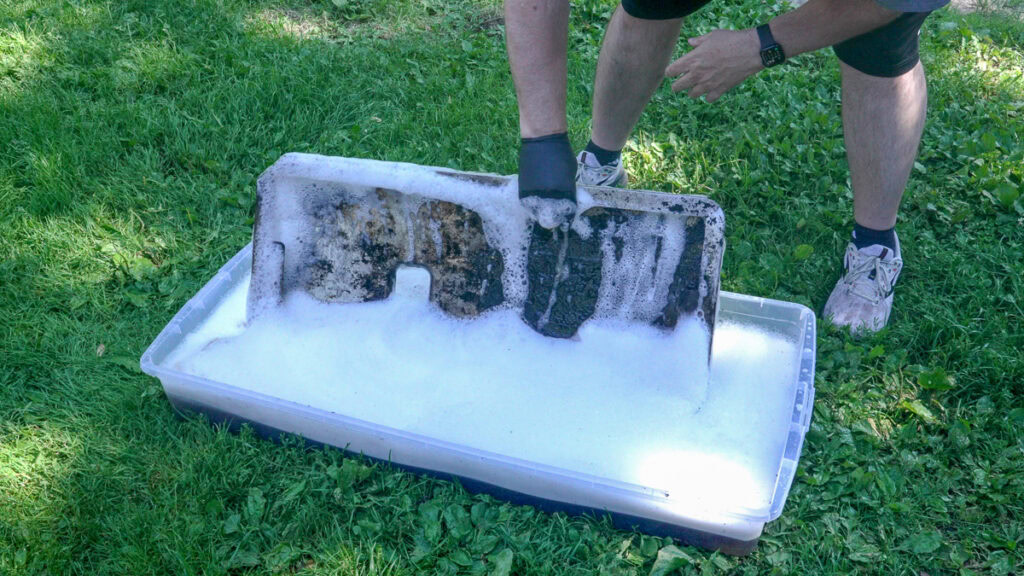
The drip tray and heat deflector usually need more time. I’ve left them soaking for two full days when the grease was really baked in.
2. Scrub and polish after soaking.
Once everything’s soaked and rinsed, let it dry fully either air-dry or towel off. Then go back over the parts with a wire brush (a drill attachment works great) to remove any leftover carbon and polish up the surface.
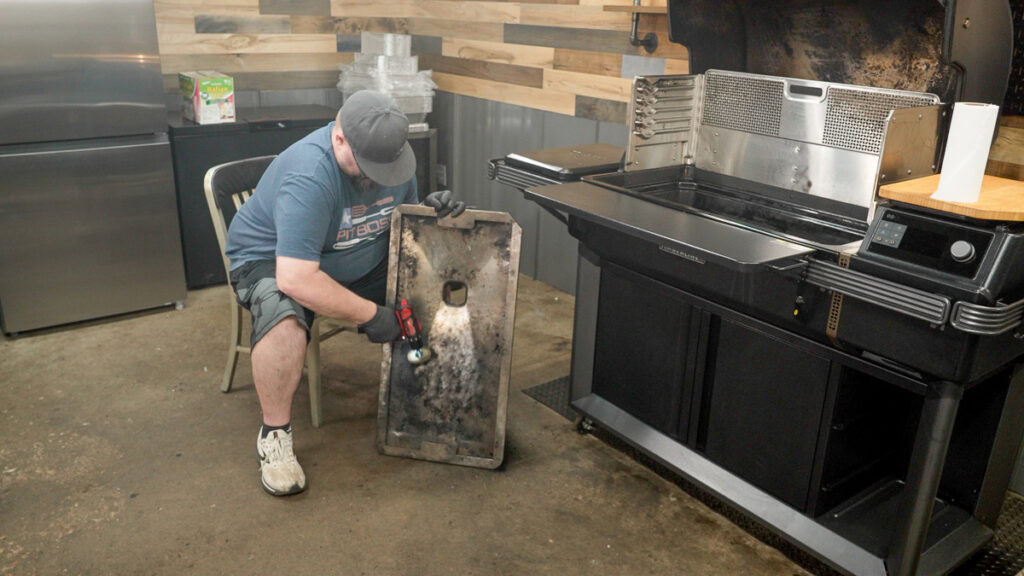
Just be careful. Those brushes can take off fast if you catch an edge, so keep a firm grip and steady angle.
3. Degrease the inside of the chamber
Spray the inside of the grill chamber with a heavy-duty degreaser. Let it sit for a minute, then wipe or scrape off the buildup. If the pit is heavily coated, you may need to repeat this a few times. My Timberline took five full passes before it looked close to clean.
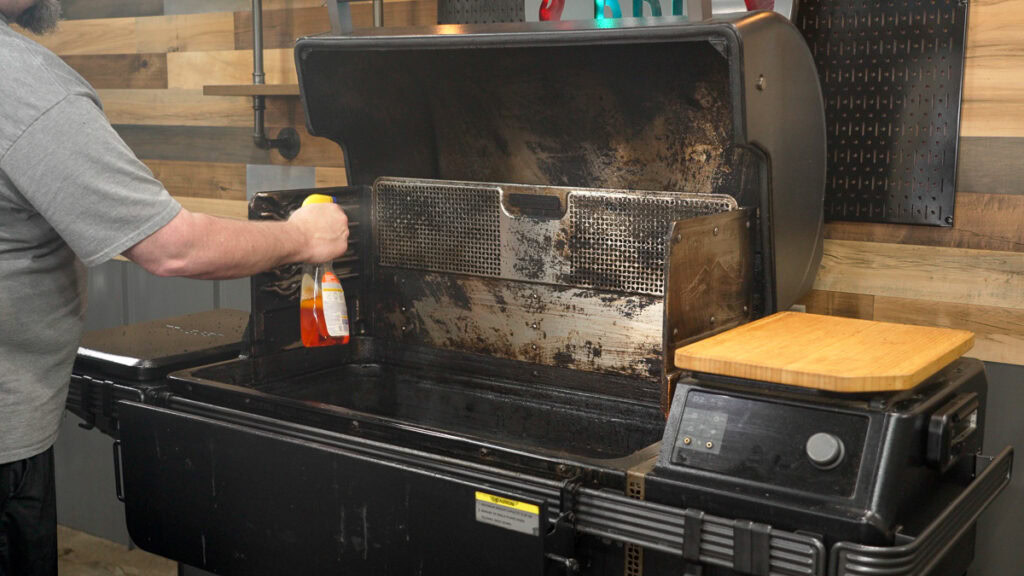
Avoid using a wire brush on stainless parts. It will scratch the surface and leave it looking dull. Instead, use plastic scrapers or a soft cloth where needed.
4. Dry it out and reassemble.
Once the chamber looks clean, rinse or wipe away any leftover degreaser. I recommend one of those squirt bottles.
Let everything dry completely before you put the parts back in.
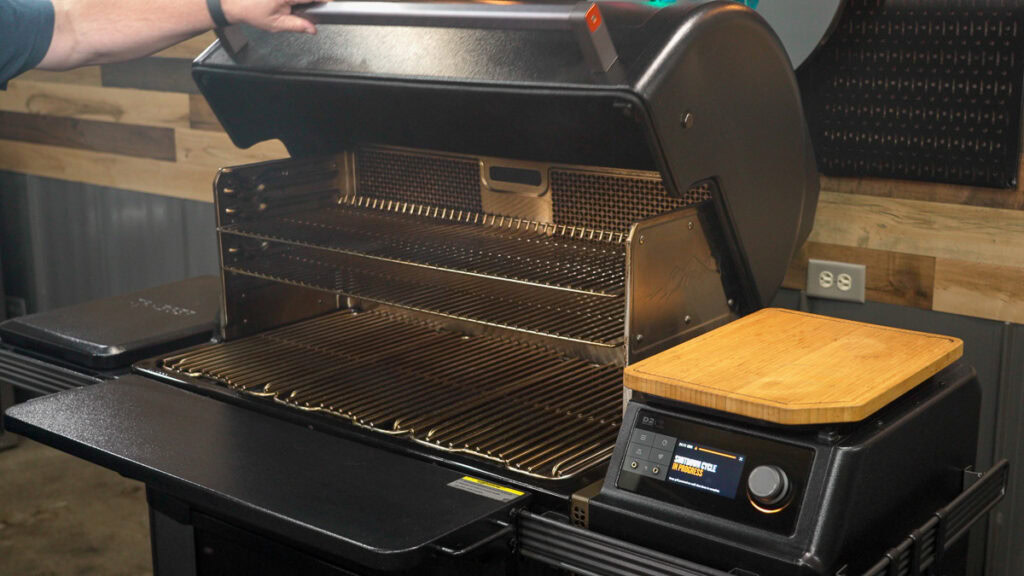
5. Clean any glass surfaces
If your grill has a glass controller screen or induction plate, spray it down with a dedicated glass cleaner like Invisible Glass to make it shine like new.
6. Burn off and re-season.
Even if you rinse thoroughly, some chemical residue will still be inside the grill. To burn it off, fire up the grill to 350°F and run it for an hour. Then spray the grates and other internal parts with a light coat of cooking oil (like Pam), crank the heat to 500°F, and run it for another hour and a half.
This burn-off step is important. It not only clears out any leftover degreaser, it also re-seasons the grates and internal metal surfaces so you’re not starting your next cook on raw steel.
After that, you’re done. It won’t look brand new, but it’ll be clean, safe, and ready to cook again. Got any grill cleaning questions? Drop them in the comments otherwise go cook some more BBQ!
Did you miss our previous article...
https://manstuffnews.com/backyard-grilling/lemonpepper-garlic-wings
