A stable rest like a bipod or sand bag is critical to sighting-in properly. Nick Marchiando
Every hunter ought to know (or learn) how to sight in a rifle. It’s a simple process technically, but sometimes it can feel like beating your head against a wall. To sight in or zero a rifle simply means adjusting the scope or sights to point where the bullet impacts at a given distance.
A hunter who has verified that their rifle is sighted in correctly will have more confidence when they shoot. Sighting in a rifle is not hard to do—except for when it is. Maybe you make scope adjustments to your scope, but your point of impact doesn’t change. Or maybe the point of impact changes much more drastically than you wanted. Or, worst of all, the rifle simply won’t shoot a consistent group and now you’ve got no idea how to adjust the scope. What started as a simple task has turned into an ammo-burning exercise in frustration.
To help you avoid the frustration, we’ve put together a step-by-step guide for how to sight in a rifle.
Steps for Sighting in a Rifle
- Bore sight
- Establish a solid shooting position
- Zero the rifle
- Shoot groups to fine tune and verify your zero
How to Bore Sight a Rifle
Bore sighting a rifle means aligning the spot at which the bore is aiming with the point of aim of your scope. Note that this step is meant to make the full sighting in process easier. A rifle that is bore sighted but not properly zeroed is not ready to hunt with.
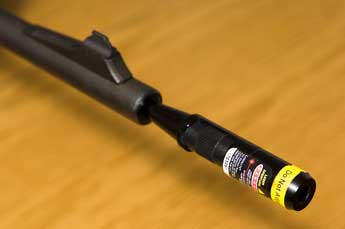
Insert a bore sight using the proper insertion pin for the caliber you’re using, then adjust the vertical and horizontal axis to your desired point of aim. Outdoor Life Online Editor
There are two simple ways to bore sight a rifle. The easiest, least expensive, and (with a little practice) most precise method is to remove the bolt (on bolt and some semiautomatic and lever-action rifles) and look down the barrel at a target. It’s usually easiest to do this on a 50-yard target. When you can see the bullseye through the bore, then move your scope reticle to the bullseye. You must ensure that your rifle does not move or wiggle in the rest while you are adjusting the scope turrets. If you can’t easily see the bull of your sight-in target at that distance, pick some other object with good contrast to focus on, like the top corner of the target backer. Or you can use a bore sighting tool. Make sure the rifle is unloaded and place the bore sighting tool in your barrel. It will project a laser. With your rifle securely placed in a rest, make turret adjustments on your scope so that the reticle aims at the laser dot.
Establish a Solid Shooting Position
Grandpa may have sighted in his deer rifle by leaning over the hood of the old Buick — his rifle resting on a rolled-up Marlboro jacket—but that’s not a recipe for precision and repeatability. Every year, my local shooting range benches are saddled by hunters resting on sleeping bags, jackets, foam mattresses, cardboard boxes, and everything else you could imagine. This is no way to sight in a rifle.
You want a solid bench, where you can be sitting comfortably. Or a flat comfortable spot to shoot from while laying in the prone position. Your rifle rest or support can be very simple and cheap, but it needs to be stable. The key is that your scope crosshairs should rest over the bullseye without you having to hold the rifle.
Various Lead-Sled-type rests are highly adjustable and popular, but I prefer resting on sandbags — and there are a lot of good ones on the market. One of the best rifle bipods works well too. You want solid supports under both the fore-end and butt of your stock. This helps you attain a rock-solid hold. A small sandbag, squeeze bag, or slider bag works great. Even a sock filled with airsoft BB’s will get the job done.
Your posture, and position should be relaxed and comfortable. If you’re straining, that tension will be put into the gun, making it more difficult to break clean, repeatable shots. Combined with a solid shooting rest, a solid shooting position will set the foundation for repeatable shots and an efficient sight in process.
How to Sight in a Rifle in Two Shots
Once you have your rifle bore sighted and your shooting position is rock stead, it’s time to shoot. Center the crosshair on the target and send a round downrange. Assuming you are on paper, there will be a hole, or “Point of Impact” (POI), in the target. Now, here’s where the rest comes into play. Re-center the crosshair on the target and, while ensuring the gun is absolutely steady, use the adjustment knobs on your scope to move the crosshair from the center of the target to the center of your POI. You’ll have to look through the scope while you do this. If you have a buddy with you, have him move the turrets while you look through the scope and guide him to your POI.
Fire a second shot — if you did everything correctly, your POI should be nearly centered on the target. Now you’re almost sighted in.
How to Sight in With a Point-Blank Zero
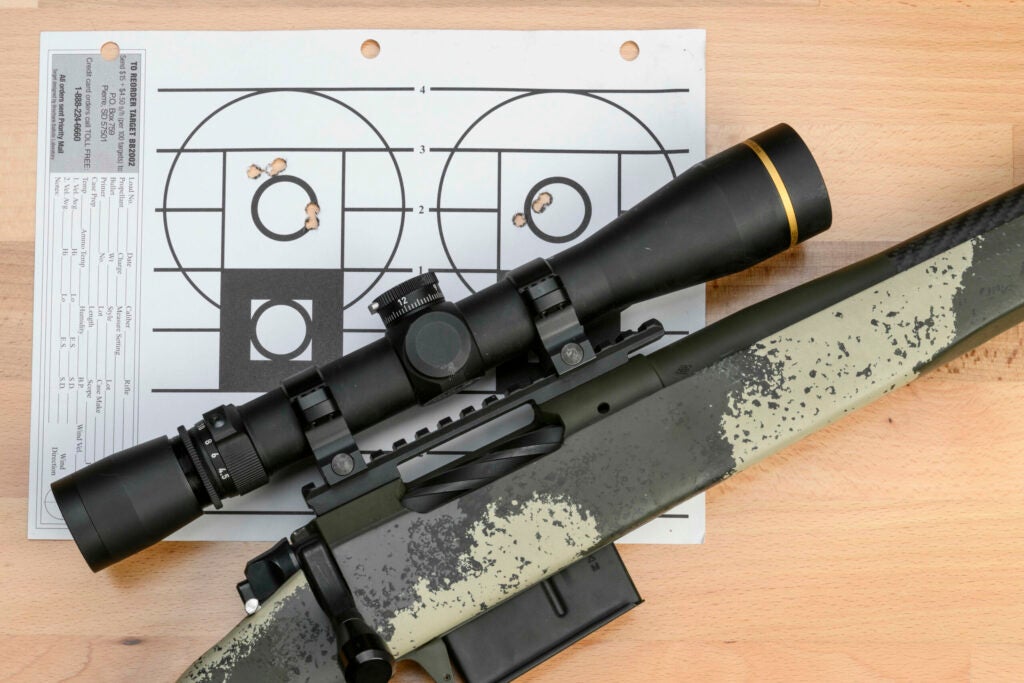
The author’s point of aim was the center of the circle in the black square, so his rounds are impacting 2 inches high. Bill Buckley
Now you want to fine-tune your POI through shooting groups. You can do this so that your rifle is zeroed at 100 yards (POI is dead on the bullseye at 100) or you can establish a point-blank zero.
Setting up a standard variable-power scope that has a duplex cross-hair reticle with a point-blank zero (PBZ) is a smart choice.
The idea is simple. You zero your rifle so that it hits a bit high at 100 yards. Depending on the distance and the size of the target, this allows you to place the crosshairs in the middle of target and not have to worry about fiddling with turrets or calculating holdovers.
Typically, you’ll want to set your zero around 2 to 3 inches high at 100 yards. With most cartridges, this will put you dead-on somewhere between 200 and 245 yards, and a few inches low around 280 yards.
So, if you’re hunting a whitetail in open country, for instance, this means you can hold right in the center of the chest as long as it’s within 300 yards.
To set up your PBZ, you’ll need to use a ballistic calculator (there are many free ones online) and gather some basic information about your rifle and ammunition. You’ll want to know your muzzle velocity, the ballistic coefficient of your projectile, and some measurements such as how high above the bore the center of the scope is, and the twist rate of the barrel.
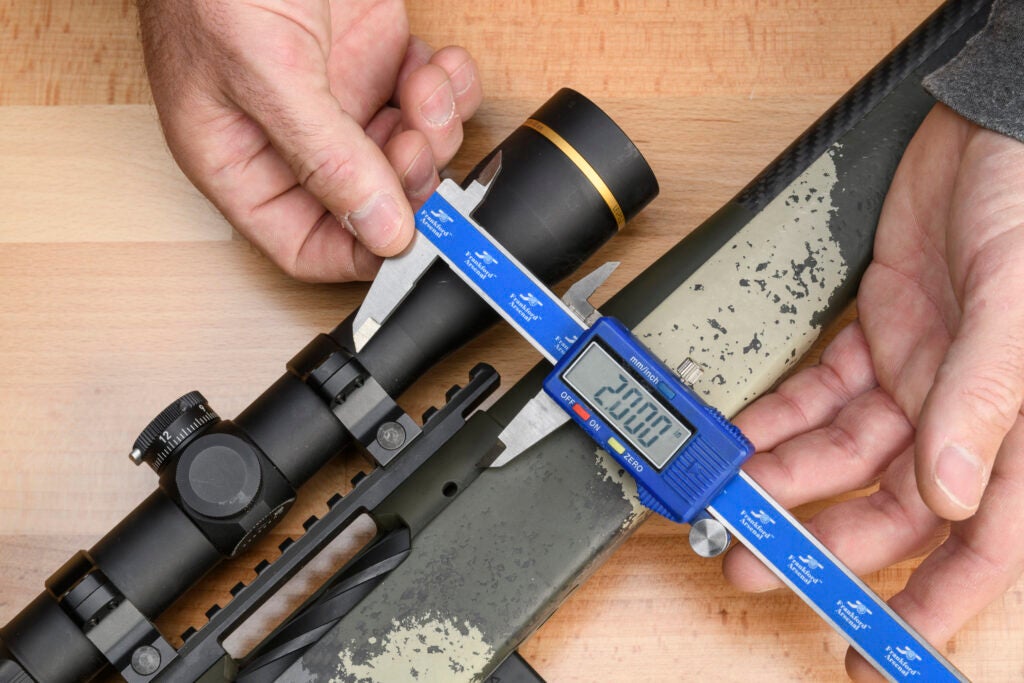
You’ll want to measure how high the center of the scope is above the bore for an accurate point-blank zero. Bill Buckley
Once you plug this information into the calculator, you can fiddle with your zero height to come up with your ideal PBZ.
With the 6.5 PRC you see pictured here, the rifle shoots the 143-grain ELD-X bullets at 3015 fps. My point of aim was the center of the circle in the black square, so my rounds are impacting 2 inches high. According to the calculator, this puts my point of impact dead on at 235 yards and 4.1 inches low at 300.
Given that the vital zone of a whitetail is about 8 inches, this means that for any buck that’s within that range, I can just hold on the center and shoot. Even if there’s a 10-mph crosswind, the bullet will only drift 4.3 inches at 300, so with a minimal correction for that, I don’t need to be too concerned about windage.
The beauty of this system is its simplicity. More than once I’ve been in the field with a hunter who had a complicated scope on his rifle, and who also had to fiddle and fuss with his calculations as precious seconds ticked away. Meanwhile, the animal moved out of range or out of sight.
Here’s a bonus tip. You can still use this system with complicated precision rifle scopes—which is something I often do. Let’s say I’m running a 3-18X first-focal plane tactical scope that uses milliradians on my rifle. Even though I zero my rifle at 100 yards, while out in the field I’ll often dial it up .6 mils, which puts the point of impact just above 2 inches at 100. This gives me the same quick point-and-shoot capability on game within that 300-yard zone, and if for some reason a longer shot presents itself, I can either try to stalk closer or take the time to adjust my scope to make a more precise shot. For me, this offers the best of both worlds.
Tips for Sighting in a Rifle
Here are a few more general tips for how to sight in a rifle.
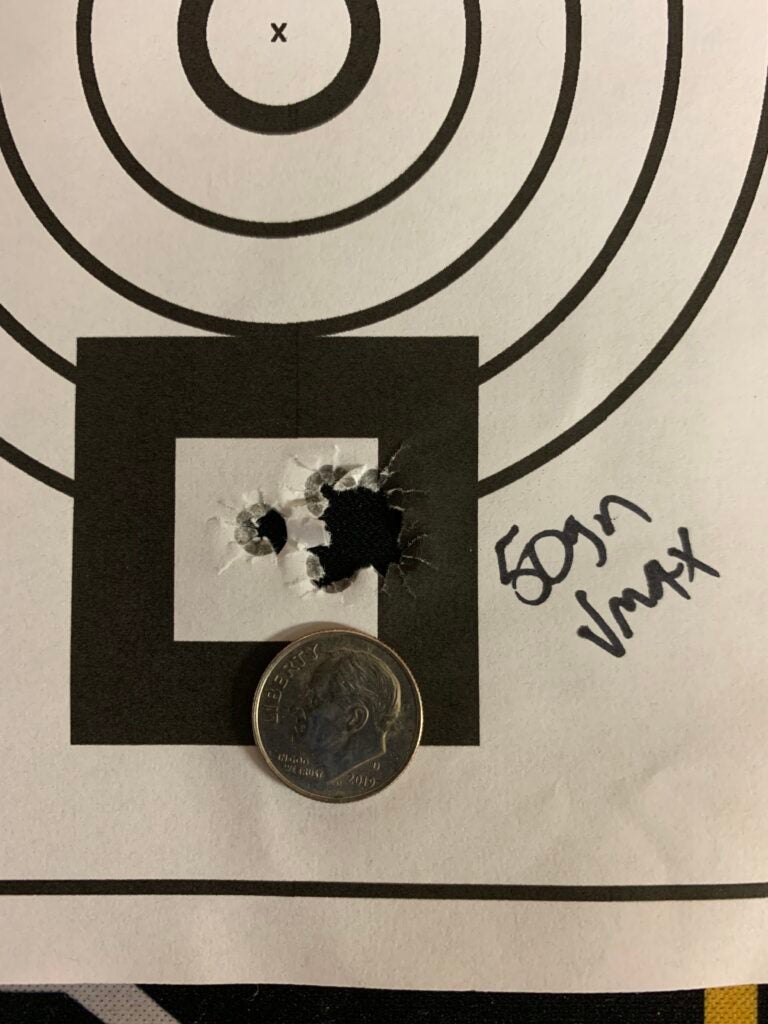
Shooting groups is generally the most efficient way to accurately sight-in your rifle. Tyler Freel
Don’t Chase Single Holes
In a perfect world, you should be able to sight in your rifle with a single shot. Shoot, make the necessary windage and elevation adjustments, and you’re sighted in. In the real world, it’s not that simple, and even if it were, you’d want to do additional shooting to verify that zero. If you approach sighting-in your rifle strategically, you’ll end up with more confidence in your zero and expend less ammunition attaining it.
While my barrel is cooling, I carefully mark the center of a three-shot group and measure the distance horizontally and vertically to where I want the impact to be. I’ll then make elevation and windage adjustments on my scope based on those measurements. Next, I’ll fire another group of three to verify my adjustments. I always make adjustments from the center of the group because this is the most accurate representation of where the rifle is zeroed—accounting for error and deviation from bullet-to-bullet. I let my barrel cool completely after each group, and if I need to fire another group and re-evaluate, I do. Finally, I’ll end up with a group that verifies my zero is where it should be.
READ NEXT: How to Shoot Better Rifle Groups
Check Your Scope Mount
It’s not easy to zero a rifle if your bullets aren’t impacting consistently. If your rifle is spraying shots all over the target, check your scope mounts. Make sure the screws are tightened properly and the scope is not sliding around in the mounts. Also make sure that the scope is not canted. The reticle should be level when the gun is positioned level in the rest. If you’re not sure that your scope is mounted properly, stop what you’re doing and read our guide on how to mount a rifle scope.
Don’t Shoot Too Fast
Because sighting-in a rifle is a simple process in theory, we think it should go quickly. Sometimes it does, but patience is important. The more calm, calculated, and precise your shooting is, the faster you will be able to sight in your rifle.
The biggest mistake I see shooters making on a regular basis when it comes to patience is not letting their barrel fully cool between groups. I’m not immune to this. A few years ago, I brought a sheep rifle to the range to verify my zero and the accuracy of a recently-loaded batch of ammunition. My first group was just as it should be, so I shot another group—which opened up a bit. I shot another, and another, and began wondering if something was wrong. I put the rifle away and made another trip to the range, more patiently waiting for the thin barrel on that rifle to cool completely between groups. Everything was fine.
Every rifle responds to barrel heat a little differently, and when sighting-in, your best bet is to let the barrel cool completely between groups. Remember, you’re setting a baseline that you want to be confident in. If you get too impatient, you’ll end up burning through all your ammo without a lick of progress and at the very least, you’ll still have serious doubts about if your rifle is truly sighted in.
Be patient, take your time, and you’ll end up finishing the job more quickly and more efficiently. If something doesn’t seem right, stop and try to diagnose the situation. If your grouping is more erratic than normal, or your adjustments don’t seem to be showing as they should on paper, check to make sure all your scope hardware is secure and your screws are tight. Something like a loose ring will make it impossible to sight in your rifle properly.
Take Notes on Each Rifle
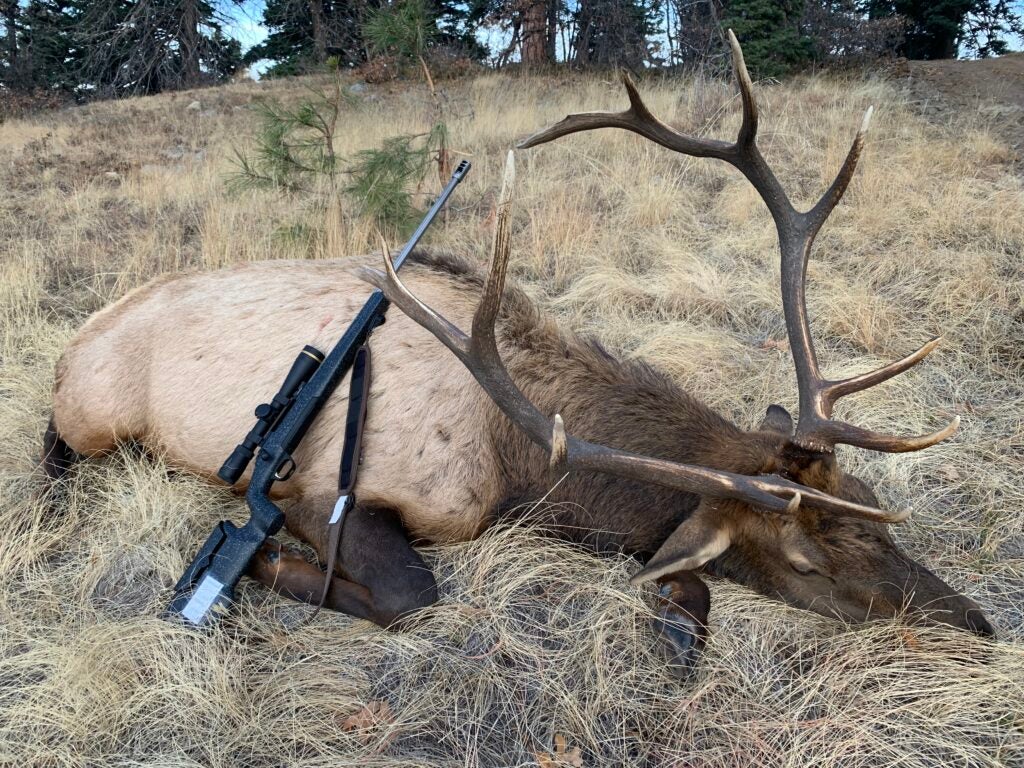
Knowing exactly which loads your rifle likes will give you more confidence in the field. Tyler Freel
Most hunters don’t record notes on their hunting rifles—that’s for nerdy precision shooters, right? Wrong. Keeping track of every round fired through every barrel you own might not pay huge dividends for your hunting rifle, but taking some notes can save you lots of ammunition and headaches in the long run. You’ll need to sight in a rifle each time you change ammunition, and if you record your adjustments it will help you be more efficient and know your rifle better.
If you keep records—even a small notebook—on your hunting rifles, it can help you shoot better and with more confidence. You can record things like your scope settings when you get it sighted in and the ammo that you used. If you want to practice with cheaper ammo, or need to use different ammo (because that’s all you can find) record the difference in point-of-impact, and any scope adjustments you have to make with the new ammo. It’s a common mistake to think that different loads will impact in the same place with any sort of reliability. There will almost always be some difference. Don’t remember which ammunition you’re sighted in for? Check your notebook, look at your scope settings, and you’ll know.
Even if you don’t deviate on ammunition, other things are valuable to record as well. Record the difference between your cold-bore zero and subsequent shots each time you shoot. Your record keeping will tell you exactly what to expect on your first shot and follow-up shots. That might even differ between loads, and you won’t know it unless you record it.
Finally, record how your zero changes — or if it does — when you clean your rifle, and how many fouling rounds it takes to get back to the established zero. Some rifles don’t show much point-of-impact shift, but others do. If you shoot a lot, it’s not unheard of for your point-of-impact to shift slightly throughout the life of your barrel, and it’s easier to track if you keep notes.
The post How to Sight in a Rifle appeared first on Outdoor Life.
By: John B. Snow, Tyler Freel, Kyle Wintersteen, and Alex Robinson
Title: How to Sight in a Rifle
Sourced From: www.outdoorlife.com/gear/how-to-sight-in-rifle/
Published Date: Wed, 09 Nov 2022 21:40:35 +0000
----------------------------------------------
Did you miss our previous article...
https://manstuffnews.com/weekend-warriors/5-things-all-bowhunters-should-know-about-broadheads
 Backyard GrillingWeekend WarriorsAdvice from DadBeard GroomingTV Shows for Guys4x4 Off-Road CarsMens FashionSports NewsAncient Archeology World NewsPrivacy PolicyTerms And Conditions
