The best way to mount your truck toolbox really comes down to a few things: what kind of box you have, how much security you’re after, and whether you’re okay with drilling into your truck.
For most folks running a standard crossover box, you can’t beat the simplicity of no-drill clamps. They’re fast, surprisingly secure, and you won’t leave a mark on your truck bed. But if you’ve invested in a heavy steel box or you’re bouncing around off-road, a permanent bolt-on installation is the only way to go.
Choosing Your Toolbox and Mounting Method
Before you even think about grabbing a wrench, remember this: the toolbox you pick basically makes the mounting decision for you. The style of the box is the first fork in the road.
A classic crossover toolbox is what most people picture—it sits neatly on the bed rails right behind the cab. Then you have side-mount boxes, which run lengthwise along the bed rails. And finally, there are chest-style boxes that just sit flat on the bed floor, usually tucked up against the cab. Each one needs to be secured in its own way.
The toolbox material matters, too. A lightweight aluminum box is a breeze to lift and position by yourself, and it puts less strain on your mounting hardware. On the other hand, a heavy-duty steel box offers top-notch security but demands a much tougher mounting setup to handle the weight, especially when you’re hitting rough trails.
Drill vs No-Drill Mounting
When you get right down to it, there are two main camps for mounting a toolbox: using clamps or breaking out the drill.
-
No-Drill Clamps: These are hands-down the most popular option, and for good reason. They typically use J-hooks or a specialized clamp design that grabs the underside of your truck bed’s lip, cinching the toolbox down tight. This method is quick, doesn’t require any permanent changes to your truck, and is perfect if you’re leasing your truck or think you might want to sell the box later.
-
Bolt-On Installation: For the ultimate in security and total peace of mind, nothing beats drilling right through the toolbox and your truck bed rails. This creates a rock-solid, permanent connection that won’t vibrate loose and is a major headache for any would-be thief. It’s my go-to recommendation for anyone carrying expensive gear or who spends a lot of time on less-than-perfect roads.
This isn’t something to gloss over. A poorly mounted toolbox can turn into a thousand-pound projectile in a hard stop or a crash. It’s a serious risk to you, your passengers, and everyone else on the road.
This chart gives you a good idea of what to expect in terms of time and money for different toolbox styles.
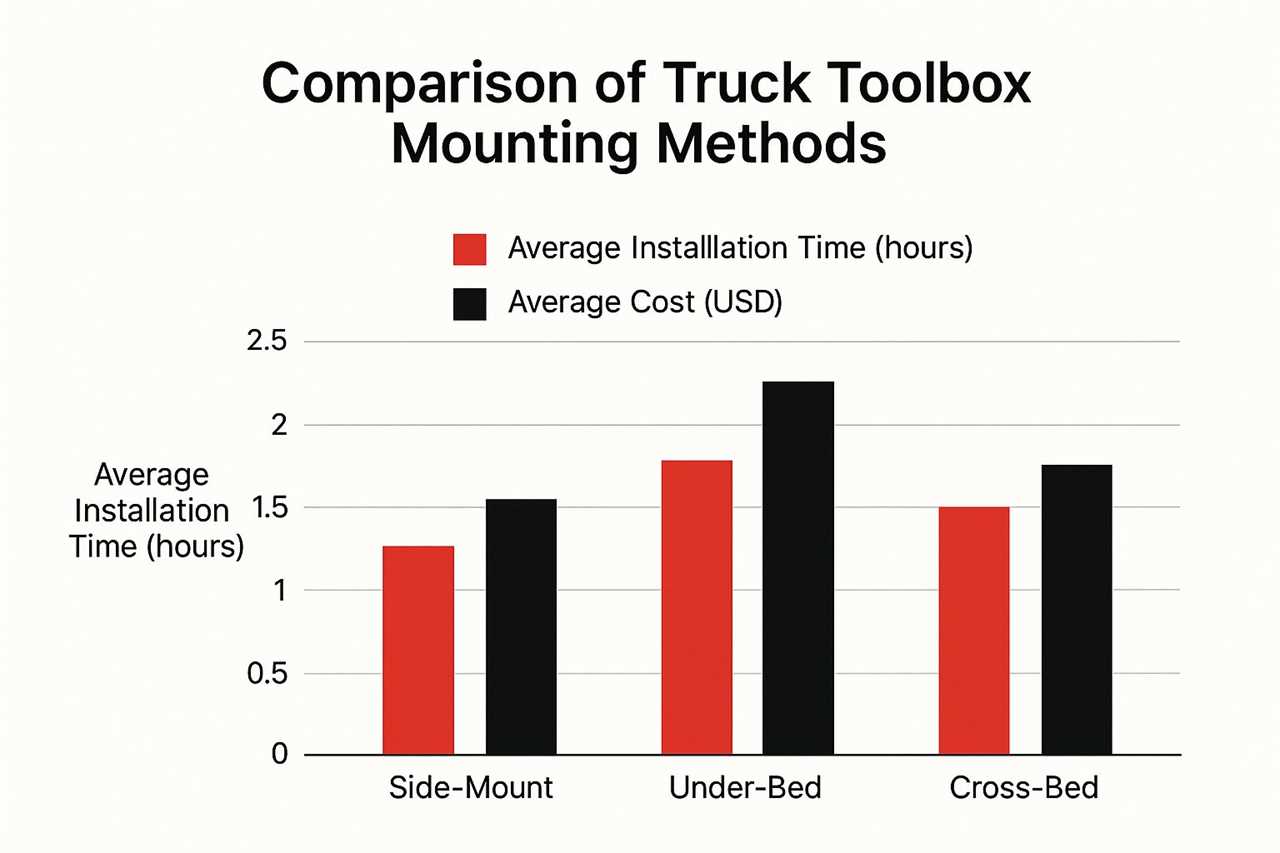
As you can see, even though cross-bed boxes might cost more upfront, they’re generally the quickest to install compared to under-bed or side-mount styles.
Comparing Toolbox Mounting Methods
Still on the fence about drilling? This table should help clear things up. It’s a straightforward look at the pros and cons of the most common mounting methods.
| Mounting Method |
Installation Difficulty |
Security Level |
Best For |
| No-Drill Clamps |
Easy (15-30 mins) |
Moderate |
Leased trucks, DIYers, temporary installations |
| Bolt-On (Drilling) |
Moderate (Requires tools) |
High |
Maximum security, heavy boxes, off-road use |
| Grip Rite System |
Easy (15-30 mins) |
High |
Crossover boxes where drilling isn’t desired |
| Self-Tapping Screws |
Moderate (Risk of stripping) |
Low to Moderate |
Lightweight boxes, budget-conscious installs (not recommended) |
Ultimately, bolting down your box offers the best security, but modern no-drill clamps have come a long way and are more than enough for most daily drivers.
Making the Right Choice
At the end of the day, picking the right box and mount is a personal call based on how you use your truck. If you need a hand sorting through all the different styles, our guide on how to pick a truck bed tool box is a great place to start.
This isn’t just a niche market, either—the global truck toolbox market is currently valued at around $2.5 billion and is only getting bigger. As you weigh your options, just think about your day-to-day grind, the value of the tools you’re hauling, and how comfortable you are with drilling a few holes in your rig. For a closer look at these industry trends, you can explore the full market report.
Getting the Right Tools and Hardware on Deck
Any solid truck toolbox install begins long before you hoist that box onto your bed rails. It really starts with getting all your gear laid out and ready to go. Nothing kills momentum like having to stop and dig through your garage for a specific socket or a drill bit you thought you had. Let’s avoid that frustration.
We’ll break down what you need. While the list changes a bit depending on whether you’re using a no-drill kit or bolting it down the old-fashioned way, some tools are just plain essential for getting the job done right.
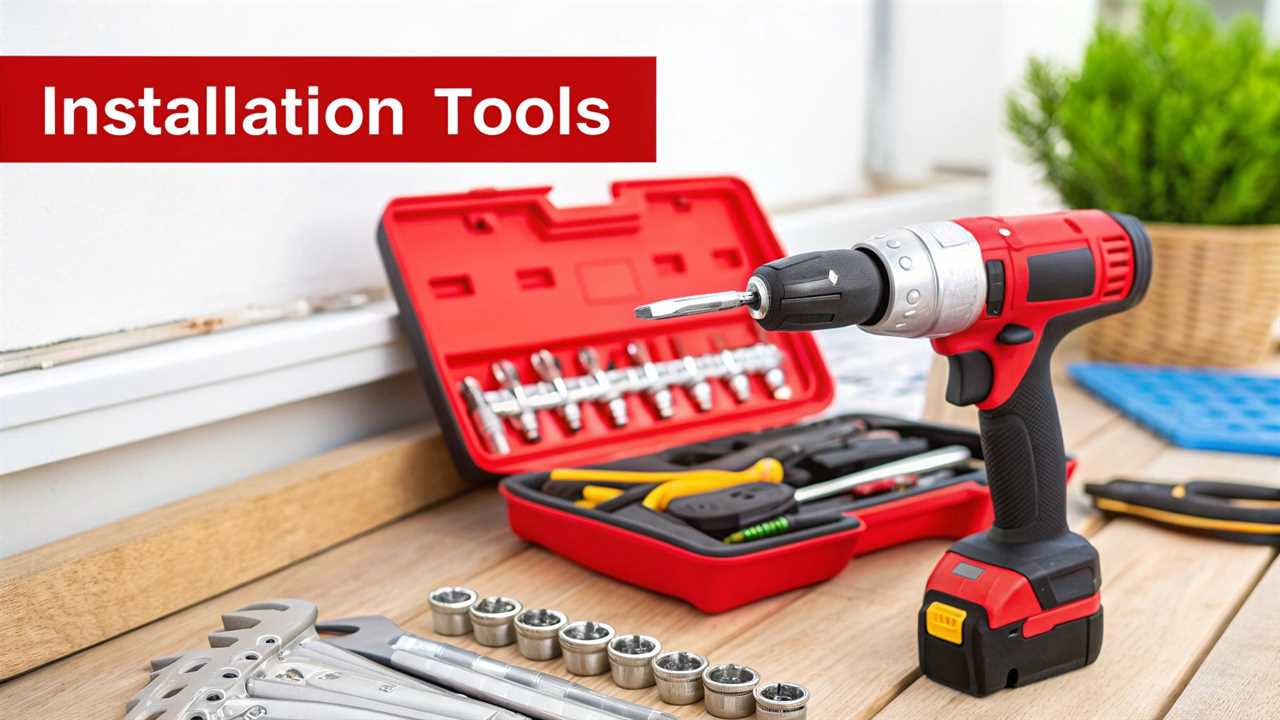
The Core Tool Checklist
Think of this as the bare minimum for a headache-free installation. Grab these items, and you’ll be set for about 90% of any standard toolbox mounting job.
- Tape Measure: Absolutely crucial for getting that box perfectly centered and checking your clearances.
- Socket Set & Wrench: You’ll be tightening nuts and bolts, whether they came with a kit or you bought your own. A good ratchet makes life much easier.
- Power Drill & Quality Drill Bits: If you’re drilling, don’t cheap out here. A sharp set of cobalt or titanium-coated bits will slice cleanly through your bed rails without “walking” all over the place.
- Center Punch: This little tool is a pro’s secret weapon for drilling perfect holes. One solid tap creates a small divot that keeps your drill bit exactly where you want it, preventing it from skittering across the metal and scratching your truck’s paint.
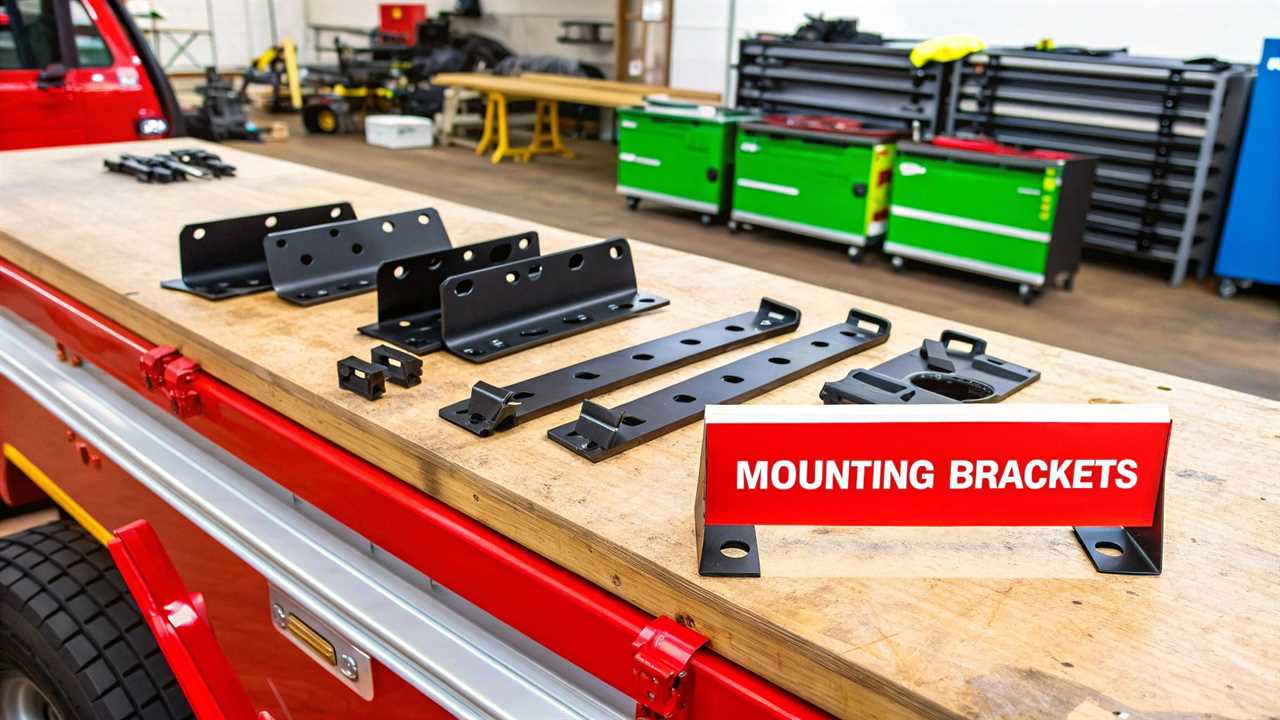
Must-Have Mounting Hardware
Sometimes the hardware that comes with a new toolbox or a no-drill kit is… less than impressive. I’ve seen cheap bolts rust out and fail after just one wet season. If you want a setup that lasts, it’s often worth sourcing your own hardware.
Here’s what should be on your shopping list:
- Stainless Steel Bolts: They’re your best defense against rust from rain, snow, and road salt. For extremely heavy loads, stepping up to Grade 8 bolts gives you superior strength.
- Nylon-Insert Lock Nuts (Nylocs): Don’t even think about using regular nuts. The small nylon ring inside a nyloc nut creates constant friction, which is key to preventing it from vibrating loose over thousands of miles of rough roads.
- Oversized or Fender Washers: These are a bigger deal than they look. They spread the clamping pressure over a much wider area, preventing the bolt head from digging into your new toolbox or damaging your truck’s bed rails.
- Rubber Washers or Weather Stripping: This is a fantastic little trick I’ve picked up over the years. Sticking a thin rubber washer or a small piece of weather seal between the toolbox and the bed rail does wonders. It kills annoying rattles and helps create a better seal against water intrusion.
Pro Tip: Before you tighten everything down, put a small dab of anti-seize lubricant on the bolt threads. This simple step prevents the stainless steel from galling or seizing up, which will save you a massive headache if you ever need to remove the toolbox down the road.
Taking the time to properly secure your toolbox is a fundamental part of a good truck bed cargo management system. A securely mounted box keeps your tools safe, and a quality installation protects your truck from getting banged up. Don’t rush it. Gathering the right tools and using high-quality hardware is how you do a job that will hold up for years.
Measuring and Positioning for a Perfect Fit
You know the old saying, “measure twice, cut once”? It’s never been more true than when you’re about to drill permanent holes in your truck. Getting the positioning right is the difference between an install that looks like it came from the factory and one that just looks… off. Trust me, spending a few extra minutes here will save you a ton of headaches later.
The main goal is to get that toolbox perfectly centered. It’s not just about looks; a centered box helps keep the truck’s weight balanced. That’s a big deal for handling, especially if you’re hauling a heavy, fully-loaded steel box.
Centering Your Toolbox
First things first, grab your tape measure. Get the total width of your truck bed by measuring from the inside of one bed rail to the other. Now, measure the width of the toolbox itself.
To figure out where it needs to sit, just subtract the toolbox width from the bed width, then divide that number by two. That’s your gap for each side. So, if your bed is 64 inches wide and the box is 60 inches, you’re looking for a 2-inch gap on both sides. Easy enough.
I like to use a bit of painter’s tape or a pencil to mark that spot on both bed rails, measuring in from the cab. This gives you a clear visual target when you go to place the box.
Performing Critical Clearance Checks
Before you even think about marking drill holes, you have to do two crucial clearance checks. This is probably the most common—and most frustrating—mistake I see people make.
First, check the lid clearance. Open the toolbox lid all the way. Make sure it doesn’t smack into your truck’s rear window or a headache rack if you have one. Some lids swing back a surprising amount.
A toolbox lid that constantly bangs against your rear window isn’t just annoying; it can actually shatter the glass over time, especially if you’re bouncing around on rough roads. Slide the toolbox toward the tailgate just enough to get at least a one-inch gap at the closest point.
Second, check the tailgate clearance. Can you open your tailgate all the way without it hitting the toolbox? This is less of a problem with standard crossover boxes, but it can be a real issue with certain chest or side-mount styles.
It’s no surprise so many people are adding these. The global toolbox market hit around $4.68 billion recently and is expected to jump to $7.37 billion by 2035. Truck-specific boxes are a huge part of that growth, showing just how many owners are looking for practical storage. You can dig into the numbers and see how the truck toolbox sector is expanding if you’re curious about the trends.
Marking Your Drill Points Accurately
Once you’ve got the box perfectly positioned and all your clearances checked, it’s time to mark your drill spots. This is where precision really prevents problems down the line.
- Use a Center Punch: After you mark your hole locations with a fine-tip marker, grab a center punch. A solid tap with a hammer creates a small divot right in the metal.
- Prevent Drill Bit “Walking”: That little divot is your best friend. It gives the tip of your drill bit a place to start, keeping it from “walking” or skittering across the surface as it starts to spin. This one simple move is the key to getting a clean, accurate hole exactly where you intended.
Nailing these steps will make sure your toolbox install ends up looking professional, feeling secure, and ready for whatever you throw in it.
Time to Make It Permanent: Drilling and Mounting
You’ve got your toolbox sitting just right, your marks are in place, and now it’s time to commit. This is the moment where all that careful prep work pays off and your toolbox becomes a permanent, secure part of your truck. Take a deep breath and take your time here—it’s the secret to a clean, professional-looking job.
Drilling into a perfectly good truck bed is probably the most nerve-wracking part of the whole install. To avoid chipping the paint, a two-step drilling process is your best friend. Start with a small pilot hole using a bit about half the diameter of your final bolt size. Then, follow up with the full-size bit. This lets the larger bit cleanly remove material instead of aggressively tearing at it, which is what saves your truck’s finish. Always use sharp, high-quality drill bits; it makes a world of difference.
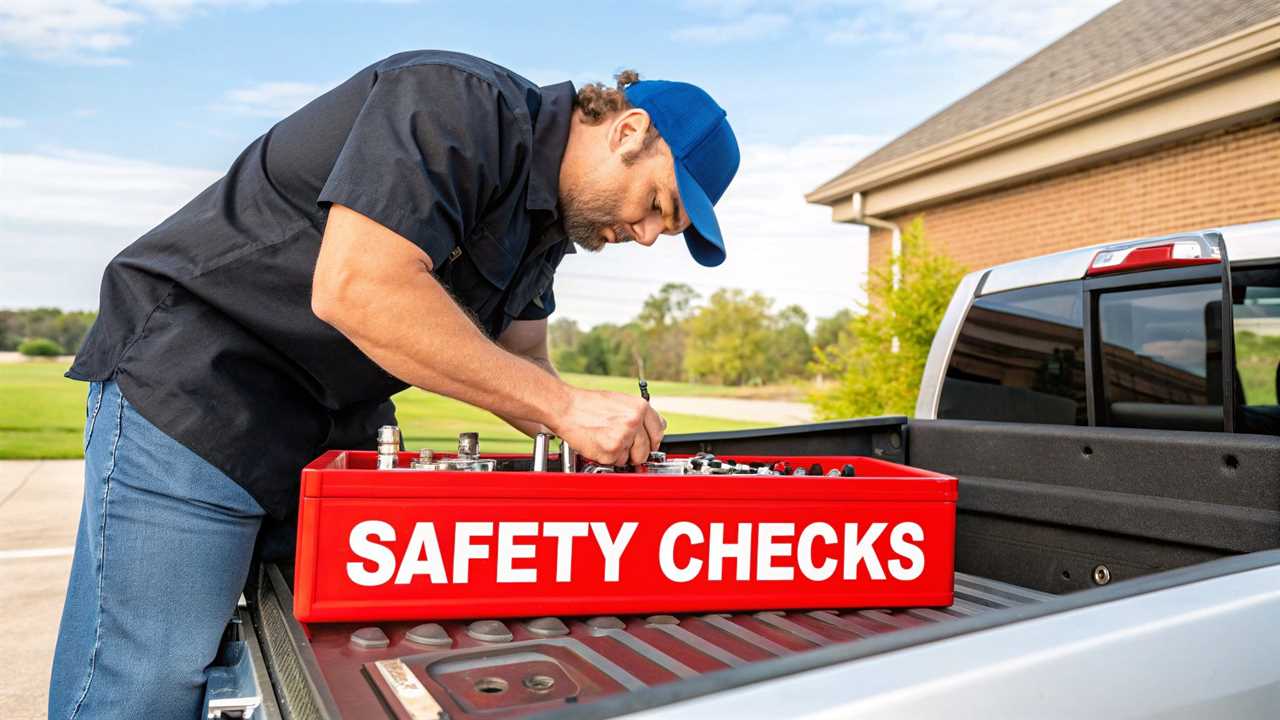
The Single Most Important Safety Check
Before any drill bit even thinks about touching metal, stop and do one last, critical inspection.
Look underneath your truck bed rails, right where you plan to drill. You absolutely must check for any obstructions. We’re talking fuel lines, brake lines, electrical wiring, or even fuel vapor canisters. Drilling into any of these is a recipe for disaster, leading to catastrophic failure, expensive repairs, or serious injury. Never, ever skip this step.
If you spot an obstruction, you have to move your mounting point. Trust me, it’s far better to have a toolbox that’s a half-inch off-center than one that’s sitting on top of a punctured fuel line.
Securing the Toolbox
With your holes cleanly drilled, you’re on the home stretch. Whether you chose a no-drill J-hook setup or you’re bolting it down, the goal is the same: firm, even pressure.
For a bolt-on installation, drop your bolts through the holes in the toolbox and down through the fresh holes in your bed rails. It’s a good idea to slip a rubber washer on the bolt first to protect the toolbox finish.
From underneath the truck, here’s the hardware sequence:
- Place a large fender washer over the bolt.
- Follow it with a nylon-insert lock nut.
That fender washer is non-negotiable. It’s what distributes the clamping force, preventing the nut from chewing up the relatively thin metal of the bed rail as you tighten it.
When it comes to tightening, don’t just crank down on one side. Snug each nut up until it makes contact, then tighten them in a crisscross or star pattern—just like you would with lug nuts on a wheel. This simple technique applies pressure evenly, which stops the toolbox base from warping and creates a rock-solid mount that won’t vibrate loose on the road. If you have a torque wrench, use it to avoid over-tightening and potentially damaging the toolbox or your truck.
If you’re interested in general installation best practices that go beyond just automotive work, there are some great DIY tips for installing building hardware that share many of the same principles of precision and proper technique.
Final Checks and Long-Term Maintenance
Just because you’ve cranked down the last bolt doesn’t mean the job is done. The final checks you do right now—and the simple maintenance you perform later—are what will actually protect your investment and make sure your toolbox stays put for the long haul.
Think of it as the last 5% of the work that gives you 95% of the long-term peace of mind.
First up, give it the old-fashioned ‘shake test’. Close and latch the lid, then grab the toolbox with both hands and give it a good shove side-to-side and front-to-back. You want to feel zero independent movement. The box should feel like a solid part of the truck itself. If you get any wiggling, rattling, or shifting, you need to go back over your hardware with a wrench.
The First Week Follow-Up
After you’ve put about a week of driving on it—say, 100-150 miles—it’s absolutely crucial to re-torque all your mounting hardware. It doesn’t matter how tight you thought you got the bolts initially. The constant vibration from the road, plus the weight of your gear, will cause everything to settle just a little. That tiny bit of compression is often just enough to loosen things up.
Snugging down the nuts after this break-in period ensures your mount is truly locked in for good. It’s a five-minute job that can prevent a major headache months or even years down the road.
This quick follow-up check is what separates a decent installation from a great one. You’re accounting for the real-world forces your truck box will face every single day, turning a fresh install into a permanent, rock-solid solution.
Long-Term Care and Inspection
A few quick checks every couple of months will keep your entire setup in prime shape. It’s easy—just tack these tasks onto your regular truck wash or oil change routine.
Here’s a simple checklist to keep in mind:
- Inspect Mounting Points: Every few months, get your eyes on where the toolbox sits on the bed rails. Check the bolts, clamps, and the area around them. You’re looking for any signs of stress like cracked paint, metal fatigue, or the start of any corrosion. Catching rust early means you can treat it before it becomes a real problem.
- Lubricate Locks and Hinges: A quick shot of graphite lubricant in the lock cylinder and a dab of white lithium grease on the lid hinges will keep everything moving like butter. This is especially important if you live in a wet or dusty climate.
- Check Weather Seals: That rubber stripping around the lid is your best defense against water and dust getting to your tools. Run your finger along it, checking for any cracks, tears, or flattened spots that could break the seal.
This kind of proactive care is a big part of our whole philosophy of vehicle ownership, and it fits perfectly into a well-rounded truck maintenance checklist. Overall, the way we mount truck toolboxes has evolved to prioritize security and toughness. While steel and aluminum are still king, the growing demand for secure, customizable mounting reflects what pros who need fast, reliable access to their tools are looking for. You can learn more about how professionals are influencing these tool organization trends.
Common Questions When Mounting a Truck Toolbox
Even when you have a solid game plan, a few questions always seem to pop up in the middle of a project. Let’s tackle some of the most common ones we hear about mounting a truck toolbox. These are the quick answers you need to keep your install moving forward.
Can I Really Mount a Toolbox Without Drilling?
You bet. Plenty of the top brands sell “no-drill” mounting kits, and frankly, they’re pretty clever. These kits use heavy-duty J-hooks or specially designed clamps that grab the underside of your truck’s bed rails, locking the toolbox down without leaving a single permanent mark.
This is the way to go if you’re leasing your truck, want to protect its resale value, or just know you’ll want to take the box off down the road. Just keep in mind that while they’re solid for everyday use, they might not be as bomb-proof as a full bolt-through setup if you’re hauling seriously heavy gear or hitting rough trails. Always double-check the weight rating on the clamp kit to make sure it’s up for the job.
What Are the Biggest Mistakes People Make During an Install?
The most common, and most frustrating, mistakes we see usually come down to three things: bad measurements, cranking down too hard on the hardware, and drilling into something you really shouldn’t.
Rushing the measurements is a classic. It’s the number one reason a box ends up crooked or the lid smacks into the back window when you try to open it. Right behind that is over-tightening the bolts. You can easily warp the bottom of your brand-new toolbox or even put permanent dents into your truck’s bed rails.
But the biggest mistake of all—and I can’t stress this enough—is not checking what’s underneath the bed rails before you drill. Fuel lines, vapor canisters, and main wiring harnesses are often routed right there. You have to do a thorough check, both by sight and by feel, before any drill bit touches metal.
How Can I Make My Toolbox More Secure Against Theft?
If security is a top priority, bolting the box down is way better than using clamps. To do it right, you’ll want to use high-quality Grade 8 bolts with big fender washers to spread out the clamping pressure. We always recommend using nylon-insert lock nuts (you might hear them called nylocs) or dabbing some thread-locking compound on the bolts to keep them from vibrating loose.
For an even bigger deterrent, some guys will tack weld the nut to the bolt after it’s all cinched down. This makes it nearly impossible for a thief to get the hardware off without a grinder or a torch, basically making your toolbox a permanent part of the truck. Just remember, a strong mount is only half the equation—your box is only as secure as its own lock.
At Offroading.com, we live for this stuff. From detailed gear reviews to step-by-step guides just like this one, our goal is to give you the confidence to tackle any project or trail. Explore all our resources at https://www.offroading.com.
https://offroading.com/truck-toolbox-mounting/?utm_source=rss&utm_medium=rss&utm_campaign=truck-toolbox-mounting
Did you miss our previous article...
https://manstuffnews.com/4x4-off-road-cars/what-size-winch-do-i-need-the-complete-sizing-guide
