Tackling a lift kit installation is about more than just bolting on new parts. A successful DIY job comes down to the prep work you do before jacking up your rig. Getting this part right separates a smooth weekend project from a total nightmare.
Your Essential Pre-Installation Game Plan
A successful lift kit install happens long before you touch a single wrench. Your game plan is the part that ensures you get it right from the start. Trust me, a weekend of frustration can almost always be traced back to skimping on planning.
We need to go beyond a simple tool list and dig into why certain gear is non-negotiable. Grabbing heavy-duty jack stands and a reliable torque wrench isn’t just a suggestion. It’s an absolute must for your safety, so cutting corners here is not an option.
The most common mistake I see new installers make is failing to prepare properly. A simple inventory check and reading the instructions twice can prevent 90% of installation headaches.
Before you start, lay out all your tools and safety gear. This organization saves you time and searching later on. Here’s a quick rundown of what should be in your workspace.
Quick Look Your Lift Kit Toolbox and Safety Gear
| Category |
Item |
Expert Tip |
| Lifting & Support |
Floor Jack & Jack Stands |
Never, ever work under a vehicle supported only by a jack. Always use stands rated well above your vehicle’s weight. |
| Hand Tools |
Full Socket & Wrench Set (Metric & SAE) |
A good set of deep sockets and breaker bar will be your best friend for stubborn, factory-torqued bolts. |
| Specialty Tools |
Torque Wrench |
This is non-negotiable. Overtightening or undertightening suspension components is a massive safety risk. |
| Specialty Tools |
Spring Compressors |
If your kit involves swapping coil springs, these are essential. Rent a quality set from an auto parts store if you don’t own one. |
| Safety Gear |
Safety Glasses & Gloves |
Flying rust, debris, and pinched fingers are a given. Protect yourself. |
| Miscellaneous |
Penetrating Oil (PB Blaster, etc.) |
Start soaking all the bolts you’ll be removing a day or two in advance. It makes a world of difference. |
Having this gear ready turns a frustrating job into a straightforward process. Don’t start the project until you can check off every box.
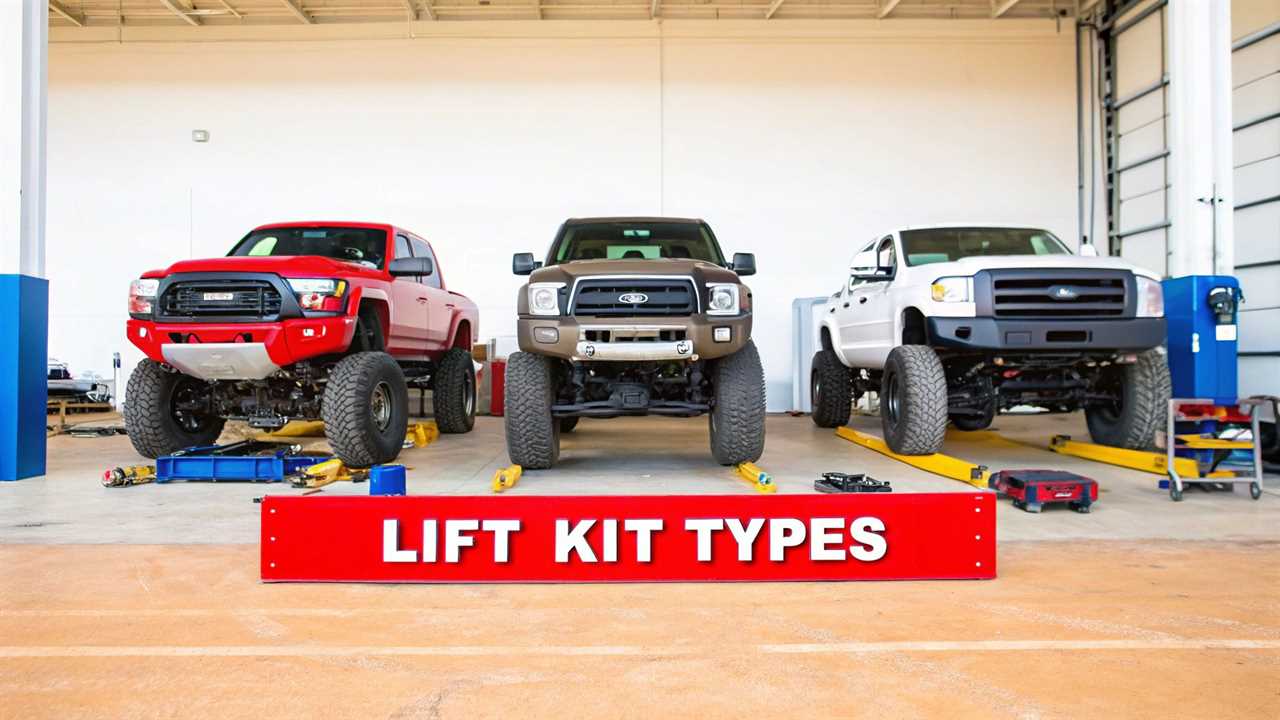
Match the Kit to Your Goal
First, you must pick the right kit for what you actually want to do. Are you chasing an aggressive look or building a serious trail rig for rock crawling? Answering that question guides you toward a spacer lift or a full-suspension system.
- Aesthetic Lifts: These often use simple spacers to raise the body or suspension. They’re cheaper and easier to install but offer little in performance gains.
- Performance Lifts: We’re talking new springs, beefier shocks, and upgraded control arms. These kits are a bigger job but transform your off-road handling and capability.
Prep work separates a smooth project from a disaster. Lay out every part from the box and check it against the packing list. Adopting a safety-first, plan-ahead mindset is the most important factor in any DIY lift.
Setting the Stage: Prepping Your Vehicle
Alright, you’ve got your tools and the kit is waiting. Now it’s time to get the truck ready for surgery. This is about setting yourself up for a smooth, safe, and less frustrating installation.
First, find a good spot. Park your rig on a perfectly flat, level surface like a concrete garage floor. Never try this on soft ground or an incline, as it’s a recipe for disaster.
Lift the vehicle using the manufacturer’s recommended jacking points. Once it’s up, slide heavy-duty jack stands under the frame rails. Those rails are the strongest part of the chassis and the only place to trust.
Here’s a pro tip that will save you hours of cussing: The night before you start, soak every single bolt you plan on touching with a quality penetrating oil. This one small step can be the difference between a seized-bolt nightmare and a bolt that spins right off.
With the truck securely on stands, you can get into the rest of the prep work. This is the perfect time to get your workspace and parts organized.
Initial Vehicle Prep
- Disconnect the Battery: This is non-negotiable. Always disconnect the negative battery terminal first to prevent electrical shorts.
- Organize Your New Parts: Unbox your lift kit and lay out all components. Check everything against the parts list to ensure nothing is missing.
- Make a Spot for Old Parts: Designate an area for removed components like old springs and shocks. A tidy workspace makes reassembly much cleaner.
Your shocks are usually one of the first things to come off. If you’re upgrading them with the lift, this is a good time to double-check your choice. If you’re still deciding, our guide on how to pick shocks for your truck can help.
Navigating the Front Suspension Install
Alright, this is where the fun really starts. The front suspension is where you’ll spend a good chunk of your time. Paying attention to details here really pays off.
First, you’ll need to disconnect key components. Think sway bar links and tie rod ends. A little finesse goes a long way in preventing stripped threads or torn rubber boots.
Next, you’re on to one of the most critical parts: removing the factory springs and struts. Those coil springs hold a serious amount of stored energy. You absolutely must respect that and use proper safety gear and techniques.
This handy graphic shows the essential tools I recommend having laid out before you even start.
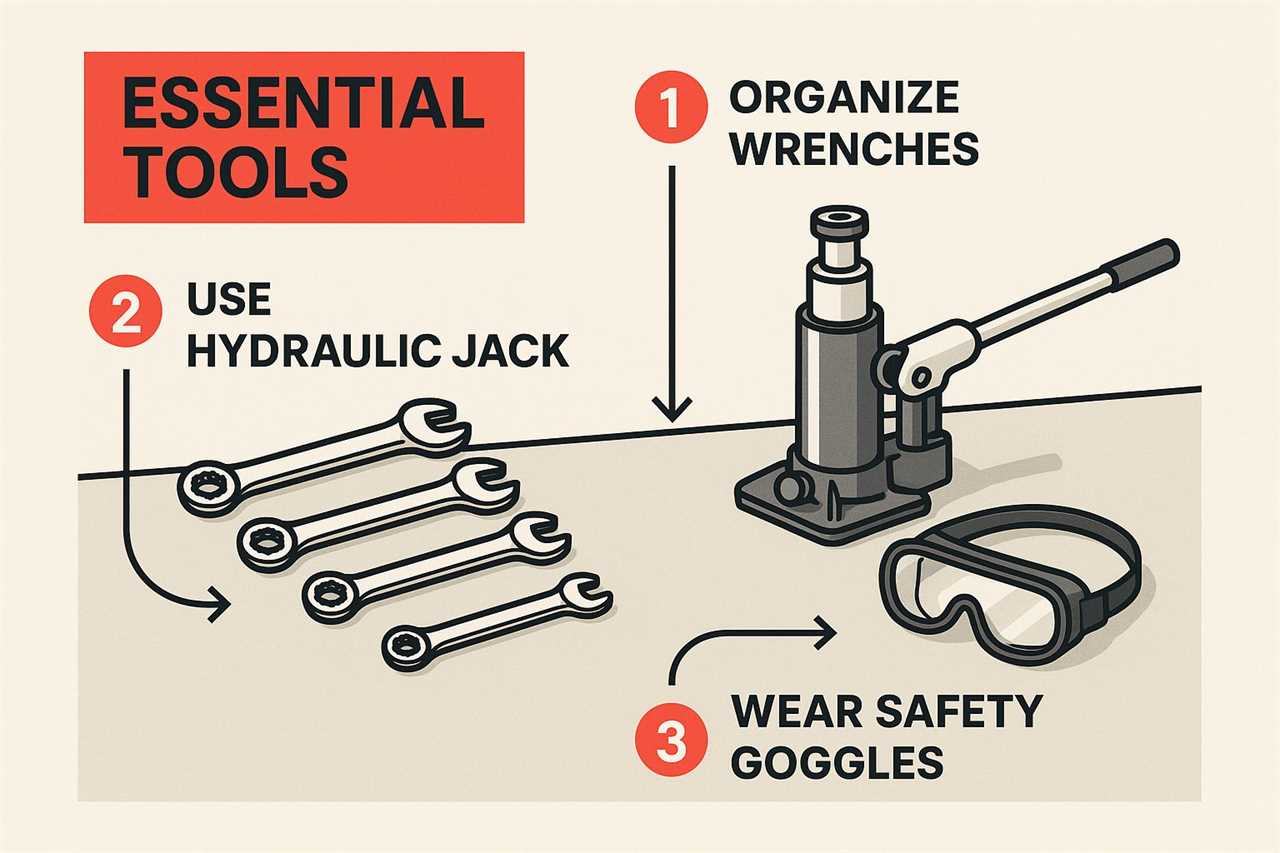
Having your tools organized and within reach makes the whole process smoother. It keeps you from hunting for a socket and lets you stay focused.
Installing New Front Components
With the old stuff cleared out, it’s time to put in the new hardware. This could be anything from strut spacers to full performance coilovers. If you’re still deciding, we have great options in our guide to Jeep Wrangler suspension upgrades.
Whatever you’re installing, here’s a pro tip: start every single nut and bolt by hand.
Cross-threading a bolt is a classic rookie mistake that can turn a fun Saturday project into a nightmare. By hand-threading a bolt for the first few turns, you can feel if it’s going in straight before you put a wrench on it.
This simple habit is a hallmark of an experienced mechanic. It protects your new kit and your vehicle’s mounting points from damage. A little patience here means a lot more confidence when you’re back on the road.
Conquering the Rear Suspension Install
After wrestling with the front end, the rear suspension should feel like a victory lap. The process back here is usually more straightforward. We’re typically dealing with lift blocks, add-a-leafs, or a full leaf spring pack swap.
First, get your floor jack under the rear axle and support it. You’re not lifting the truck off the stands. You just need to take enough weight to let the suspension relax.
Once the axle is supported, get the old U-bolts and shocks out of there. Always—always—replace your U-bolts. They are a one-time-use part, and reusing them is asking for trouble.
Positioning New Rear Components
Now for the fun part: installing the new gear. If you’re using lift blocks, make sure they’re seated perfectly on the axle pad. Pay close attention to getting the center pin lined up.
For an add-a-leaf, you’ll need C-clamps to hold the spring pack together. This helps while you slide in the new, longer center pin.
A key takeaway here is to keep the axle properly centered and aligned as you work. Use the jack to make small adjustments, raising or lowering the axle to line up bolt holes for the new, longer shocks.
Finally, snug up all new hardware, but wait for the final torque. The truck’s weight needs to be back on the suspension first. Projects like these are fueling the suspension lift kit market, valued at $1.5 billion in 2024 per Verified Market Reports.
The Final Checks That Guarantee a Safe Ride
Just because you’ve installed the lift kit doesn’t mean the job is finished. Getting these next few steps right is what separates a solid installation from a risky one.
Once your truck is on the ground with its full weight on the new suspension, grab the torque wrench. You need to re-torque every single nut and bolt to the manufacturer’s specs. Components shift under load, and this step is critical for safety.
A professional wheel alignment isn’t just a strong suggestion after you learn how to install a lift kit—it’s absolutely mandatory. Skipping it guarantees you will destroy your expensive new tires and create an unsafe, wandering ride.
Critical Post-Installation Adjustments
After torquing everything down, a few more tasks are essential for safety and function. Your truck’s geometry has changed significantly. You have to account for it before you hit the road.
- Headlight Aiming: Your headlights are now probably pointed at the sky. You must re-aim them down to the proper level for safe nighttime driving.
- The 100-Mile Re-Torque: This is a big one. After your first 100 miles, get that torque wrench out again and check every bolt.
This attention to detail is a huge part of what makes off-road culture so strong. North America currently leads the suspension lift kit market, thanks to a massive community of enthusiasts. You can dig into more market insights at Wise Guy Reports.
Common Questions About Lift Kit Installations
Even with a perfect set of instructions, you’re bound to have questions. It’s a big job, so it’s smart to get concerns ironed out first. Let’s go through some of the most common questions.
The number one question is about wheel alignment. Let me be crystal clear: Yes, you 100% need a professional wheel alignment. A lift kit fundamentally changes your truck’s suspension geometry.
Skipping the alignment is a fast track to terrible handling and shredded tires. This isn’t a friendly suggestion. It’s a non-negotiable final step for a safe installation.
Timing and Warranty Concerns
Another big question is about how long this process takes. If this is your first time, block off a full weekend. A typical install can run from 8 to 12 hours with some mechanical skill.
Rushing is your worst enemy here. It’s how you make mistakes or end up with a half-finished truck. Give yourself plenty of breathing room to work methodically.
A huge concern for many truck owners is whether a lift kit will void the factory warranty. The short answer? It can. While it won’t void your entire warranty, it can give a dealership a reason to deny a claim on related parts.
If a part fails, they might argue your lift kit was the cause. Talk with your dealership service department beforehand. For a better handle on the total investment, check out our guide on lift kit installation cost.
By the way, the most dangerous mistake is not using a torque wrench. Every bolt has a specific torque spec for a reason. Guessing is a surefire way to have parts come loose on the road.
At Offroading.com, our goal is to give you the expert knowledge and confidence to tackle any terrain. From detailed how-to guides to gear reviews, we help you prepare for your next adventure. Visit us at https://www.offroading.com to get started.
https://offroading.com/how-to-install-lift-kit/?utm_source=rss&utm_medium=rss&utm_campaign=how-to-install-lift-kit
Did you miss our previous article...
https://manstuffnews.com/4x4-off-road-cars/how-to-measure-shock-length-for-a-perfect-fit
