One of the most satisfying tasks for any dedicated home cook is learning how to make sausage after mastering other meats like brisket, pork butt, and chicken.
Sausage-making can seem daunting if you’ve never done it before. But it’s not as complicated as it initially seems. Investing in the right tools makes the experience much easier.
I’ve also made a video where I walk through the equipment you need and all the tips I’ve learned from 20+ years of making my own sausage.
[TAG0]
How to make sausage at home
Sausage making is one of those things where once you learn a little bit, you can really go nuts experimenting with different flavors.
I’m going to walk through everything that I think is important to know to get into sausage making. I’ve also included a simple German Bratwurst recipe. This is a great beginner sausage since it’s fresh with no cure and can be grilled or smoked.
Ingredients you’ll need
- Meat – I prefer pork butt, but you can use beef, pork, or wild game like venison.
- Seasoning – I recommend picking up a PS Seasoning Sausage Making Kit. It includes seasoning, casings, and a cure (if applicable).
- Casings – I typically use natural sheep or hog casings, which you can get in the PS Seasoning kits, Amazon, or your local butcher.
- Cure– this is optional, depending on the type of sausage you’re making.
Equipment you’ll need
You can easily spend over $1000-$2000+ to get “prosumer” level sausage-making equipment. You really don’t need all the expensive gear you see in my photos and videos to get started, though.
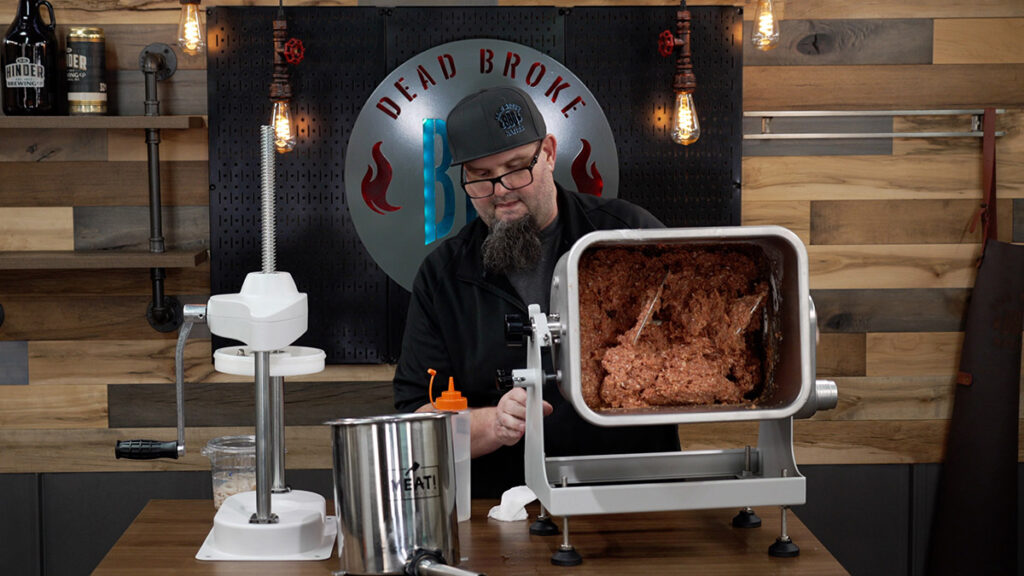
I’ve had good results using the meat grinder attachment from KitchenAid on my stand mixer. I recommend investing in the best grinder you can afford, and then slowly upgrade and add gear along your sausage making journey.
- Boning knife – to cut up and trim the meat.
- Large container – to store the meat. Ensure it fits in your fridge (and under your grinder), as you’ll need to chill the meat between steps.
- Motorized stuffer – this 20lb electric stuffer makes your life much easier. Here are other great sausage stuffers.
- Meat grinder – I use the LEM Big Bite Meat Grinder #22. If you’re starting small, you can use a KitchenAid grinder attachment. But it’s worth investing in one of these meat grinders for big batches.
- Mixer – I recommend the LEM Big Bite 25-Pound Meat Mixer. But I also often mix by hand.
- Sausage pricker – or, you can also use a strong needle to remove the air from the casings and help the fat run out while cooking.
- Aluminum sheet pans
- Scales – a smaller one for measuring ingredients and a bigger one for measuring meat.
- Cut-proof gloves – these are lifesavers when handling that chilled meat.
- Vacuum sealer – particularly worthwhile if you do large batches like me.
- Smoker – this is optional, but if you want to make smoked sausage, use a pellet grill, an offset smoker, or an electric smoker. I use the PK 100 vertical smoker, but here are more worthy vertical smokers. I prefer them because they can maintain lower temperatures.
What meat to use for sausage?
You ideally want a 75:25 or 70:30 meat-to-fat ratio for sausage. If you reduce the fat below 25%, it will start tasting quite dry.
You can use beef, pork, wild game like venison, or a combination. I love using pork butt because it has a great meat-to-fat ratio.
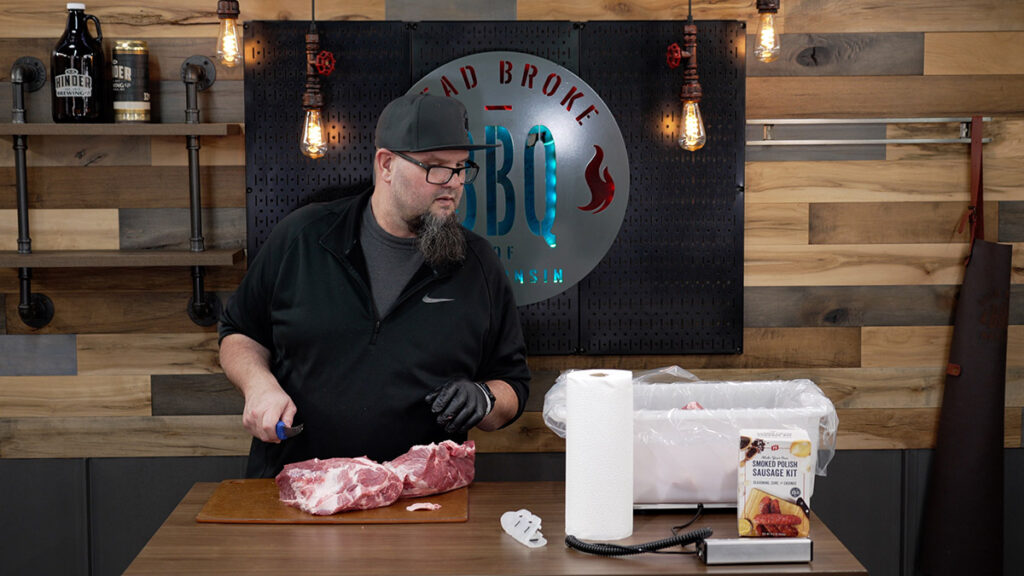
For beef, I often opt for a chuck roast.
Don’t sleep on seasoning kits
I recommend the PS Seasoning Sausage Making Kits for beginners. I still regularly use them, and the results are fantastic every single time.
The kit includes seasoning, casings, and a cure. There are also kits for snack sticks, brats, summer sausage—you name it!
Everything is pre-measured for you so you don’t have to worry about ratios, especially important when working with cure.

But which seasoning is best depends on the type of sausage you’re making. For example:
Once you are ready to start experimenting, I recommend picking up the book Home Production of Quality Meats and Sausages. It includes a fantastic spice table with measurements I know several professional sausage makers use.
Cured vs fresh sausage
If you’re making fresh sausages, you don’t need a cure. But if you’re making smoked sausage, I highly recommend adding a cure. Typical cured sausages include snack sticks, summer sausage, pepperoni, and salami.
Adding a cure:
- Gives the meat that deep pink hue (otherwise, it’ll look grey).
- Enhances the flavor.
- Kills harmful bacteria that cause botulism.
PS Seasoning has a cure for every occasion and flavor: Cure #1, Prague Powder #1, and Pink Cure are common types.
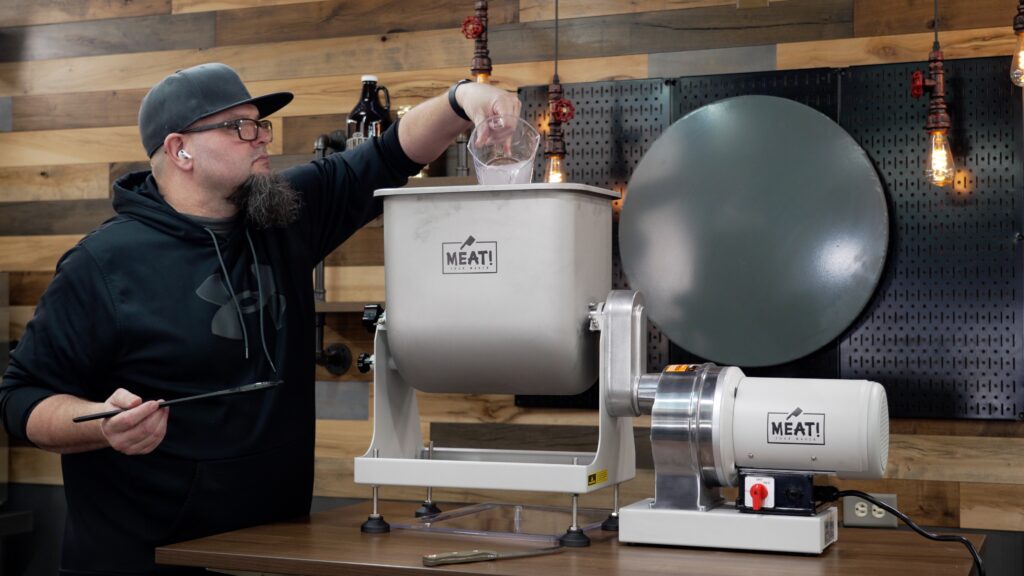
Adding a cure to the meat mixture.
I recommend using a cure with either sodium erythorbate or encapsulated citric acid to speed up the process.
Learn more about curing in our cold-smoking meat guide.
But it’s important to know that if you use a cure, you can immediately put your stuffed sausage into the smoker. Otherwise, the sausages must ferment in the fridge for another 24 hours.
Keep it cold!
My top tip for sausage-making is to keep the meat and equipment as cold as possible. This helps avoid the “smear,” which happens when the fat warms up and can easily ruin the texture of your sausages.
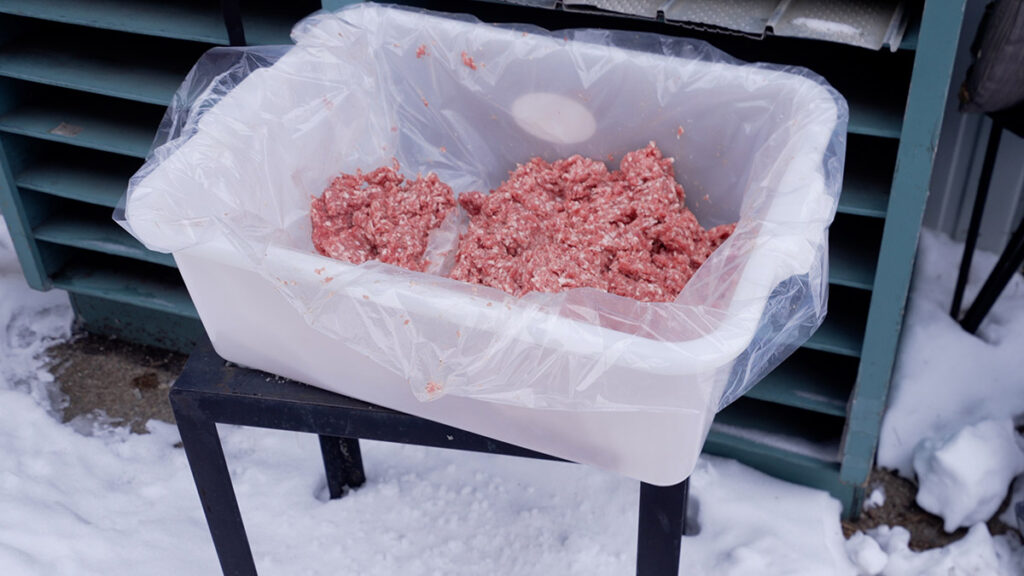
You want your meat almost frozen (or below 35°F) before grinding.
I keep my studio cool when making sausage. Another option is placing the grinder head in the freezer to get cold before grinding to help the meat cut cleaner.
If you’re lucky enough to live somewhere cold like me, you can even use the great outdoors to your advantage.
How to make sausage at home
This is my process to make fresh German-style Bratwurst.
1. Prep the casings
I like to start the process the day before for natural hog casings.
Rinse the casings and soak them in warm water for an hour, then repeat this process for another hour. This makes them much more pliable.
When I’m done, I place half a teaspoon of baking soda in the tub and let it sit in the fridge overnight.
They’ll be a little more slippery, which makes them much easier to load onto the horn.
Pro tip: If you have leftovers, store them in the fridge (not the freezer) in a container filled with salt water. This way, they’ll keep for up to 4 months.
2. Prep the meat
Use a boning knife to trim and cut up the meat. You want to cut it into cubes that fit down your meat grinder’s throat.
Place it back in the fridge or freezer while you continue prepping.
Grab your seasoning kit or spices and set up your grinder before removing the meat from the fridge.
3. Grind
The size of the grinder plate depends on the type of texture you’d like. For fresh sausage, I do one pass through a 6mm (¼-inch) plate or a 10mm (⅜-inch) plate.
If grinding for snack sticks or summer sausage, I make two passes: the first through a 10mm plate and the second through a 4.5mm (3/16-inch) plate.
Ensure you check that the meat is sitting below 35°F before grinding. If not, place it back in the freezer for 30 to 45 minutes so it stiffens up. I often return it to the freezer between passes because cold is key!
For more tips, here’s our guide to grinding meat.
4. Season
Mixing the meat is crucial in ensuring the proteins and fats bind together and emulsify. This carries through to the cooking process, so you don’t end up with dry and crumbly sausages.
I typically hand-mix the seasoning into the ground meat for about 10 minutes. But with cured sausage, I use my mixer and mix for around 5 minutes. You can also use a stand mixer’s paddle attachment for small batches.
When mixing, ensure the seasoning is evenly distributed and you get a nice protein extraction. If you’re new and have no clue what I mean, here are some tricks.
Firstly, if the mixed meat sticks to your hand and doesn’t fall off when you turn it upside down, you’re good. Secondly, you’ll start to see what looks like feathery hairs.
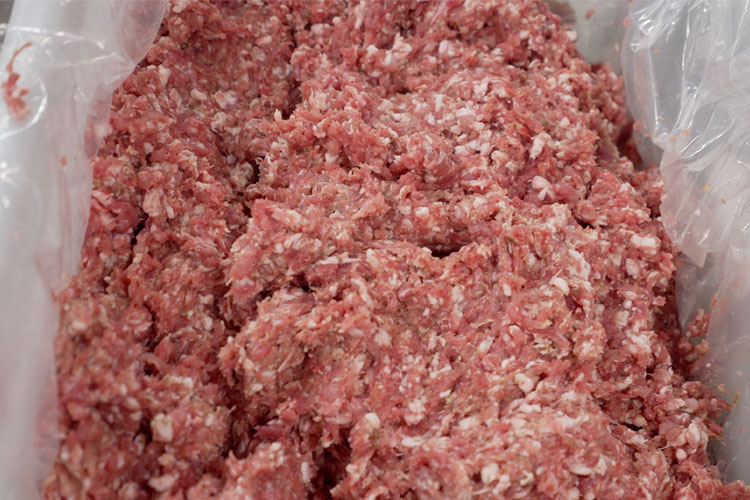
Perfect ground meat for brats.
Place that back in the fridge while you set up your stuffer.
If you’re only making sausage patties, you can stop right here. Shape the cooled meat into patties, then keep scrolling for how to cook and store them.
5. Stuff
Pack the ground meat tightly into the canister to push out air pockets. When I make snack sticks, I thread as much of the casing onto the horn as possible.
Pro tip: Keep the horn and casing moist throughout the process to prevent rips.
Slowly feed the mixture through the stuffer and into the casing, taking care not to overstuff or break the casing.
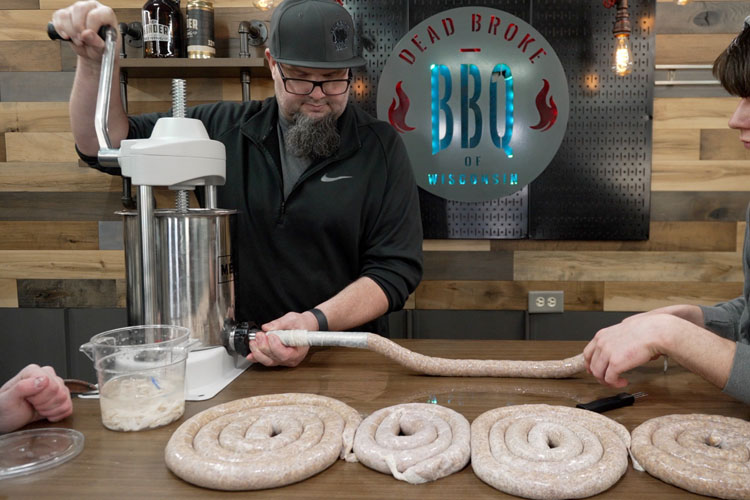
With natural casings, I like to fill them up ¾ full to make it easier to twist. If it feels a little loose, twist them up a little more.
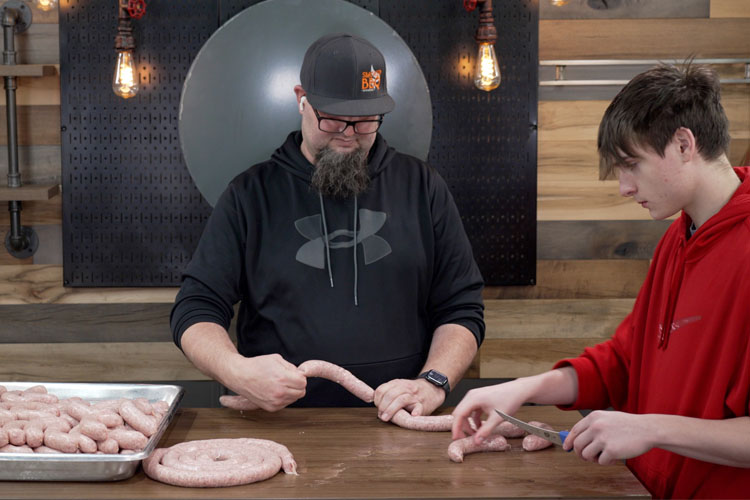
My technique involves moving down the sausage, pinching, and twisting as I go. Then, I use my sausage pricker to add a few “escape hatches.”
You don’t have to do this with fibrous casings, as they already have holes.
6. Drying
You can cook the sausage at this point, but it’s best to let it rest and dry out in the refrigerator for a few hours (preferably overnight). This allows the flavors to meld together and dries out the casing so the moisture doesn’t steam the meat while cooking.
This is more important if you’re curing and smoking sausages. Drying out the casings allows the smoke to adhere better to the sausage and permeate into the meat.
It’s not necessary if you’re going to cook fresh sausage right away. But the result will be much better if you let the sausage rest and the casings dry out.
7. Cook
There are several ways to cook sausage, but no matter what, you want to reach the ideal internal temperature. For pork sausage, this is 150°F, although I like it sitting between 156 -158°F.
Let’s look at how to cook your fresh sausages:
- Hot smoke the sausages at 250°F to 300°F until they reach the ideal internal temperature. Here’s our guide to smoking sausage.
- Cook them in a frying pan over medium heat for 3 to 4 minutes on each side until brown. For extra flavor, you can add a braising liquid like beer.
- Cook them in a 400°F air fryer for about 7 minutes or until they reach the above internal temp.
Pro tip: Place smoked sausages immediately in an ice bath to stop the cooking process. Then, remove them from the water, place them on a wire rack, and let them dry off or “bloom” for about an hour.
After that, you can slice them into individual links. Return them to the fridge for another 24 hours to air dry before you vacuum seal them.
8. Store the sausage
When stored in an airtight container, fresh sausages will last in the fridge for up to a week and in the freezer for 3 months.
I prefer to make big batches and vacuum seal my sausages, which allows them to last several months in the freezer.
Try some of our other sausage recipes
Print
Basic HOmemade German Bratwurst
A coarsely ground sausage flavored with white pepper, herbs, and spices that's perfect for beginners.
Course Main Course
Cuisine German
Prep Time 2 hours hours
Cook Time 10 minutes minutes
Total Time 1 hour hour 10 minutes minutes
Servings 16 Sausages
Calories 421kcal
Author Jeff Rice
- casings 32-35mm
- ½ tsp baking soda
- 5.5 lbs pork
- 45 g salt NOTE 1
- 9 g white pepper
- 2.5 g marjoram dried
- 2.5 g caraway
- 2.5 g ginger ground
- 2 eggs white only
- 250 g water
Prep the casings the day before making the sausage by rinsing and soaking them in warm water for an hour, repeat this process for another hour.
Place half a teaspoon of baking soda in the tub and let the casings sit in the fridge overnight.
Use a boning knife to trim and cut up the meat into cubes that will fit down your grinder. Place the meat in the freezer until you are ready to grind. You want it to be sitting below 35°F before grinding.
Grind the meat through a 3mm plate.
Whisk the egg whites lightly.
Hand-mix the seasoning and ground meat with the egg whites for 10 minutes, or use a mixer and blend for 5 minutes. It's mixed when the meat sticks to your hand when turned upside down.
Pack the ground meat tightly into the stuffer’s canister. Try to push out any air pockets. Thread the casings onto the horn and keep them both moist.
Slowly feed the mixture through the stuffer and into the casings, pinch, and twist to make 4" links, removing any air pockets with the sausage pricker.
Place the sausage in the refrigerator to rest and dry out for a few hours (preferably overnight).
Cook sausages on the grill or in a frying pan over medium heat for 3 to 4 minutes on each side until brown. For extra flavor, you can add a braising liquid like beer
Store in an airtight container, fresh sausages will last in the fridge for up to a week and in the freezer for 3 months.
1. Why grams? Grams are the most common measurement for sausage making because they are more accurate than teaspoons and tablespoons, which are difficult to scale. I recommend investing digital scales.
Calories: 421kcal | Carbohydrates: 1g | Protein: 27g | Fat: 34g | Saturated Fat: 12g | Polyunsaturated Fat: 3g | Monounsaturated Fat: 15g | Trans Fat: 0.002g | Cholesterol: 133mg | Sodium: 1220mg | Potassium: 461mg | Fiber: 0.3g | Sugar: 0.03g | Vitamin A: 54IU | Vitamin C: 1mg | Calcium: 32mg | Iron: 2mg
Did you miss our previous article...
https://manstuffnews.com/backyard-grilling/big-green-egg-brined-turkey-with-lanes-bbq
 Backyard GrillingWeekend WarriorsAdvice from DadBeard GroomingTV Shows for Guys4x4 Off-Road CarsMens FashionSports NewsAncient Archeology World NewsPrivacy PolicyTerms And Conditions
