There’s nothing I like more than making smoked venison snack sticks when the weather turns and deer hunting season approaches.
Whether you want to call them snack sticks, meat sticks, or slim jims, these on-the-go homemade snacks are a must-try on any smoking journey.
Smoking cured meats can be a little intimidating for many people. But I’ve made a video showing the easy but prolonged process.
I’m making a 15-pound batch using venison, pork, and beef for this recipe. I’ve also included instructions for a drier snack stick with a more jerky-like texture. But the key when smoking snack sticks is to gradually increase the temperature so there’s no fat loss.
Try this recipe once, and I promise you’ll be hooked.
Smoked Venison Snack Sticks
Ingredients you’ll need
- Venison – I’m using very lean venison.
- Pork butt
- Beef trimmings – I used some I’d trimmed off a prime rib roast earlier in the week.
- PS Seasoning Snack Stick Kit: This kit has everything you need and does up to a 25-pound batch. It includes the No. 769 Willie’s Snack Stick seasoning, speed cure, and smoke collagen casings.
If you’re doing a smaller batch like me, you’ll need to do some math to get the correct measurements.
Equipment you’ll need
- Meat grinder – I’m using the LEM #22 Dual Grind Big Bite Grinder, check out all our grinder recommendations here.
- Kitchen scale
- Large container – big enough to hold 15 lbs of meat!
- Mixer – I’m using the LEM mixer attachment for my grinder. But you can use a Kitchenaid or mix it with your hands.
- Electric sausage stuffer – Here are our top sausage stuffer picks. Use what you’ve got, even if it’s a prehistoric hand-crank sausage stuffer!
- Large baking sheet – a big one that fits your smoker is perfect for holding all those sticks.
- Vertical smoker with rods – I’m using my Pro Max Smoker but any smoker that can run around 100°F will work.
- Sawdust – This Pro Max can run on sawdust, but you can run wood chips or pellets, depending on your smoker. I’m using hickory because I love the smoky flavor it adds to the snack sticks.
- Knife
- Cutting board
- Chamber vacuum sealer – The best way to preserve a big batch of snack sticks.
What is the meat-to-fat ratio?
The optimal meat-to-fat ratio for snack sticks is 85:15. You shouldn’t go over an 80:20 mixture because it gets a little greasy.
If you want it a little drier, go for a 90/10, which I’ve done with this smoked venison snack stick recipe.
Adding extra flavor
You’ll notice many snack sticks include additional flavors. I’m just using the seasoning included in the kit today. But here are a couple more options to mix in when you add the seasoning:
- Encapsulated citric acid adds a tang and won’t break down the meat’s texture. Add one teaspoon per pound of ground meat.
- High-temp cheddar cheese can withstand the heat while adding a creamy cheese flavor to any sausages. I’d go for about 1 cup in this recipe.
How to make Smoked Venison Snack Sticks
1. Grind
You want to ensure your meat and grinder are cold when making sausage.
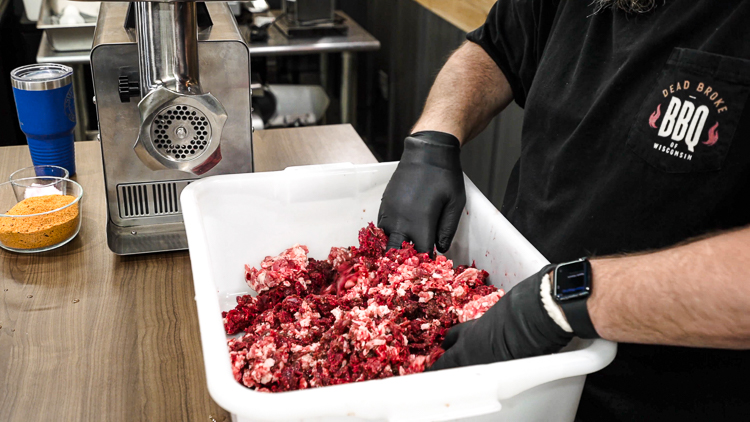
For the venison and pork butt, I used a coarse grind at half an inch. I actually did this earlier and froze it. I then thawed it in the fridge two days in advance.
I passed the beef trimmings through the grinder once.

Use your hands to combine the meat in your biggest container.
2. Cure and season
Typically, when I’m using any type of cure, I like to put it in water during the mixing process (step 4). This time, I just evenly spread the dry cure over the mixed meat before mixing it with my hands. But I’d recommend mixing it with water. Follow the instructions on the kit box.
As for the seasoning, I typically add it before grinding. But because most of my meat was pre-ground, I just hand-mixed it in before the last pass.
3. Grind again
I used a quarter-inch plate, but I usually use a 3/16th-inch plate. As for the finished product, I don’t think there was any difference.
Before the last pass, I like to drop some fat right down the grinder’s throat. This just helps keep a little bit of wear and tear off the grinder.
4. Mix
I used my grinder’s mixer attachment to mix the ingredients one last time. Add one ounce of water per one ounce of ground meat.
Depending on the batch size, you’ll need to mix for about five minutes.
Take a clump; if it sticks to your hand, you’re good to go.
5. Stuff and cure
Use the collagen casings in the Snack Stick Kit and stuff your sausages.
Because I didn’t use a cure accelerator, I cured mine for 24 hours in the fridge before placing them in the smoker.
This gives the seasoning more time to enhance the flavor and gives you a jump start on drying.
6. Drying
Preheat the smoker to 100°F or the lowest setting available. We want to dry out these sticks nice and slow.
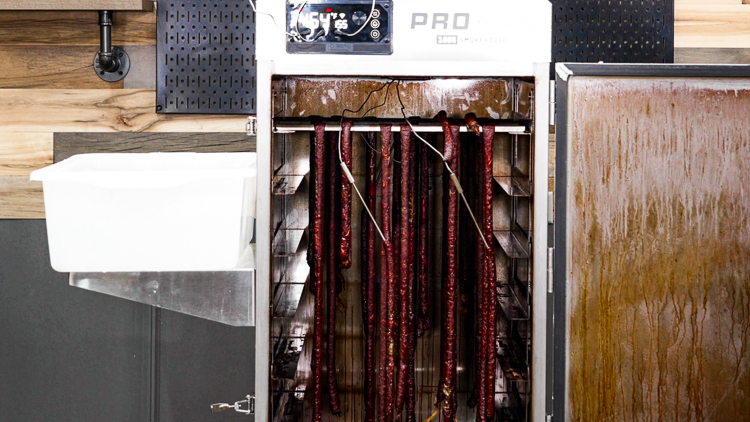
I used my Pro Max Smoker with rods and hung about five sausages on each rod.
Be careful when testing the temperature, as they often break, as you’ll see in the video. I just place any broken sticks on top of the rods until they’re done.
Now, let them sit for an hour to give the casings time to set. After the hour, increase the smoker’s temperature to 150°F to get some smoke on the sticks. I use a full pan of hickory sawdust for the smoke fuel, which lasts about three hours.
When my pit is done producing smoke (around the five-hour mark), I crank it up to 170°F to finish the sticks off.
The snack sticks are done when they reach an internal temperature of 155°F.
The cooking time is 8 to 10 hours, depending on the smoker and batch size. This results in snack sticks with a tender bite.
If you want more jerky-style sticks, you can do what I did with this batch. After 8 hours, I turned the temperature back down to 155°F and smoked them for a further 4 hours.

Jerky-style sticks.
Once I remove the sticks from the smoker, I dunk them immediately in an ice bath for five minutes to stop them from cooking further. It also helps them cool down so you can cut them immediately into individual sticks.
7. Storing
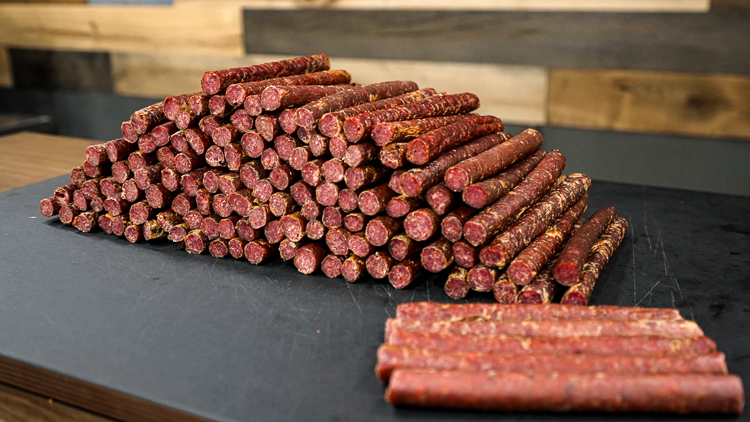
I typically cut them into 6″ sticks and preserve them using my chamber vacuum sealer.
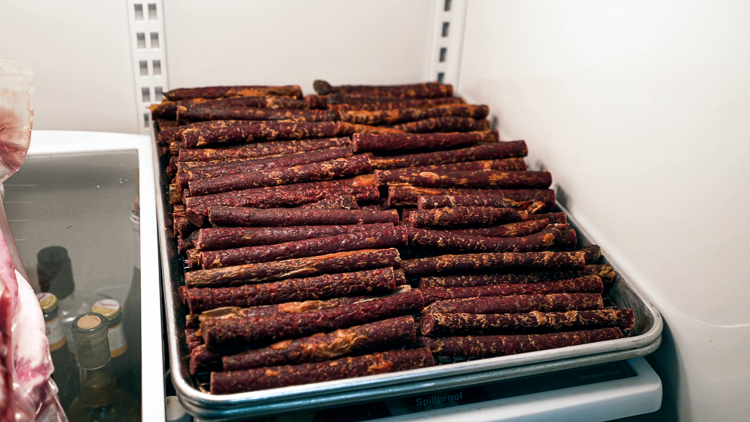
Before I start sealing the bags, I like to place them back on the large baking sheet, uncovered, and in the fridge. I leave them in there until the casings start to bloom.

Cooling them in the fridge also gives them that nice snap
I start vacuum packing once they reach an internal temperature of 40°F or below.

Snack sticks last in the freezer for several months and in the fridge for 2 to 3 weeks when properly sealed.
Other recipes you might like…
Print
Smoked Venison Snack Sticks
These snack sticks are made from a combination of venison, beef, and pork, similar to jerky but thinner.
Course Snack
Cuisine American
Prep Time 30 minutes minutes
Cook Time 8 hours hours
Servings 50
Author Jeff Rice
- 9 lbs lean venison
- 5 lbs pork butt
- 1 lb beef trimmings
- 1 ps seasoning stick sausage kit
- water
Coarse-grind the venison and pork butt and pass the beef trimmings through the grinder once.
Use your hands to combine the meat in your biggest container.
Add seasoning to meat before grinding. If you pre-ground it, hand-mix it in now.
Add a little fat first, then pass the meat through the grinder one last time using a quarter-inch plate.
Mix the cure, water (one ounce of water per one ounce of ground meat), and ground meat together for five minutes. It’s done when a clump sticks to your hand.
Use the collagen casings provided in the kit and stuff your sausages.
Cure the sausages in the fridge for 24 hours.
Preheat the smoker to 100°F or the lowest setting available.
Hang about five sausages on each rod before placing them in your smoker.
After one hour, increase the smoker’s temperature to 150°F and add a full pan of hickory sawdust.
Around the five hour mark, increase the temperature to 170°F. The snack sticks are done when they reach an internal temperature of 155°F (eight to ten hours later).
Optional: For drier jerky-style sticks, turn the temperature back down to 155°F and smoke for four hours. Dunk them immediately in an ice bath for five minutes.
Once cool, cut them into six inch sticks. Place them back on the large baking sheet, uncovered, and in the fridge. Remove when the casings start to bloom.
Preserve them using a chamber vacuum sealer.
 Backyard GrillingWeekend WarriorsAdvice from DadBeard GroomingTV Shows for Guys4x4 Off-Road CarsMens FashionSports NewsAncient Archeology World NewsPrivacy PolicyTerms And Conditions
