If you have been unfortunate enough to struggle through dry turkey, it was likely never brined properly. A good brine gives the breast a fighting chance, and this method keeps things simple.
Our turkey brine builds a strong base for moisture with a festive blend of savory, sweet, and citrus notes that never overpower the turkey.
One reader, Sandy, commented: “This was the perfect brine for my spring turkey smoke. The only thing I did was split the turkey in half. I seasoned one half with thyme and rosemary, and the other half with Chipotle seasoning. Loved it and so glad I ran across your recipes

thanks. ★★★★★“
At its simplest level, a brine is a solution of salt in water. However, there are plenty of flavor options you can add.
- Do you want it sweet? Try some brown sugar in the mix.
- Do you want it spicy? Throw in some cayenne.
- Do you want some citrus notes? Add some orange, lemon, or even grapefruit.
- Feeling festive? Go with rosemary and cranberries.
So long as you stick to the salt and water ratios, the rest of the ingredients are easy to substitute with whatever you’ve got on hand. Even though the brine liquid itself is strong, it soaks into the meat smoothly, adding those subtleties and nuances that make for a great bite of delicious turkey.
Once it is chilled, it has plenty of volume to cover a medium to large bird and works steadily during the soak, ensuring the meat is seasoned evenly.
Once you’ve brined your turkey, check out our fantastic pellet grill whole smoked turkey recipe, or try our smoked spatchcock turkey, which gives you the best crispy skin.
What you need to make this turkey brine
Ingredients:
- Water
- Ice – To cool down the hot brine liquid quickly so you can safely add the turkey
- Salt and black pepper: We use Kosher salt and freshly ground black pepper. But you can also use whole peppercorns.
- Brown sugar
- Citrus: Oranges and lemons cut into wedges. But feel free to swap the oranges for clementines if you prefer.
- Fresh garlic cloves
- Fresh herbs: We’re using rosemary sprigs and thyme, but other popular options include sage and coriander.
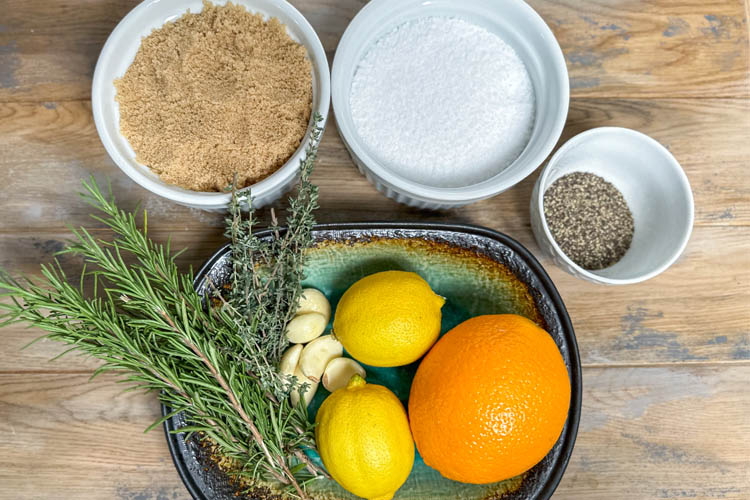
My go-to brine ingredients.
Equipment:
If you don’t have a large brining container available (or room in the fridge), I recommend dry brining your turkey instead.
What’s the difference between a wet brine and a dry brine?
This is a wet brine recipe. This means the turkey is submerged in salted water for 24 hours. A dry brine is a wet brine without the water. You rub the turkey with salt (and other ingredients), which absorbs into the meat overnight.
Here’s our step-by-step guide on how to dry brine a turkey.
Pros and cons of brining
The brine is like turkey spa day before hitting the heat. It should moisten the meat all the way through, preventing those easily overcooked areas from becoming dry.
Now, there are some negatives to using a turkey brine:
- You have to get the balance of salt right. Too little and you will just have a wet bird. Too much and your guests will be rushing for water.
- Time and effort. A good brine should last from 8 to 24 hours. Any longer and the texture of the skin can deteriorate.
- General messiness and hassle of making the brine and finding a suitable vessel for the bird to sit in.
Also, note that the time and the strength of the brine should correlate, just like with a marinade. Use a stronger brine for less time and vice versa.
What’s the best vessel to brine in?
Depending on the size of your turkey, you may have some trouble finding a container large enough to hold the whole turkey and brine in. If you have a smaller turkey, a brining bag works great. Just put the turkey and brine in the bag, tie it closed, and refrigerate.
If you do use a bag, place the turkey inside breast side down. Then at about hour 18 of 24, flip the turkey in the bag for maximum impact.
A food-safe 5-gallon bucket, stock pot, or container may also be a good option to brine the turkey. If you can find room in your fridge to house something that tall or wide, that is.
I’ve used my 5 gallon Yeti bucket with great results.
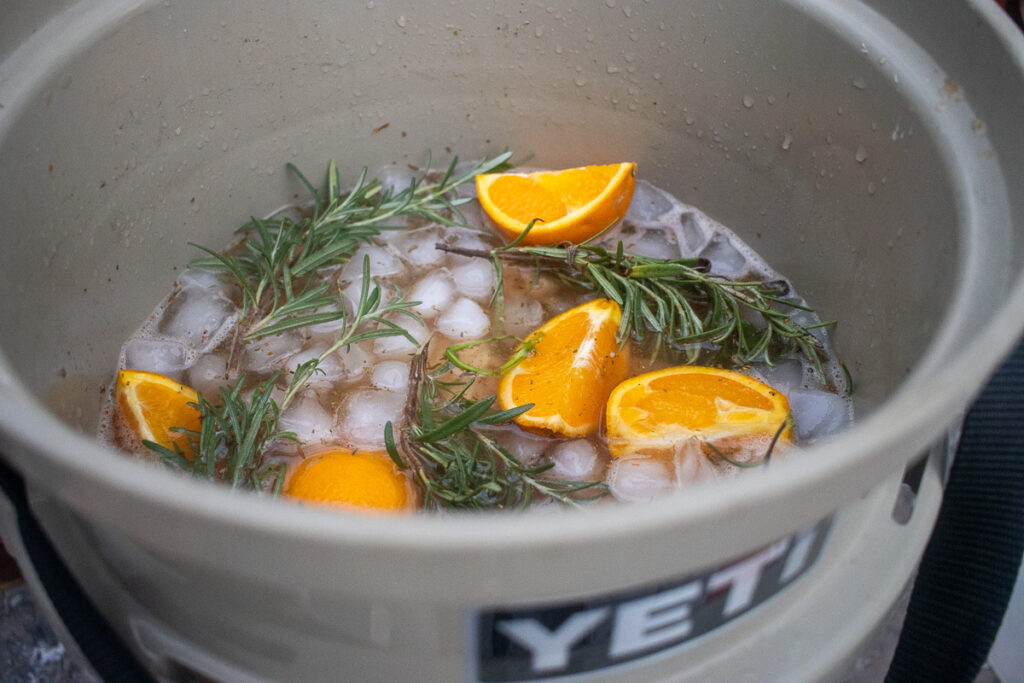
My personal favorite vessel for wet brining turkey though? A cooler.
With a cooler, I have plenty of space for any size turkey. With some ice on top, I can also leave it there overnight. This leaves room in my fridge for other Thanksgiving necessities.
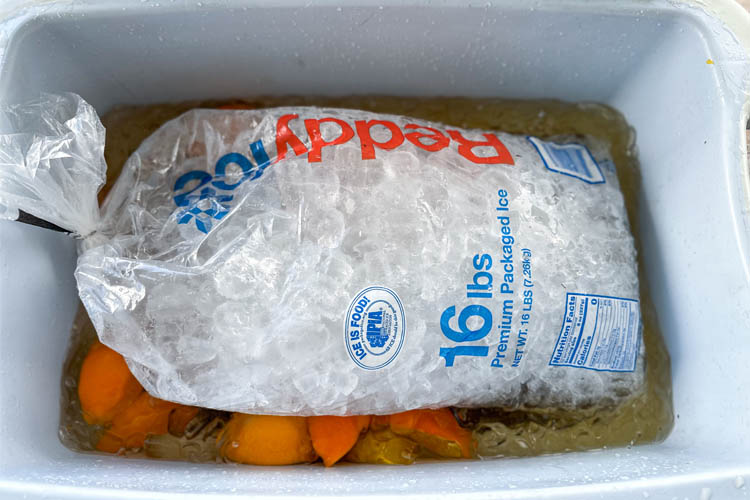
TIP: Sit a bag of ice on your turkey to ensure it’s submerged and keep the temp cool.
How to brine a turkey
1. Heat one gallon of water
Set a large pot on the stove and pour in the first gallon of water. Start heating it over medium-high heat. Heating helps the salt and sugar dissolve and softens the citrus as the mixture warms.

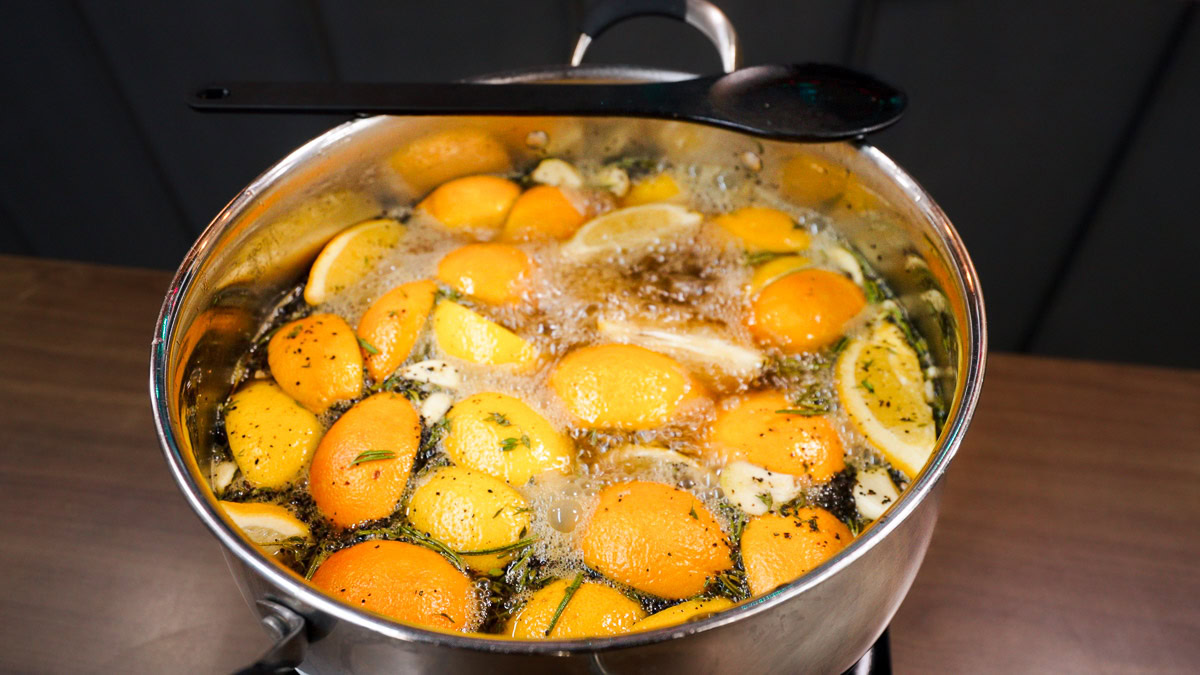
2. Add brine ingredients
As the water heats, add the salt, sugar, peppercorns, citrus, garlic, rosemary, and thyme. Besides the sugar and salt, you can experiment with different combinations and herbs.
Make the brine your own:
- Swap the citrus for apples or add a splash of apple juice if you want a slightly sweeter profile
- Add bay leaves or rosemary for a more savory profile, or use sage if you prefer a classic holiday flavor
- Crushed garlic, extra peppercorns, or a small amount of chili flakes can give the brine a little more punch.
Stir until the salt and sugar dissolve. Let the mixture reach a small rolling boil and give it a short simmer. This step helps the citrus break down and release more juice into the brine, which boosts the final flavor.
3. Cool the brine
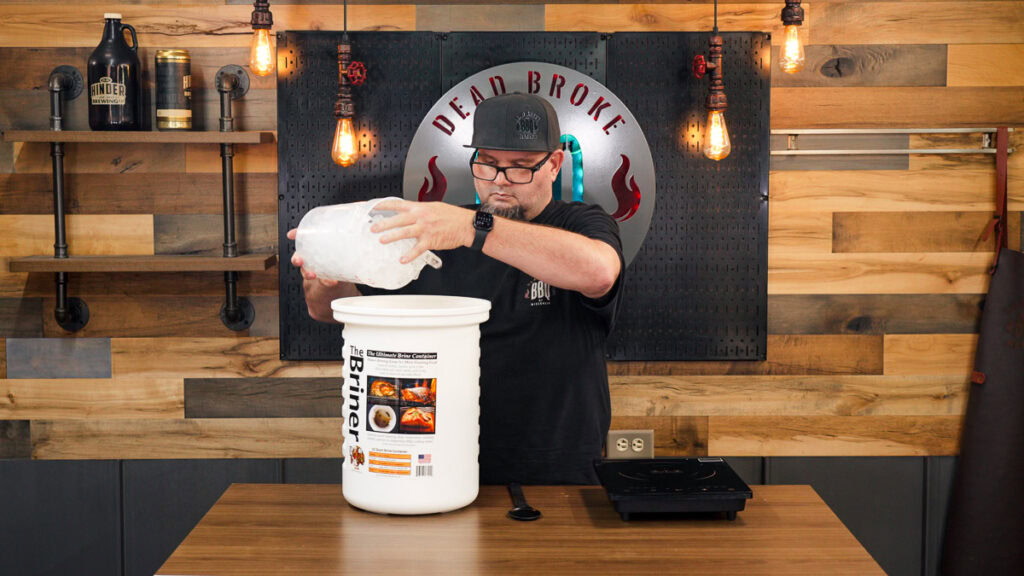
Take the pot off the heat and carefully pour the hot brine into your brining vessel.

Once the hot brine is in the vessel you plan to use, add the cold water and stir to bring the temperature down. Add ice and keep stirring until the brine is fully chilled. The brine must be colder than fridge temperature before the turkey goes in.
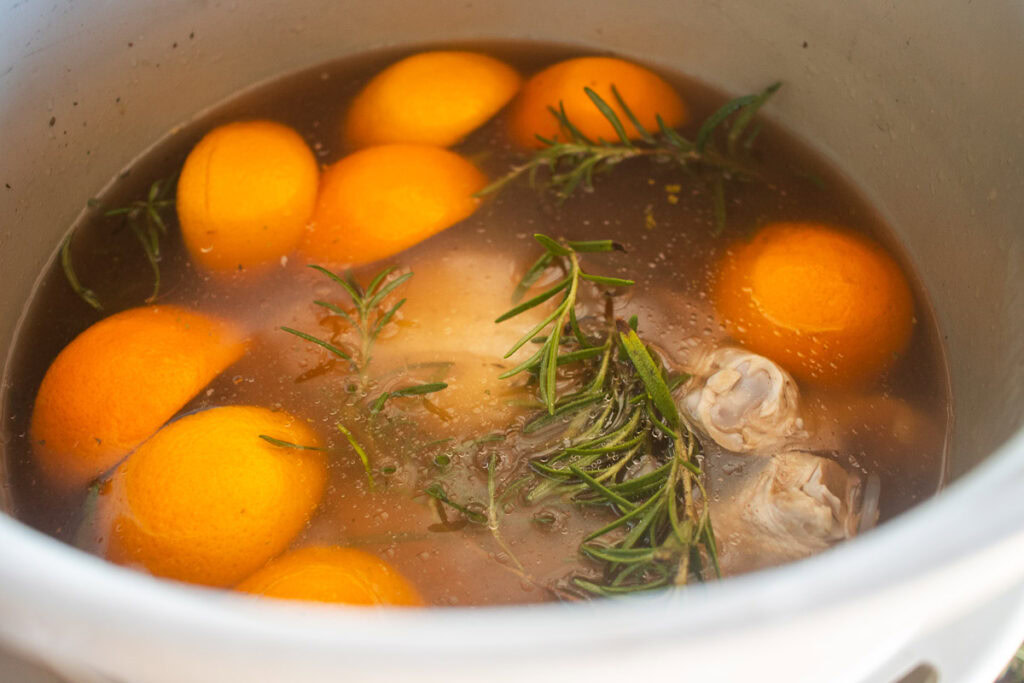
After the cold water and ice are added, there will be enough liquid to easily cover a ten to fourteen pound turkey. You can add a little extra cold water if you need more volume, but avoid adding too much or the brine will weaken.
The liquid must be colder than fridge temperature before the turkey goes in. Once the cold water and ice are added, you will have enough volume to easily submerge a 10-14lb turkey.
You can add a little extra cold water if needed, but avoid adding too much, as this will dilute the brine.
4. Brine for 12 to 48 hours
Add the turkey, ensuring it remains fully submerged. If it floats, place a plate, a bowl, or a sealed bag of ice on top to keep it under the liquid. The Briner bucket I used has a handy contraption that holds the turkey down.
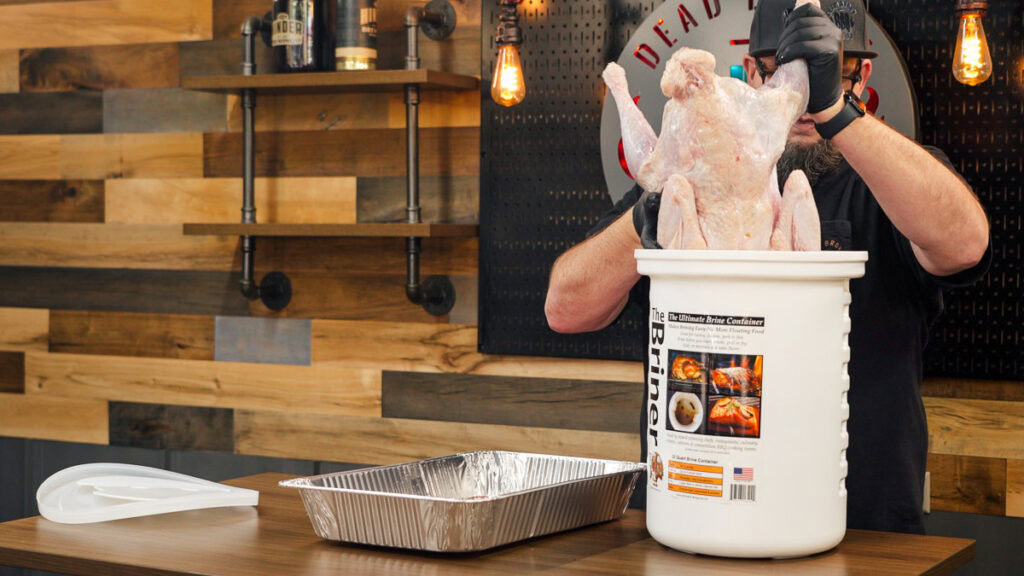
Turning the turkey once during the brine helps with even absorption, especially with larger birds. Keep the brine cold the entire time.
Twelve hours gives a lighter result, while a full day gives deeper seasoning and better moisture in the breast. Brining for up to forty-eight hours is also common if the brine stays cold.
5. Remove the turkey from the brine
Lift the turkey out of the brine and let the excess liquid drain off. Discard the brine. Pat the skin dry with paper towels until the surface is as dry as you can get it.
There is no need to rinse the turkey.
For Extra Crispy Skin: Transfer the turkey to a wire rack and move it to the fridge uncovered so the surface can dry out before cooking.
You’re now ready to apply your turkey seasoning. While you don’t need to, you can also inject the turkey.
Turkey brine FAQs
What is the best turkey for brining?
Ideally, you want to brine a fresh turkey. This is because most frozen turkeys are pre-salted. Look out for terms like “kosher” or “enhanced” if you’re unsure. You just don’t want to add more salt on top of this. An organic frozen turkey is usually a safe bet, but make sure it’s thawed before brining.
How long should you brine a turkey?
Turkey brining should last for at least 18 hours, but up to 24 hours. The larger the bird, the longer you should brine it. We recommend brining for a maximum of 24 hours though.
Can you brine a turkey for too long?
Yes, you don’t want to leave your uncooked turkey in the brine for longer than 24 hours. This will make your turkey taste too salty.
Do you rinse turkey after brining?
When you are ready to cook the turkey, you should remove it from the brine liquid and wipe it dry with a few paper towels. There’s no need to wash the meat before cooking.
In fact, washing the turkey has been proven to spread bacteria to other surfaces in your kitchen.
The one exception to this rule is if you are using a rub or seasoning you know will be quite salty. In that instance, give the turkey a quick wash and dry with paper towels.
Is sugar required for a brine?
No, sugar isn’t mandatory. But we like to add brown sugar to our easy turkey brine recipe because it enhances the turkey’s flavor and encourages better skin browning come cooking time.
Can you make the brine in advance?
Yes, you can cook the brine a few days ahead of time. Keep it stored in an airtight container in the fridge until brining time. Making it in advance also means you don’t have to wait for it to cool down.
Can you make gravy from a brined turkey?
Yes, you can still make gravy from brined turkey drippings. But it will be saltier, so you probably won’t need to add more salt. If it’s too salty, add water or unsalted stock to balance out the flavors.
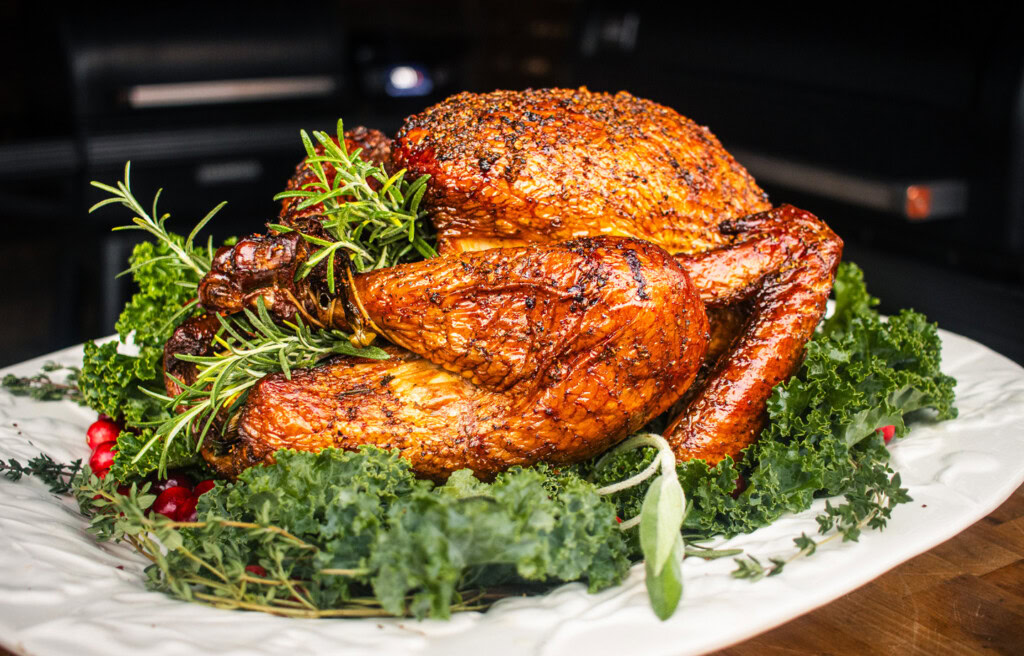
Does brining a turkey really make a difference?
Yes, it really does. It results in a juicy turkey that’s literally bursting with so much flavor. You’ll just have to try it yourself to see the difference.
Recipes to use this brine with
You can use this brine solution for any of our whole turkey recipes or use it to add extra flavor to wings, breasts, or legs. Here are just some of our favorite turkey recipes:
This turkey brine works perfectly for a Thanksgiving turkey and one my family uses every year without fail. If you try it, do me a favor and leave us a 5-star rating so more people discover it.
Print
The BEST Turkey Brine Recipe for Juicy and Flavorful turkey
This citrus and herb brine keeps the breast juicy and adds a subtle sweetness that carries through the whole turkey.
Course Main Course
Cuisine American
Prep Time 10 minutes minutes
Cook Time 10 minutes minutes
Total Time 20 minutes minutes
Servings 1 whole brined turkey
Calories 2087kcal
- 1 gallon water for heating
- ½ gallon cold tap water
- ice as needed to cool the brine below 45°F, see note 1
- 1½ cups Kosher salt
- 2 cups brown sugar
- 3 tbsp whole black pepper corns
- 3 oranges cut into wedges
- 3 lemons cut into wedges
- 5 cloves garlic smashed
- 4 tbsp fresh rosemary
- 4 tbsp fresh thyme
Heat 1 gallon of water in a large pot over medium high heat and stir in the salt, brown sugar, and peppercorns until they dissolve.
Add the oranges, lemons, garlic, rosemary, and thyme to the pot, bring the mixture to a light boil, and let it simmer for a few minutes so the citrus releases juice.
Remove the pot from the heat, pour in ½ gallon of cold tap water, and add enough ice to bring the brine below 45°F.
P;ace the turkey in a brining bucket or food safe container and pour the chilled brine over the top, adding more cold water or ice if the turkey is not fully submerged. Use a plate, a bowl, or a sealed bag of ice to weigh the turkey down so it stays under the brine.
Remove the turkey from the brine, discard the brine, and pat the turkey dry with paper towels.
For better browning, set the turkey on a wire rack and let it air dry in the fridge for 2 to 4 hours before cooking.
1. Cooling the Brine With Ice: Use enough ice to bring the brine temperature under 45°F before adding the turkey. About 2 to 3 pounds of ice, or roughly 4 to 6 cups, is usually enough to cool a hot brine batch this size. You can add a little extra cold water if needed, but do not add too much or you will dilute the brine. If you do not have ice, chill the pot in the fridge until it reaches the same temperature.
Calories: 2087kcal | Carbohydrates: 541g | Protein: 14g | Fat: 3g | Saturated Fat: 1g | Polyunsaturated Fat: 1g | Monounsaturated Fat: 0.5g | Sodium: 170092mg | Potassium: 2462mg | Fiber: 31g | Sugar: 472g | Vitamin A: 2685IU | Vitamin C: 432mg | Calcium: 1124mg | Iron: 15mg
