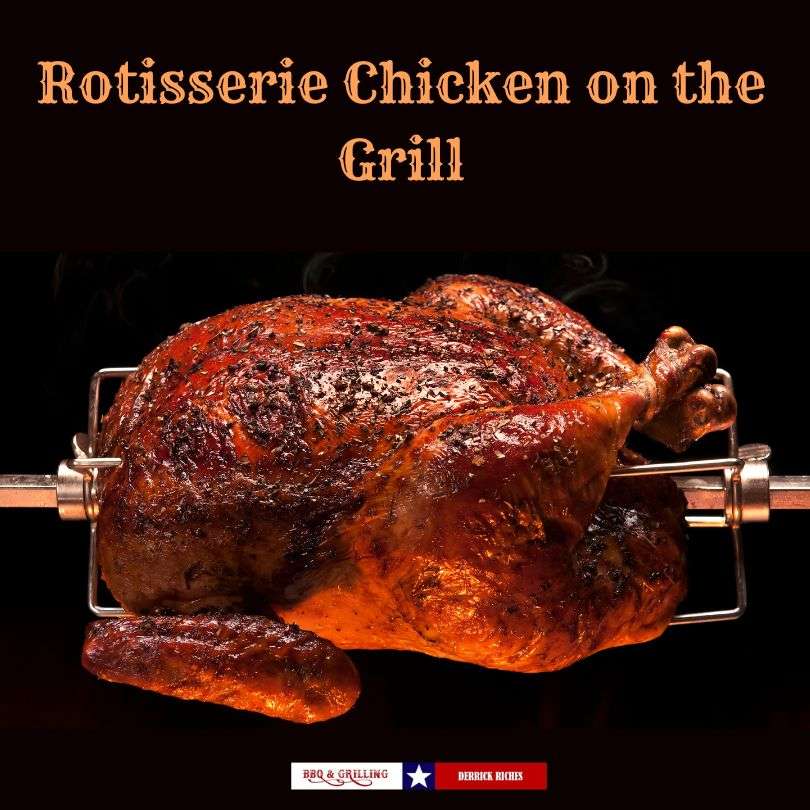
Learn how to make Rotisserie Chicken on the Grill with our comprehensive, step-by-step guide, and say farewell to store-bought varieties!
Rotisserie chicken is not just a popular fast food item; it’s a delicious and flavorful way to enjoy tender, juicy chicken. One little-known fact about homemade rotisserie chicken is that it is ready to eat just 10 minutes off the grill. That beats the grocery store version that spends hours under a warming lamp. The best part is that cooking your rotisserie chicken is quite simple. All you need is a grill (charcoal or gas) with a rotisserie attachment, a whole chicken, and seasonings.
What you’ll need
- A grill with compatible rotisserie unit
- A rotisserie kit
- Fuel, enough for a 2-3 hour cooking time
- Heat-safe gloves
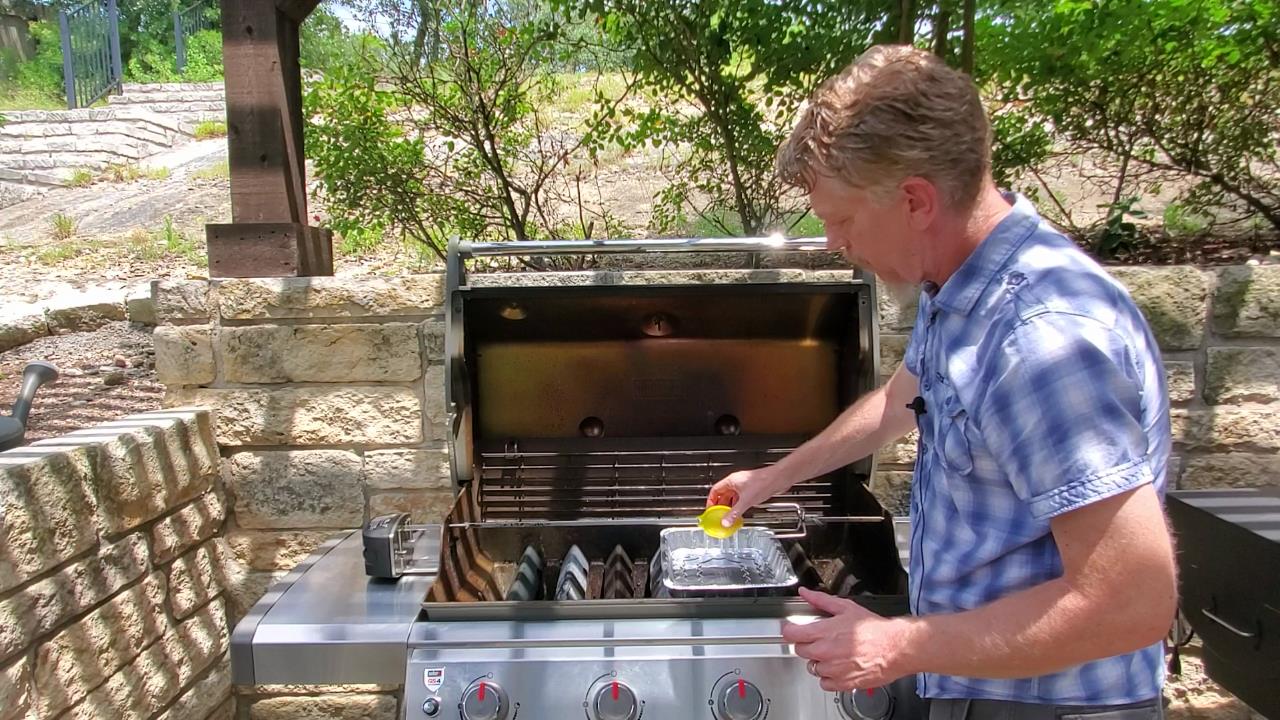
- A disposable aluminum pan
- Reliable meat thermometer
- Butchers twine for trussing the chicken
- Ingredients
- Whole chicken
- One large lemon (or apple, onion, or orange)
- 3/4 cup of Lemon-Herb Marinade (lots of herbs, garlic, lemon juice, etc.)
- Baste and basting bush (or spray bottle)
*If you are a visual learner, please see my video below.
Rotisserie test run
- Set up the rotisserie kit on your grill.
- Rest assured, setting up the rotisserie kit is straightforward and only requires 10 minutes and a screwdriver. You’ve got this! Keep in mind that different grills and rotisserie kits have different configurations, so it’s best to follow the manufacturer’s instructions.
Prepping the chicken
- Trim off loose bits of skin and fat from the chicken.
- Combine Lemon-Herb Marinade (or preferred marinade) ingredients.
- Place chicken in a large Pyrex or ceramic baking dish. Pour marinade over the top. Using your hands, work the marinade under the breast skin and inside the cavity. Cover chicken tightly with plastic wrap, and allow it to marinate in the fridge for 4-6 hours.
- Once marinated, it is time to truss the chicken. Doing this helps it hold together better while it’s on the rotisserie.
- Please note, if you plan to brine the chicken, omit the marinade, and use a sodium free poultry rub instead.
Preparing the rotisserie rod
- Balance: You’ll need a large lemon to help balance the chicken and secure it on the rotisserie rod. The lemon will fill up the cavity of the chicken and help hold it in place. As the chicken cooks, it will shrink and secure it even more.
- Alternatives: If you don’t like the lemon flavor on your chicken, you can use an onion, apply, or medium orange.
- The rod and fork: Make sure that one fork is on the rod’s handle side, pointing towards the middle of the handle end.
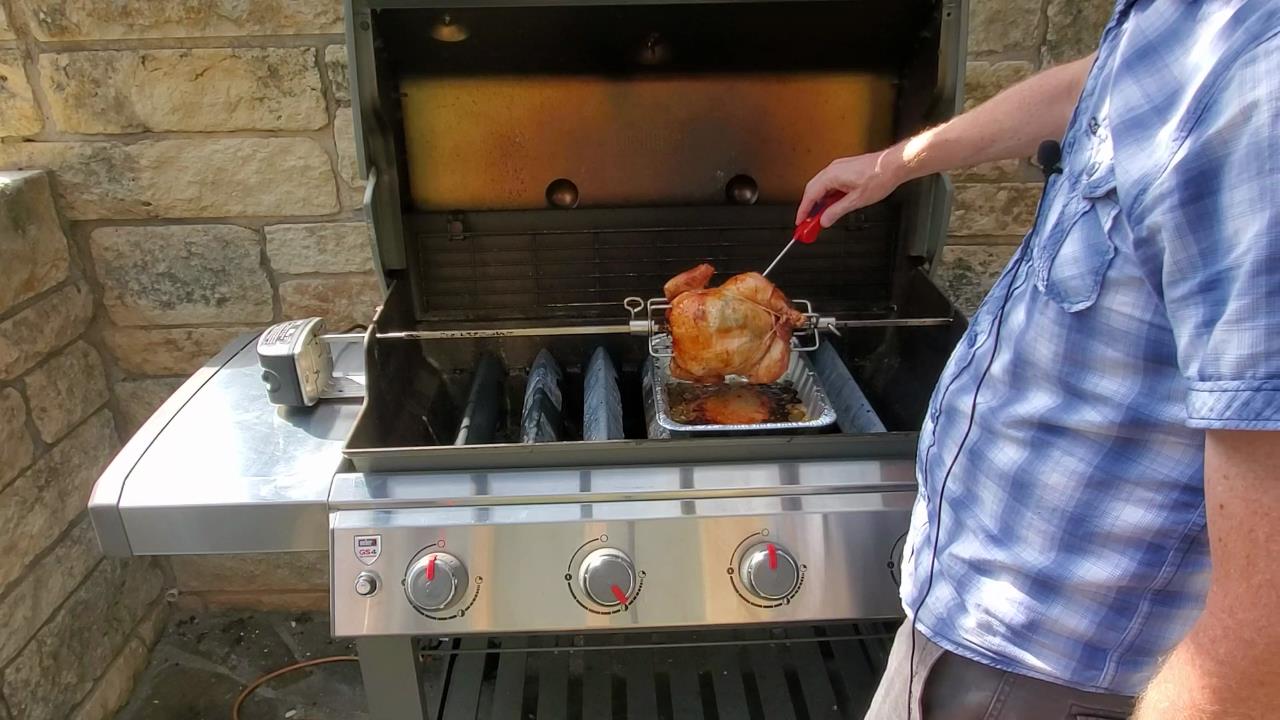
- Set up: Remove the cooking grates from the grill. Place the rod on the grill and adjust the placement of the lemon to the location between the burners. This chicken is cooked over indirect heat, so there won’t be any fire directly underneath it. Place your aluminum pan under where your chicken will go to help collect the drippings and prevent flare-ups.
Securing the chicken
This can be the most challenging step in the process, but this guide will help you get it right.
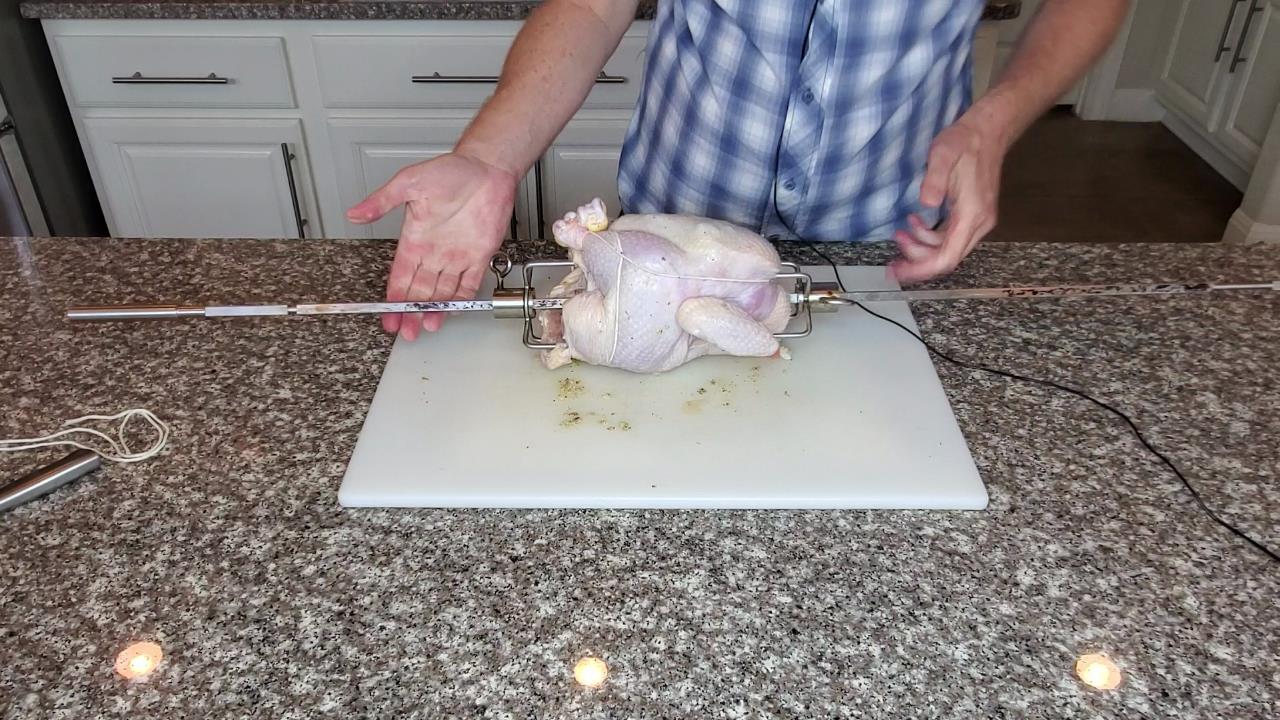
- Place the marinated (and trussed) chicken on a platter or cutting board. Wash your hands and any surfaces that come into contact with raw chicken to prevent cross-contamination. Run the rod (with the lemon) through the chicken cavity and out through the neck.
- Now, with the lemon safely inside, it’s time to place the second fork on the rod, pointing towards the chicken, and bring it through. It might seem like you don’t have enough hands for this operation, but remember, patience is key here. Press the forks together, securing the entire chicken.
- Once you have the bird secured, tighten the screws on the forks. Roll it around a little to make sure that it’s snug, and nothing is flopping around.
- Look at the picture above. You will notice that I have pulled the wings through the forks so they can’t move. This is how the chicken should be positioned.
Rotisserie counterbalance

If your rotisserie does not have a counterbalance, skip to the next step.
Balancing the chicken on the rotisserie is crucial for even cooking and to prevent the motor from overworking. If the rotisserie kit has a counterbalance, then there should be no trouble balancing it. If not, then you’ll have to put in some guesswork. Keep in mind that chickens are heavier on the back than on the breast side.
- To balance the chicken, remove the motor from the bracket and place the rotisserie rod with the chicken on the grill so that it moves freely. The heavy side will drop towards the bottom.
- Pull the counterbalance straight up and tighten. It won’t balance perfectly, but you can offset the weight to allow the motor to handle the load easily.
- Attach the motor and turn it on. Make sure that the chicken isn’t loose on the rod and that it turns smoothly. Once you have determined that it will stay put, you can start the grill.
- Rotisserie chicken is grilled indirectly, which means that the burners directly underneath the chicken are turned off while the adjacent burners are on. If the burners under the chicken are on, you will have flare-ups.
- Adjust the heat on your grill until it reaches 350 degrees F. Do not wander away too long. It is best to keep an eye on the chicken for the first few minutes to make sure that everything is working properly.
Basting a rotisserie chicken
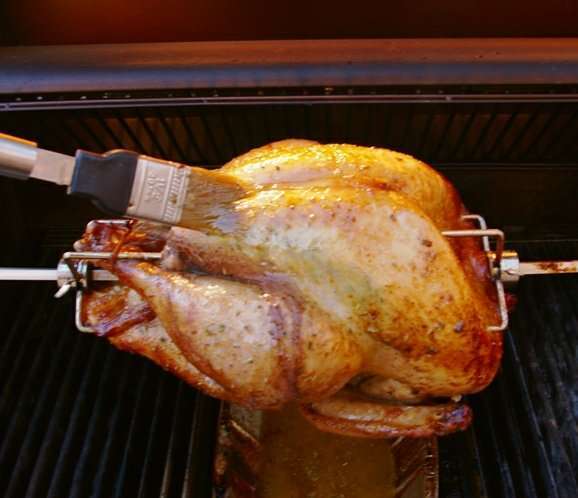
Basting a rotisserie chicken on the grill enhances its flavor and juiciness as it cooks. Not only does basting contribute to a more flavorful chicken, but it also helps encourage a golden, crispy skin that is both visually appealing and mouthwatering. A baste can be made with simple ingredients like those listed below. You can also make extra marinade and reserve it for basting. Our all-purpose poultry baste is a game changer and highly recommended. If you’d like to start with simple favors, use the recipe below.
- 1/2 cup olive oil
- 1/2 cup lemon juice
- 1 tablespoon fresh rosemary leaves
- pinch or two of salt
- Break up the rosemary leaves a little with a rolling pin to extract the oils. Add them to the olive oil and lemon juice. The acid in the lemon juice will bring out the rosemary flavor and blend it with the olive oil.
- After 20 minutes of cooking, start basting the chicken, then continue basting every 15-20 minutes until it is nearly done.
Check the temperature
Cooking time: At 350 degrees F, a chicken takes about 20 to 25 minutes per pound to cook through. A 4-pound chicken should take nearly 2 hours.
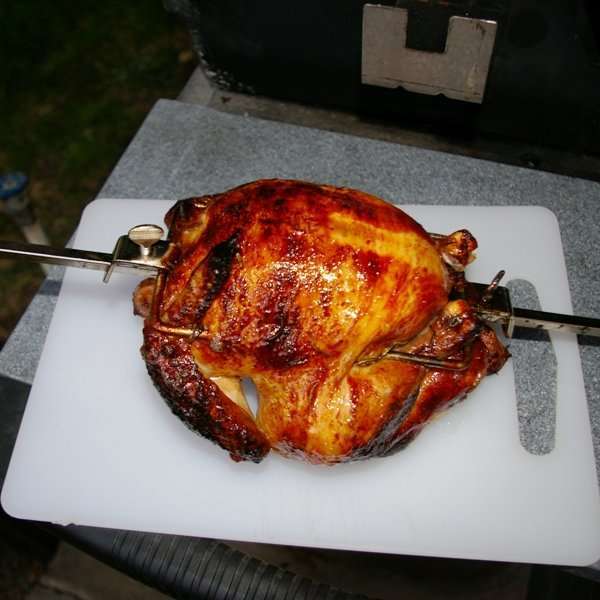
- Appearance: As the chicken cooks, you may notice that it tends to plump up. When it’s close to being done, the plumping effect goes away. Also, the skin of the chicken will be deep golden brown. These are clues that it is time to start checking the temperature.
- Test the internal temperature: Use a meat thermometer and take readings in several spots for accurate results. Test the center of the chicken breast and in the thigh right above the drumstick. These are the densest parts of the chicken and the slowest to cook. Once the breast reaches 165 degrees F and the thighs reach between 175-180 degrees F, the chicken is safe to remove from the grill.
How to remove rotisserie chicken
- Have heat-resistant gloves and a large heat-resistant cutting board ready near the grill. When handled, the metal rod will be over 300 degrees F. It is easy to burn yourself, so please be careful.
- To remove the rotisserie rod and chicken from the grill, start by turning off the burners and rotisserie motor. It is usually easier to lift and pull the motor first to move it out of the way.
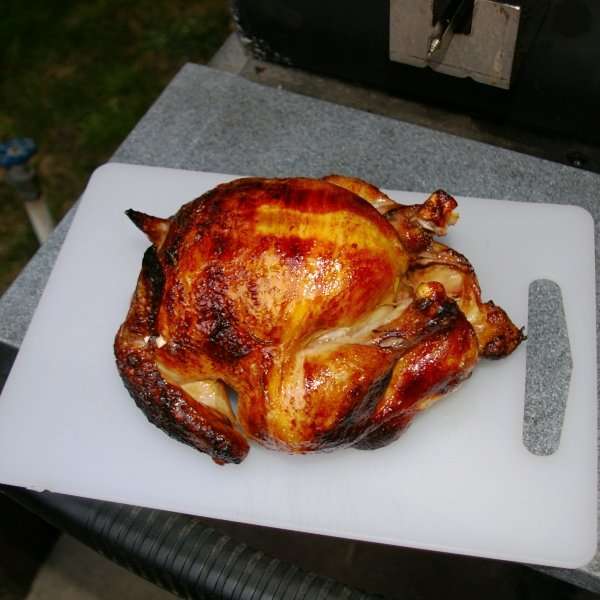
- Carefully hold the rod on both ends and place the chicken on the cutting board. I’ve seen many a bird fall to the ground, so be mindful not to tip the rod downward.
Removing the rod and carving
- Using a hot pad or glove, loosen the screw on the fork opposite from the handle and slide it off. Now, the rotisserie chicken is free to move.
- Gently hold the chicken down on the cutting board and slowly pull the rod out. The lemon will remain inside the cavity. Remove it before carving.
- Let the chicken rest for 10 minutes, allowing the juices to flow back into the meat.
- Remove the drip pan from your grill and replace the cooking grates.
- To carve the chicken: remove the leg quarters first and separate the thighs from the drumsticks.
- Next, remove the wings and then the breasts. Serve and enjoy.
- Freeze the chicken carcass to make a delicious bone broth or chicken noodle soup! Use up those leftovers to make chicken sandwiches.
More rotisserie recipes!
The post Rotisserie Chicken on the Grill appeared first on BBQ & Grilling with Derrick Riches.
Did you miss our previous article...
https://manstuffnews.com/backyard-grilling/beef-rib-lollipops
